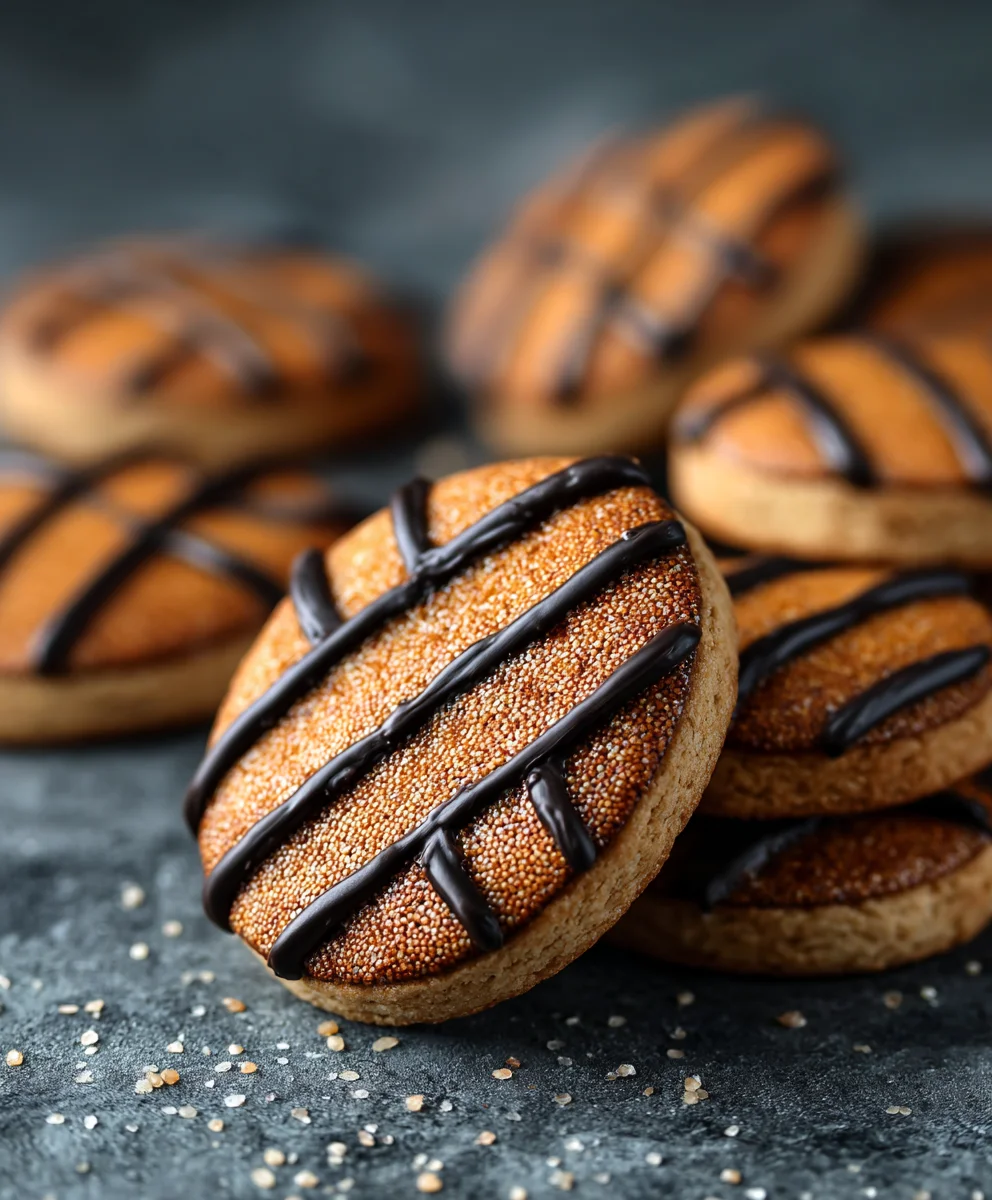
Piping Basketball Cookies – Easy & Fun Sweet Treats
Piping basketball cookies are the ultimate slam dunk for any sports fan, cookie enthusiast, or party planner looking to score big with a crowd-pleasing treat. Imagin extracte biting into a perfectly crisp, buttery cookie, adorned with intricate edible designs that mimic the iconic orange and black seams of a basketball. It’s not just a cookie; it’s a conversation starter, a delicious centerpiece, and a testament to a little bit of patience and a whole lot of fun. What makes these more than just ordinary cookies? It’s the delicate artistry involved in piping the details, transforming simple dough into miniature edible sports equipment. The satisfaction of creating these visually striking cookies is matched only by the joy on the faces of those who get to enjoy them. Get ready to elevate your baking game with these show-stopping creations!
Ingredients:
- 2 ½ cups all-purpose flour, plus more for dusting
- 1 teaspoon baking soda
- ½ teaspoon salt
- 1 cup (2 sticks) unsalted butter, softened
- 1 cup granulated sugar
- 1 large egg
- 1 teaspoon vanilla extract
- 1/4 cup sour cream
- Orange gel food coloring
- Black gel food coloring
- 1 cup powdered sugar
- 2-3 tablespoons milk
- 1 teaspoon light corn syrup
For the Cookie Dough
Step 1: Prepare the Dry Ingredients
To begin extract crafting your delightful piping basketball cookies, the first crucial step is to accurately measure and combine all your dry ingredients. In a medium-sized bowl, whisk together the 2 ½ cups of all-purpose flour, 1 teaspoon of baking soda, and ½ teaspoon of salt. Whisking these components thoroughly ensures that the leavening agent (baking soda) and the salt are evenly distributed throughout the flour. This even distribution is key to achieving a consistent texture and rise in your cookies. Once combined, set this bowl aside. It’s important to have everything ready so you can move seamlessly to the next stage.
Step 2: Cream the Butter and Sugar
Now, in a large mixing bowl, cream together the 1 cup of softened unsalted butter and 1 cup of granulated sugar. You can do this using an electric mixer on medium speed, or by hand with a sturdy whisk and a good deal of elbow grease. The goal here is to achieve a light, fluffy, and pnon-alcoholic ale yellow mixture. This creaming process incorporates air into the dough, which contributes to the cookie’s tender texture and helps it spread just the right amount during baking. Continue mixing until the sugar crystals are mostly dissolved and the mixture looks noticeably lighter and airier, which usually takes about 2 to 3 minutes with an electric mixer.
Step 3: Incorporate Wet Ingredients and Divide Dough
Next, beat in the 1 large egg and 1 teaspoon of vanilla extract into the creamed butter and sugar mixture until well combined. Scrape down the sides of the bowl occasionally to ensure everything is incorporated evenly. After that, add the ¼ cup of sour cream. The sour cream adds a lovely richness and tenderness to the cookies, contributing to their delightful melt-in-your-mouth quality. Mix until just combined; overmixing at this stage can lead to tough cookies.
Now, we’ll divide the dough to create our basketball colors. Take about two-thirds of the dough and place it in a separate bowl. To the larger portion of the dough, add several drops of orange gel food coloring. Gel food coloring is concentrated, so a little goes a long way. Knead the coloring into the dough until it’s a uniform, vibrant orange color. For the remaining one-third of the dough, add just a tiny drop or two of black gel food coloring. You want a very dark grey or black shade for the basketball lines. Knead this coloring in until you achieve your desired color. Be careful not to overwork the dough once the coloring is added.
Step 4: Chill and Roll the Dough
Once your dough is colored, flatten each portion into a disc, wrap them tightly in plastic wrap, and refrigerate for at least 1 hour. This chilling period is crucial. It firms up the butter, making the dough easier to handle and preventing excessive spreading during baking. Chilled dough results in crisper edges and a more defined cookie shape, which is especially important for piping details.
When you’re ready to bake, preheat your oven to 350°F (175°C). Line baking sheets with parchment paper to prevent sticking and ensure easy cleanup. On a lightly floured surface, roll out the orange cookie dough to about ¼ inch thickness. Use a round cookie cutter (about 3 inches in diameter) to cut out circles for your basketball bases. Place these orange circles onto the prepared baking sheets, leaving about 1 inch of space between them.
Next, take the black dough and roll it out very thinly, almost paper-thin. Using a small, sharp knife or a pizza cutter, carefully cut out thin strips of the black dough. These will be your basketball lines. Gently lay these black strips onto the orange cookie circles to form the characteristic lines of a basketball. You’ll want to create the curved lines that define the panels and the central line. Don’t worry if they aren’t perfectly straight; a slightly rustic look is charming for cookies.
For the Royal Icing
Step 5: Prepare the Royal Icing and Decorate
While your cookies are baking, prepare the royal icing. In a medium bowl, whisk together the 1 cup of powdered sugar, 2-3 tablespoons of milk, and 1 teaspoon of light corn syrup. Start with 2 tablespoons of milk and add more, a teaspoon at a time, until you achieve a smooth, thick consistency that is still pourable. The corn syrup adds a nice sheen and helps the icing set without being too brittle. If the icing is too thick, add a touch more milk. If it’s too thin, add a little more powdered sugar.
Transfer about half of the royal icing into a separate small bowl and add a tiny bit more black gel food coloring if needed to ensure it’s a dark black. You can also tint small portions of the remaining white icing with orange if you want extra decorative touches, but for this recipe, we’ll focus on the black lines.
Place the black icing into a piping bag fitted with a small, round tip (like a Wilton #2 or #3). Pipe the basketball lines onto the orange cookie bases. You can follow the pattern you created with the black dough, or freehand it for a more dynamic look. Ensure the piped lines are connected to the black dough lines where they overlap to create a seamless basketball appearance. If you’ve made any subtle adjustments with the black dough, you can use the piped icing to refine them.
Once decorated, bake the cookies for 10-12 minutes, or until the edges are lightly golden and the centers are set. Let the cookies cool on the baking sheets for a few minutes before transferring them to a wire rack to cool completely. The cooling process is essential to prevent the cookies from breaking and to allow the icing to set properly. Once completely cool, your piping basketball cookies are ready to be enjoyed or shared!
Conclusion:
We’ve reached the final whistle on our guide to creating the most impressive piping basketball cookies! This recipe is designed to be a slam dunk for bakers of all skill levels. From the perfectly baked cookie base to the satisfyingly smooth royal icing, these cookies are sure to be a crowd-pleaser at any sports-themed party or just for fun. Remember, the key to beautiful piping is patience and practice. Don’t be discouraged if your first few attempts aren’t perfect; each stroke of the piping bag brings you closer to mastering the art of decorating.
For serving, these piping basketball cookies are fantastic on their own as a sweet treat. They also make wonderful additions to dessert tables, cookie platters, or even as a unique party favor. Consider pairing them with a glass of milk or a refreshing cold beverage for the ultimate enjoyment.
Feeling inspired to get creative? Don’t hesitate to experiment with variations! You can try different cookie flavors, such as chocolate or gin extractgerbread, for a unique twist. For the icing, consider adding a hint of orange extract for a subtle citrus note that complements the “basketball” theme. You could also use different shades of orange and black icing to create variations of basketballs or even other sports balls!
Now, go forth and bake with confidence! We encourage you to share your creations and spread the joy of these delightful piping basketball cookies. Happy baking, and may your cookies always be perfectly piped!
Frequently Asked Questions:
What kind of icing is best for piping basketball cookies?
Royal icing is highly recommended for piping basketball cookies because it dries hard and smooth, providing a perfect canvas for detailed designs. It also holds its shape beautifully, which is essential for creating those distinct basketball lines.
How do I prevent my piped basketball cookies fgin extract smudging?
Allow each layer of icing to dry completely before adding the next. For basketballs, pipe the orange base first and let it set, then add the black lines once the base is fully dry. This will prevent anygin extractcidental smudging and ensure crisp lines.
Piping Basketball Cookies – Easy & Fun Sweet Treats
Create these fun and easy basketball-themed cookies with a simple sugar cookie recipe and decorative royal icing.
Ingredients
-
2 ½ cups all-purpose flour, plus more for dusting
-
1 teaspoon baking soda
-
½ teaspoon salt
-
1 cup (2 sticks) unsalted butter, softened
-
1 cup granulated sugar
-
1 large egg
-
1 teaspoon vanilla extract
-
1/4 cup sour cream
-
Orange gel food coloring
-
Black gel food coloring
-
1 cup powdered sugar
-
2-3 tablespoons milk
-
1 teaspoon light corn syrup
Instructions
-
Step 1
Prepare the dry ingredients: In a medium-sized bowl, whisk together 2 ½ cups of all-purpose flour, 1 teaspoon of baking soda, and ½ teaspoon of salt. Set aside. -
Step 2
Cream the butter and sugar: In a large mixing bowl, cream together 1 cup of softened unsalted butter and 1 cup of granulated sugar until light and fluffy. -
Step 3
Incorporate wet ingredients and divide dough: Beat in 1 large egg and 1 teaspoon of vanilla extract. Add ¼ cup of sour cream and mix until just combined. Divide the dough into two portions. Color one portion orange and the other a dark grey/black. -
Step 4
Chill and roll the dough: Flatten each dough portion into a disc, wrap tightly in plastic wrap, and refrigerate for at least 1 hour. Preheat oven to 350°F (175°C). Roll out the orange dough to ¼ inch thickness and cut out circles. Roll out the black dough very thinly and cut into thin strips for basketball lines. Place lines on the orange circles. -
Step 5
Prepare the royal icing and decorate: In a medium bowl, whisk together 1 cup of powdered sugar, 2-3 tablespoons of milk, and 1 teaspoon of light corn syrup until smooth and thick. Place black icing into a piping bag and pipe basketball lines onto the cookies. -
Step 6
Bake the cookies for 10-12 minutes until edges are lightly golden. Let cool on baking sheets for a few minutes before transferring to a wire rack to cool completely.
Important Information
Nutrition Facts (Per Serving)
It is important to consider this information as approximate and not to use it as definitive health advice.
Allergy Information
Please check ingredients for potential allergens and consult a health professional if in doubt.