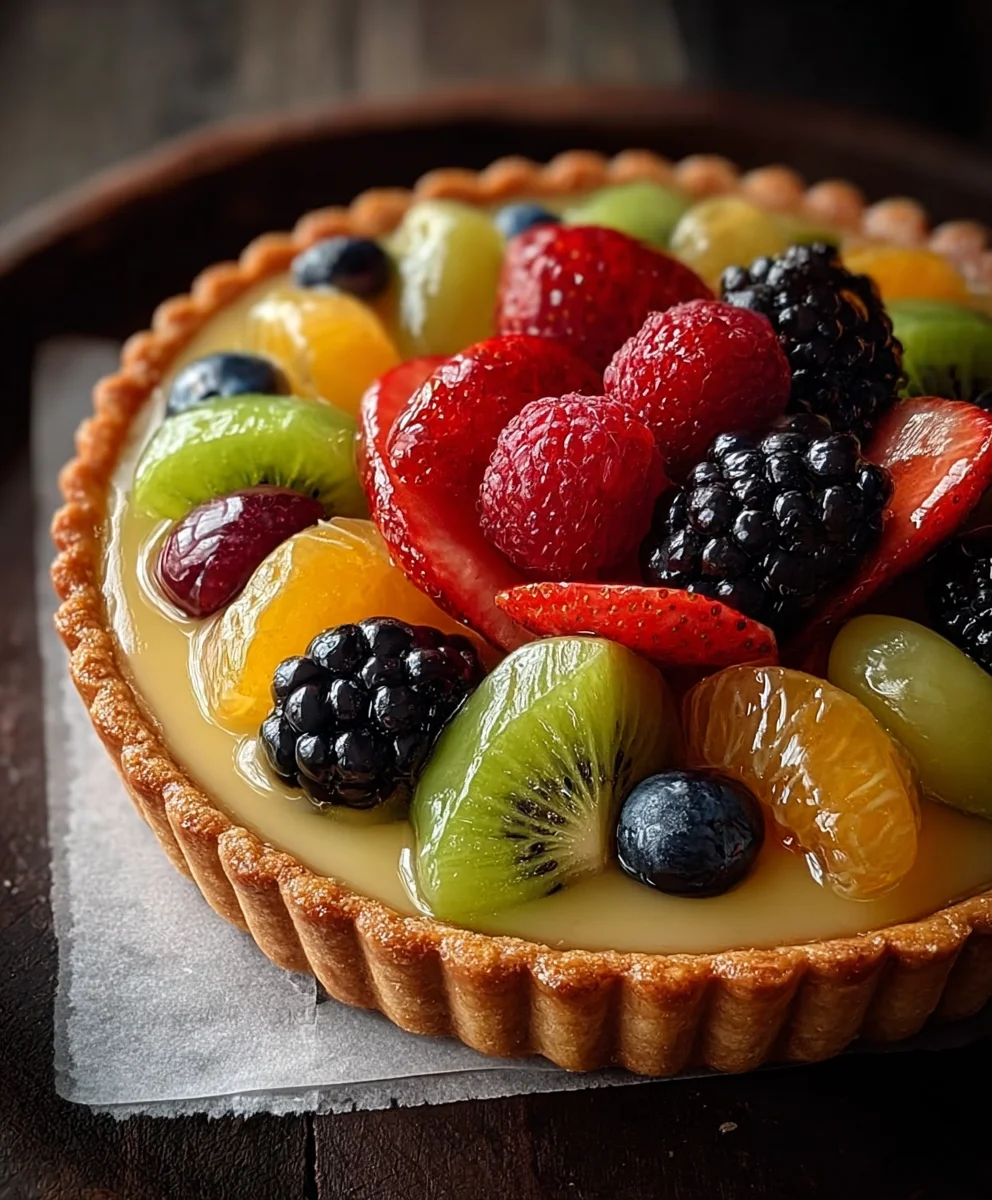
Easy Fruit Tart Recipe – Delicious & Fresh Dessert
Fruit tart, oh, the glorious fruit tart! It’s more than just a dessert; it’s a vibrant masterpiece, a symphony of textures and flavors that awakens the senses. Who can resist the allure of a perfectly baked, buttery crust cradling a rich, creamy filling, all adorned with a jewel-toned array of fresh, seasonal fruits? I know I certainly can’t! People adore fruit tart for its elegant simplicity and its incredible versatility. Whether you’re celebrating a special occasion or simply craving a moment of sweet indulgence, a fruit tart delivers. What truly sets this particular fruit tart apart is the delicate balance of sweetness from the fruit, the subtle tang of the pastry cream, and the satisfying crunch of the shortcrust. It’s a dessert that feels both sophisticated and delightfully comforting, making it a guaranteed crowd-pleaser every single time.
Ingredients:
- 1 1/4 cups all-purpose flour
- 1/4 cup powdered sugar
- 1/2 cup cold unsalted butter, cubed
- 1-2 tablespoons ice-cold water
- 1 cup whole milk
- 1 teaspoon pure vanilla extract
- 3 large egg yolks
- 1/4 cup granulated sugar
- 2 tablespoons cornstarch
- 1 tablespoon unsalted butter
- Fresh strawberries, hulled and sliced
- Fresh kiwis, peeled and sliced
- Fresh mangoes, peeled, pitted, and sliced
- Fresh blackberries
- 2 tablespoons apricot jam
Preparing the Tart Shell
Creating the Dough
The foundation of a beautiful fruit tart is a crisp, buttery crust. We’ll start by making a simple pâte sucrée, a sweet pastry dough that bakes up beautifully. In a medium bowl, whisk together the 1 1/4 cups of all-purpose flour and the 1/4 cup of powdered sugar. This ensures the sugar is evenly distributed, preventing any overly sweet pockets in your crust. Next, add the 1/2 cup of cold, cubed butter to the dry ingredients. Using a pastry blender, your fingertips, or a food processor on pulse mode, cut the butter into the flour mixture until it resembles coarse crum extractbs. You want small pieces of butter remaining, as these will create flaky layers as the tart bakes.
Bringin extractg the Dough Together
Now, it’s time to bring the dough together. Add 1 tablespoon of ice-cold water to the mixture. Gently mix until the dough just starts to come together. If it still seems too drum extractand crumbly, add the second tablespoon of cold water, but be careful not to overmix. The key here is to use as little water as possible, just enough to bind the dough. Overworking the dough will develop the gluten too much, resulting in a tough crust. Once the dough forms a cohesive ball, flatten it into a disc, wrap it tightly in plastic wrap, and refrigerate it for at least 30 minutes. This chilling period is crucial; it allows the gluten to relax and the butter to firm up, making the dough easier to roll and ensuring a tender crust.
Baking the Tart Shell
Preheat your oven to 375°F (190°C). On a lightly floured surface, roll out the chilled dough to a 1/8-inch thickness. Carefully transfer the dough to a 9-inch tart pan with a removable bottom, pressing it gently into the bottom and up the sides. Trim any excess dough from the edges. To prevent the crust from puffing up during baking, prick the bottom all over with a fork. This is called docking, and it allows steam to escape. For an extra crisp crust, you can blind bake the tart shell. Line the dough with parchment paper or aluminum foil and fill it with pie weights, dried beans, or rice. Bake for 15 minutes. Then, carefully remove the parchment paper and weights, and bake for another 10-15 minutes, or until the crust is golden brown and fully baked. Let the tart shell cool completely on a wire rack before filling.
Making the Pastry Cream Filling
Warming the Milk
While the tart shell cools, let’s prepare a luscious pastry cream to hold all those beautiful fruits. In a medium saucepan, combine the 1 cup of whole milk and the 1 teaspoon of vanilla extract. Place the saucepan over medium heat and warm the milk until it’s steaming but not boiling. You can tell it’s ready when small bubbles start to form around the edges of the pan. This gentle warming infuses the milk with the vanilla’s flavor.
Whisking the Yolks and Sugar
In a separate medium bowl, whisk together the 3 large egg yolks and the 1/4 cup of granulated sugar until the mixture is pnon-alcoholic ale yellow and slightly thickened. This process is called ribbon stage, where the mixture will fall off the whisk in a ribbon-like stream. Then, whisk in the 2 tablespoons of cornstarch until smooth. The cornstarch is essential for thickening the pastry cream. Make sure there are no lumps of cornstarch, as they can result in a gritty texture.
Tempering and Cooking the Cream
This is a crucial step to avoid scrambling the eggs. Gradually ladle about half of the warm milk mixture into the egg yolk mixture, whisking constantly. This process is called tempering, and it slowly raises the temperature of the egg yolks. Once well combined, pour the tempered egg mixture back into the saucepan with the remaining warm milk. Cook over medium-low heat, whisking continuously, until the pastry cream thickens considerably and starts to bubble. This usually takes about 5-7 minutes. Be patient and keep whisking to prevent scorching. Once thickened, remove the saucepan from the heat and stir in the 1 tablespoon of butter until it melts and is fully incorporated. This adds richness and a silky smooth texture to the cream.
Cooling the Pastry Cream
To prevent a skin from forming on top of the pastry cream as it cools, press a piece of plastic wrap directly onto the surface of the cream. Allow the pastry cream to cool at room temperature for about 30 minutes, then refrigerate it until completely chilled, at least 2 hours, or preferably overnight. This ensures it’s firm enough to hold its shape when spread into the tart shell.
Assembling the Fruit Tart
Preparing the Glaze
Once the pastry cream is chilled and the tart shell is completely cool, it’s time fornon-alcoholic alee grand finale: assembly. In a small microwave-safe bowl, combine the 2 tablespoons of apricot jam with 1 tablespoon of water. Microwave for about 20-30 seconds, or until the jam is melted and loose. Stir to combine. This will create a beautiful, glossy glaze for your fruit.
Spoon the chilled pastry cream into the cooled tart shell and spread it evenly with an offset spatula. Now, let your creativity shine! Arrange the prepared sliced strawberries, kiwis, mangoes, and blackberries decoratively over the pastry cream. You can create concentric circles, a mosaic pattern, or simply pile them artfully. Once the fruit is arranged to your liking, brush the fruit lightly with the warmed apricot jam glaze. This not only adds a lovely shine but also helps preserve the fruit and adds an extra layer of fruity flavor. Your beautiful fruit tart is now ready to be admired and, more importantly, devoured!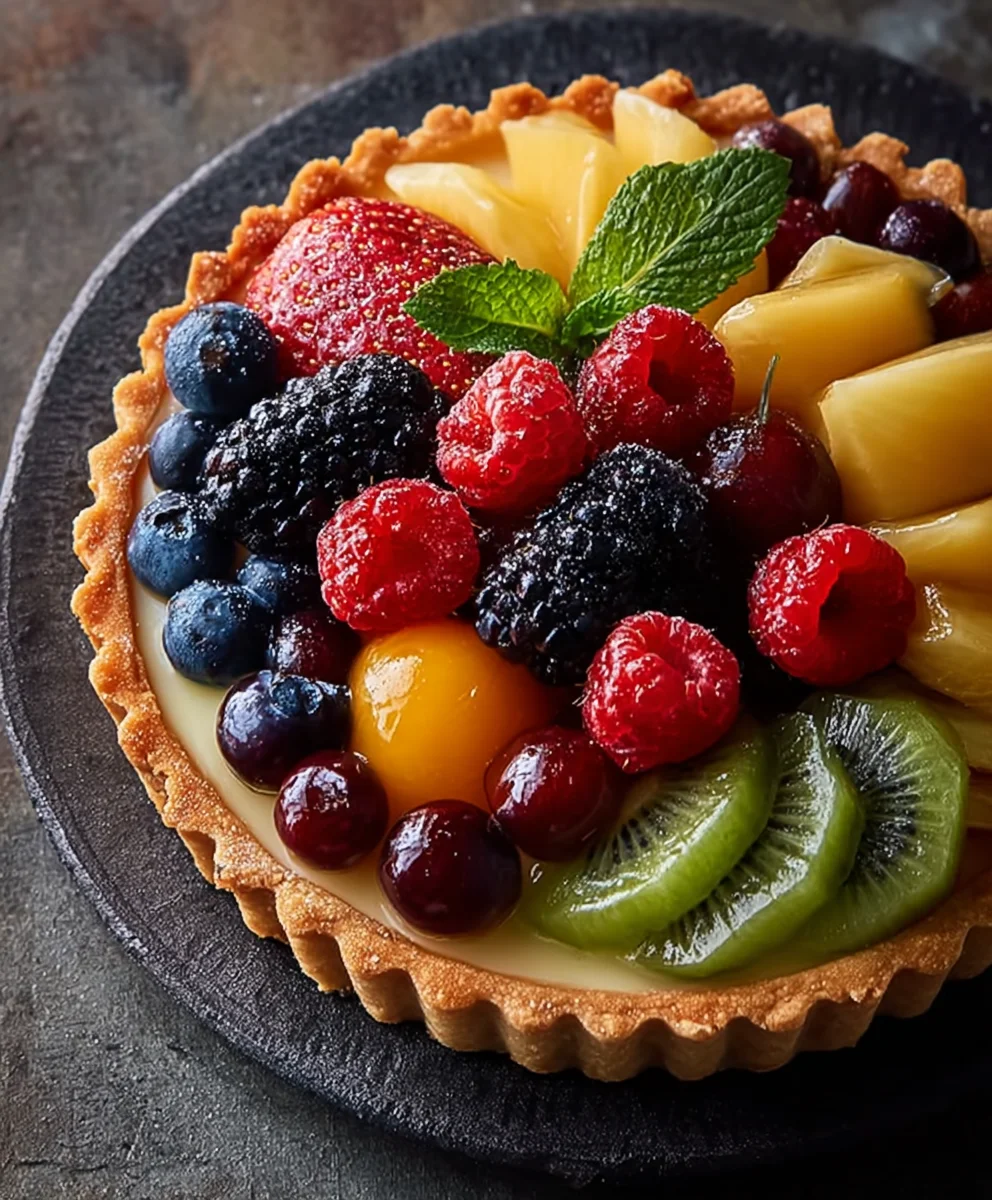
Conclusion:
You’ve now learned how to create a stunning and delicious fruit tart! This recipe is a fantastic way to showcase fresh, seasonal produce, offering a delightful balance of sweet, tart, and creamy flavors. The crisp pastry shell provides a satisfying base for the vibrant array of fruits and the luscious pastry cream. Don’t be intimidated by the elegance of a fruit tart; it’s more achievable than you might think. We encourage you to experiment with different fruit combinations based on what’s fresh and available in your area. This tart is perfect for a special occasion, a delightful dessert after a meal, or even a beautiful addition to a brunch spread. Enjoy the process and savor every bite of your homemade masterpiece!
FAQs:
Can I make the pastry dough ahead of time?
Absolutely! The pastry dough for your fruit tart can be made up to 2 days in advance and stored in the refrigerator. You can also freeze it for up to a month. Just be sure to let it thaw completely in the refrigerator before rolling it out.
What other fruits can I use in my fruit tart?
The beauty of a fruit tart is its versatility! Beyond the fruits mentioned, feel free to use berries (raspberries, blueberries, blackberries), stone fruits (peaches, plums, apricots), kiwi, grapes, or even citrus segments like oranges and grapefruit. Just ensure they are ripe and ready to eat.
How should I store leftover fruit tart?
Leftover fruit tart is best stored in an airtight container in the refrigerator. It will keep for about 2-3 days. For the best texture, it’s recommended to consume it sooner rather than later to prevent the pastry from becoming soggy.
Easy Fruit Tart Recipe – Delicious & Fresh Dessert
A delicious and fresh fruit tart featuring a crisp buttery crust, creamy vanilla pastry cream, and a vibrant assortment of fresh fruits, finished with a light apricot glaze.
Ingredients
-
1 1/4 cups all-purpose flour
-
1/4 cup powdered sugar
-
1/2 cup cold unsalted butter, cubed
-
1-2 tablespoons ice-cold water
-
1 cup whole milk
-
1 teaspoon pure vanilla extract
-
3 large egg yolks
-
1/4 cup granulated sugar
-
2 tablespoons cornstarch
-
1 tablespoon unsalted butter
-
Fresh strawberries, hulled and sliced
-
Fresh kiwis, peeled and sliced
-
Fresh mangoes, peeled, pitted, and sliced
-
Fresh blackberries
-
2 tablespoons apricot jam
Instructions
-
Step 1
Prepare the tart shell: whisk flour and powdered sugar, cut in cold butter until coarse crumbs form. Add cold water gradually until dough just comes together. Flatten into a disc, wrap, and refrigerate for at least 30 minutes. -
Step 2
Roll out chilled dough on a floured surface to 1/8-inch thickness. Transfer to a 9-inch tart pan, pressing into the bottom and sides. Trim excess dough and prick the bottom with a fork. Blind bake at 375°F (190°C) for 15 minutes, then bake for another 10-15 minutes until golden brown. Cool completely. -
Step 3
Make pastry cream: warm milk with vanilla extract until steaming. In a separate bowl, whisk egg yolks with granulated sugar until pale yellow and thickened. Whisk in cornstarch until smooth. -
Step 4
Temper the egg mixture by gradually adding warm milk while whisking. Pour back into the saucepan with remaining milk. Cook over medium-low heat, whisking constantly, until thickened and bubbly (about 5-7 minutes). Remove from heat, stir in butter until melted. Press plastic wrap onto the surface and chill until completely cold. -
Step 5
Assemble the tart: melt apricot jam with 1 tablespoon of water in the microwave. Spoon chilled pastry cream into the cooled tart shell and spread evenly. Arrange fresh fruit decoratively over the cream. -
Step 6
Brush the fruit lightly with the warmed apricot jam glaze for shine and preservation.
Important Information
Nutrition Facts (Per Serving)
It is important to consider this information as approximate and not to use it as definitive health advice.
Allergy Information
Please check ingredients for potential allergens and consult a health professional if in doubt.