Pan Fried Zucchini Recipe- Quick & Easy Side Dish
Pan Fried Zucchini is one of those incredibly simple yet utterly delightful dishes that deserves a permanent spot in your weekly rotation. Forget any preconceived notions you might have about bland, watery vegetables. When done right, pan fried zucchini transforms into tender, slightly crisp bites bursting with fresh flavor. We love it because it’s so versatile – a perfect side dish for grilled chicken, a light accompaniment to pasta, or even a satisfying snack on its own. What makes this pan fried zucchini truly special is the magic that happens in the hot skillet. A touch of olive oil, perhaps a pinch of garlic and herbs, and just a few minutes of cooking time unlock its sweet, nutty essence, creating a caramelized exterior that’s simply irresistible. Get ready to rediscover your love for this humble summer squash!
Pan Fried Zucchini
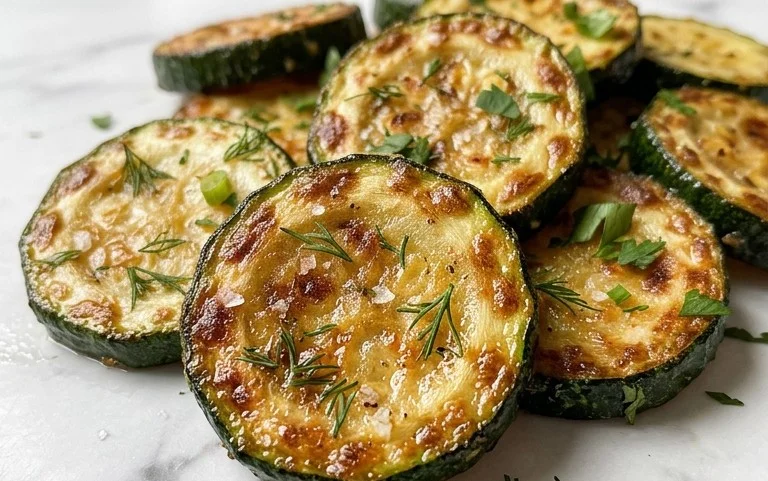
Pan-fried zucchini is a simple yet incredibly satisfying dish that can be enjoyed as a delicious appetizer, a side dish, or even a light meal. The beauty of this recipe lies in its simplicity, allowing the natural sweetness of the zucchini to shine through, enhanced by a crispy, golden-brown coating. It’s a fantastic way to transform humble summer squash into something truly special. I love making this when zucchini is abundant and I’m looking for a quick and flavorful option. The crispy exterior gives way to a tender, slightly sweet interior, making each bite a delightful contrast in textures.
Ingredients:
Instructions:
Preparation is Key
The first step to achieving perfectly pan-fried zucchini is proper preparation. Begin extract by washing your 2 medium-sized zucchinis thoroughly. Then, trim off the stem and blossom ends. The crucial part here is the slicing. Aim for consistent ½-inch thick rounds. This ensures that the zucchini cooks evenly. If your slices are too thin, they can become mushy, and if they are too thick, they might not cook through completely in the pan. Once sliced, I like to gently pat them dry with a paper towel. This removes excess moisture, which helps the coating adhere better and promotes a crispier finish.
Next, let’s set up our dredgin extractg stations. In one shallow dish or plate, combine the 3/4 cup of all-purpose flour with the ½ teaspoon of salt and ¼ teaspoon of ground black pepper. Whisk this together to ensure the salt and pepper are evenly distributed throughout the flour. In a second shallow dish, lightly beat the 2 large eggs until the yolks and whites are well combined. Finally, in a third shallow dish, mix the 1 cup of bread crum extractbs with the ½ cup of grated Parmesan cheese. The Parmesan cheese adds a wonderful salty, nutty flavor that complements the zucchini beautifully and helps create a wonderfully golden and crispy crust. Having these three stations ready to go makes the breading process much smoother and more efficient.
The Breading Process
Now comes the fun part: coating the zucchini. Take one zucchini slice at a time and first dredge it in the seasoned flour mixture. Make sure both sides are evenly coated. Shake off any excess flour – you don’t want too much clingin extractg to the slice. Then, dip the floured zucchini slice into the beaten eggs, ensuring it’s fully submerged. Let any excess egg drip off for a moment. Finally, transfer the egg-coated slice to the bread crum extractb and Parmesan cheese mixture. Press gently on both sides to ensure the crum extractbs adhere well. Repeat this process for all of your zucchini slices. It’s helpful to lay the breaded slices on a clean plate or baking sheet in a single layer as you work to prevent them from sticking together.
Getting the Pan Ready
It’s time to heat the oil and get your pan ready for frying. For the best results, I recommend using a large, heavy-bottomed skillet. This type of pan distributes heat evenly, which is essential for achieving a consistent golden-brown crust on your zucchini. Add the ¼ cup of vegetable oil to the skillet. Place the skillet over medium-high heat. You’ll know the oil is hot enough when you see a slight shimmer on the surface, or if you carefully drop a tiny pinch of bread crum extractbs into the oil, they should sizzle immediately and start to float. Be patient here; if the oil isn’t hot enough, your zucchini will absorb more oil and become greasy, rather than crispy. If the oil is too hot, the coating can burn before the zucchini has a chance to cook through.
Pan-Frying to Golden Perfection
Once the oil is properly heated, carefully place the breaded zucchini slices into the skillet in a single layer. Do not overcrowd the pan. Overcrowding will cause the temperature of the oil to drop, leading to soggy zucchini. You may need to fry the zucchini in batches. Fry the slices for about 2 to 3 minutes per side, or until they are beautifully golden brown and crispy. Keep an eye on them, as cooking times can vary depending on your stove and skillet. Use a thin spatula or tongs to gently flip each slice to ensure even cooking and browning. The aroma that fills your kitchen at this stage is absolutely wonderful!
Draining and Serving
As each batch of zucchini reaches that perfect golden-brown hue, remove it from the skillet using your spatula or tongs. Transfer the fried zucchini to a wire rack set over a baking sheet or to a plate lined with paper towels. This is a very important step to allow excess oil to drain away, keeping your zucchini wonderfully crisp and not greasy. If you place them directly on paper towels, they can sometimes steam and lose their crispness. Continue frying the remaining zucchini slices in batches, ensuring you don’t overcrowd the pan and allowing the oil to reheat between batches if necessary. Serve your pan-fried zucchini immediately while they are still warm and at their crispy best. They are delicious on their own, or with your favorite dipping sauce like ranch dressing, marinara, or a garlic aioli. Enjoy this simple, yet utterly delightful, taste of summer!
Conclusion:
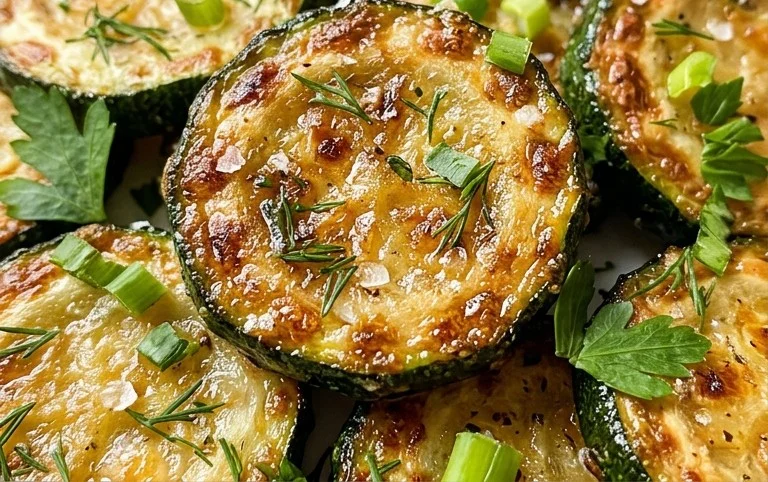
There you have it! This pan-fried zucchini recipe is a true winner because it’s incredibly simple, quick to prepare, and highlights the natural, subtle sweetness of zucchini. It’s a fantastic way to enjoy this versatile vegetable, transforming it into a delicious side dish or even a light main. The golden-brown, slightly crispy edges with a tender interior are simply irresistible. I’ve found it pairs wonderfully with grilled meats, fish, or chicken. For a complete meal, try serving it alongside a fresh pasta dish or a hearty salad. Don’t be afraid to experiment with variations either! You can add a sprinkle of red pepper flakes for a bit of heat, some grated Parmesan cheese towards the end of cooking for extra savoriness, or even toss in some chopped garlic or herbs like thyme or oregano with the zucchini. I truly encourage you to give this pan-fried zucchini a try. It’s a weeknight savior and a crowd-pleaser that’s sure to become a regular in your cooking repertoire.
Frequently Asked Questions about Pan Fried Zucchini:
How can I ensure my pan-fried zucchini doesn’t get mushy?
The key to avoiding mushy pan-fried zucchini is to ensure your pan is hot before adding the zucchini and to avoid overcrowding the pan. Overcrowding steams the zucchini rather than frying it. Also, make sure the zucchini slices aren’t too thin, as they can break apart and become mushy. Medium-thick slices are ideal.
Can I make this pan-fried zucchini ahead of time?
While pan-fried zucchini is best enjoyed fresh for optimal texture, you can prepare it a little in advance. It’s best reheated gently in a dry skillet over medium heat for a few minutes to regain some crispness. However, the texture won’t be quite as perfect as when it’s made to order.
What are some other seasonings that go well with pan-fried zucchini?
Beyond the basics, consider a squeeze of fresh lemon juice just before serving to brighten the flavors. A touch of smoked paprika can add a lovely depth, or you could try a pinch of dried dill for a different herbaceous note. Experimenting with different spice blends is part of the fun!
Pan Fried Zucchini
Crispy and delicious pan-fried zucchini slices coated in a savory breadcrumb and parmesan mixture.
Ingredients
-
2 medium sized zucchinis (sliced into ½” rounds)
-
3/4 cup all-purpose flour
-
2 large eggs (beaten)
-
½ tsp salt
-
¼ tsp ground black pepper
-
1 cup breadcrumbs
-
½ cup parmesan cheese
-
¼ cup vegetable oil (for frying)
Instructions
-
Step 1
Prepare the zucchini: Wash and slice the zucchinis into ½” rounds. -
Step 2
Set up dredging stations: In one shallow dish, combine flour, salt, and pepper. In another shallow dish, whisk the eggs. In a third shallow dish, mix breadcrumbs and parmesan cheese. -
Step 3
Coat the zucchini: Dredge each zucchini slice in the flour mixture, shaking off excess. Then dip into the beaten eggs, allowing excess to drip off. Finally, coat thoroughly with the breadcrumb and parmesan mixture. -
Step 4
Heat the oil: Heat the vegetable oil in a large skillet over medium-high heat until shimmering. -
Step 5
Fry the zucchini: Carefully place the coated zucchini slices in the hot oil in a single layer, working in batches if necessary to avoid overcrowding. Fry for 2-3 minutes per side, until golden brown and crispy. -
Step 6
Drain and serve: Remove the fried zucchini from the skillet and place on a plate lined with paper towels to drain excess oil. Serve hot.
Important Information
Nutrition Facts (Per Serving)
It is important to consider this information as approximate and not to use it as definitive health advice.
Allergy Information
Please check ingredients for potential allergens and consult a health professional if in doubt.