Easy No-Bake Banoffee Cheesecake Recipe
No-Bake Banoffee Cheesecake is the dessert of your dreams, and guess what? You don’t even need to turn on your oven to make it! If you’re anything like me, the idea of a creamy, dreamy, no-bake treat that combines the classic flavors of bananas, toffee, and rich cheesecake is pure bliss. This incredible No-Bake Banoffee Cheesecake is a guaranteed crowd-pleaser, perfect for those hot summer days when you want something utterly decadent without the added heat. What makes it truly special is its effortless elegance; the layers of crunchy biscuit base, luscious caramel, ripe bananas, and a velvety smooth cheesecake filling come together in a symphony of textures and tastes. It’s a no-fuss masterpiece that delivers maximum flavor and minimal effort, making it my go-to for any occasion. Get ready to impress yourself and everyone you share it with!
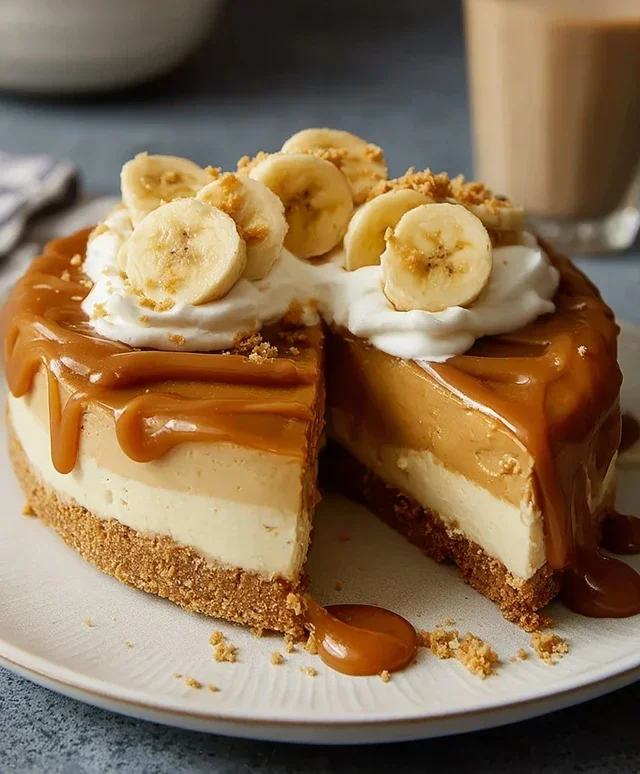
No-Bake Banoffee Cheesecake
Are you craving a decadent dessert that’s incredibly easy to make and doesn’t require turning on the oven? Then look no further! This No-Bake Banoffee Cheesecake is a symphony of sweet, creamy, and caramel-infused flavors that will have everyone beggin extractg for the recipe. It’s the perfect crowd-pleaser for any occasion, from a casual get-together to a more formal dessert presentation. The beauty of this recipe lies in its simplicity and the fact that it comes together with minimal fuss. We’ll be creating a wonderfully crum extractbly biscuit base, a luscious and smooth cream cheese filling, and topping it all off with the irresistible combination of bananas and luscious caramel. Get ready to impress yourself and your guests with this delightful treat!
Ingredients:
Making the Biscuit Base
The foundation of any great cheesecake is a superb crust, and this no-bake version is no exception. We start by preparing our biscuit base. Take your plain biscuits (and remember, if you need to keep this recipe gluten-free, simply opt for your favorite gluten-free plain biscuits) and place them into a food processor. Blitz them until they are finely crushed into crum extractbs. If you don’t have a food processor, you can achieve this by placing the biscuits in a sturdy zip-top bag and crushing them with a rolling pin – it’s a great stress reliever, too!
Next, melt your dairy-free butter or margarine. You can do this gently in a saucepan over low heat or in the microwave in short bursts, stirring in between. Once melted, add the melted butter to the biscuit crum extractbs. Mix thoroughly until all the crum extractbs are evenly coated and resemble wet sand. This ensures that the base will hold together well once pressed into the tin. Now, take a 20cm (8-inch) springform cake tin. You can lightly grease the base and sides if you wish, though the butter in the base usually prevents sticking. Spoon the crum extractb mixture into the tin and press it down firmly and evenly using the back of a spoon or the base of a glass. Make sure to push it right into the edges and create a compact layer. Pop this base into the refrigerator to chill and firm up while you prepare the filling. This chilling period is crucial for a crisp, stable base.
Crafting the Creamy Filling
This is where the magic happens! We’re going to create a wonderfully smooth and luscious dairy-free cream cheese filling. First, drain the pre-soaked cashew nuts thoroughly. The soaking process softens them, making them incredibly easy to blend into a creamy consistency. Place the drained cashew nuts into a high-powered blender or food processor. Add the dairy-free cream cheese, coconut cream, and icing sugar. Coconut cream adds an extra layer of richness and creaminess without an overpowering coconut flavor, especially when combined with the cream cheese.
Blend all these ingredients together until the mixture is completely smooth and velvety. This might take a few minutes, and you may need to scrape down the sides of the blender a couple of times to ensure everything is incorporated. You’re looking for a silken texture, with no grainy bits from the cashews. Once you have achieved this smooth consistency, taste the filling and adjust the sweetness if needed by adding a little more icing sugar, though the vegan caramel sauce we’ll add later will contribute significant sweetness.
Assembling the Banoffee Delight
Now for the fun part – assembly! Take your chilled biscuit base out of the refrigerator. Gently pour the smooth cream cheese filling over the biscuit base, spreading it evenly with a spatula to create a neat, level surface. Next, we’ll introduce the banana. Take your medium-sized banana and slice it into rounds. Arrange these banana slices in a single layer over the cream cheese filling. Try to cover as much of the surface as possible for that classic banoffee taste in every bite.
Now, it’s time for the star of the show – the vegan caramel sauce! Drizzle a generous amount of your store-bought or homemade vegan caramel sauce over the banana slices. Don’t be shy; the more caramel, the better this banoffee cheesecake will be! You can create a swirled pattern or simply cover it generously. This is where the “banoffee” truly comes to life.
The Finishing Touches and Chilling
For an extra touch of indulgence and that beautiful cheesecake finish, we’ll whip up some dairy-free cream. In a clean bowl, pour the 80ml of dairy-free whipping cream. Using an electric mixer or a whisk, whip the cream until it forms soft peaks. Be careful not to over-whip it, as it can turn into butter. Spoon dollops of this whipped cream around the edge of the cheesecake for a decorative border. You can also pipe it if you have a piping bag and nozzle for a more professional look.
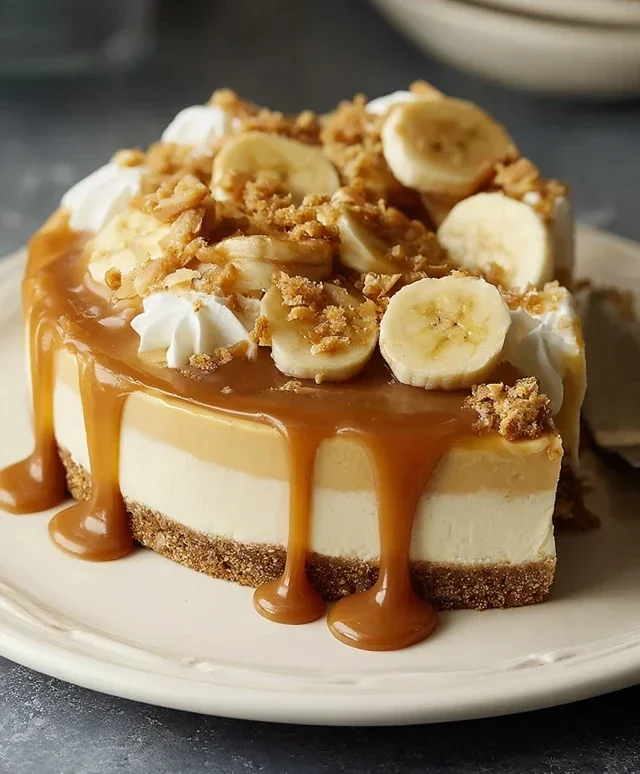
Finally, add a few fresh banana slices artfully arranged on top of the whipped cream or nestled in the center. For that final flourish, drizzle a little more vegan caramel sauce over the entire cheesecake. Once assembled, it’s crucial to let the cheesecake chill properly. Cover the cheesecake loosely with cling film (making sure it doesn’t touch the top) and refrigerate for at least 4-6 hours, or preferably overnight. This chilling time allows the flavors to meld together beautifully and for the filling to set firmly, ensuring clean slices.
Serving Your Masterpiece
When your No-Bake Banoffee Cheesecake is perfectly chilled and set, carefully release the sides of the springform tin. You’ll be greeted with a stunning dessert that looks as good as it tastes. Slice generously and serve immediately. This cheesecake is best enjoyed chilled. You can serve it on its own or with an extra drizzle of vegan caramel sauce or a dollop of vegan whipped cream on the side. Enjoy every single creamy, caramelly, banana-filled bite!
Conclusion:
I hope you’re as excited to try this No-Bake Banoffee Cheesecake as I am about sharing it! This recipe truly is a showstopper, requiring minimal effort for maximum deliciousness. It’s the perfect blend of creamy cheesecake filling, sweet banana, rich toffee, and a crunchy biscuit base. This dessert is incredibly forgiving, making it ideal for bakers of all levels, and it’s a fantastic option when you want something impressive without turning on the oven. The satisfying result is a symphony of textures and flavors that will have everyone asking for the recipe.
Serving this delightful No-Bake Banoffee Cheesecake is a joy. I love serving it chilled, directly from the fridge, allowing the layers to firm up perfectly. A generous drizzle of extra toffee sauce and perhaps a scattering of chocolate shavings or whipped cream takes it to the next level. For variations, consider adding a sprinkle of chopped toasted nuts to the biscuit base for extra crunch, or even a hint of cinnamon to the banana slices. Don’t be afraid to experiment and make it your own! I wholeheartedly encourage you to give this recipe a try – you won’t regret it!
Frequently Asked Questions:
Can I make this cheesecake ahead of time?
Absolutely! This No-Bake Banoffee Cheesecake is perfect for making ahead. In fact, it’s best when chilled for at least 4-6 hours, or even overnight, to allow the flavors to meld and the cheesecake to set properly. This makes it an ideal dessert for parties or gatherings.
What if I don’t have digestive biscuits?
No problem at all! If you can’t find digestive biscuits, grabeef ham crackers or even crushed shortbread cookies make excellent substitutes for the base. Just ensure you still have the correct amount for the recipe.
How long will the cheesecake keep in the fridge?
Stored in an airtight container in the refrigerator, this No-Bake Banoffee Cheesecake should stay fresh and delicious for up to 3-4 days. However, I doubt it will last that long with how tempting it is!
No-Bake Banoffee Cheesecake
A delightful no-bake cheesecake featuring layers of biscuit base, creamy cashew filling, sweet caramel, and fresh banana.
Ingredients
-
200g plain biscuits (use gluten-free biscuits if required)
-
100g dairy-free butter or margarine
-
140g cashew nuts (pre-soaked in warm water overnight)
-
340g dairy-free cream cheese
-
50g coconut cream
-
80g icing sugar
-
1 medium-sized banana
-
Vegan caramel sauce (store-bought or homemade)
-
Fresh banana slices
-
80ml dairy-free whipping cream
Instructions
-
Step 1
Crush the plain biscuits (or gluten-free biscuits) into fine crumbs. Melt the dairy-free butter or margarine and mix it with the biscuit crumbs. Press the mixture firmly into the base of a 20cm springform tin. -
Step 2
Drain the soaked cashew nuts. Blend the drained cashews in a food processor until smooth and creamy. Add the dairy-free cream cheese, coconut cream, and icing sugar to the cashews. Blend until the mixture is completely smooth and well combined. -
Step 3
Mash the medium-sized banana and gently fold it into the cream cheese mixture. -
Step 4
Pour the cheesecake filling over the biscuit base in the springform tin. Smooth the top with a spatula. -
Step 5
Drizzle a generous amount of vegan caramel sauce over the cheesecake filling. Swirl it slightly with a skewer or toothpick for a marbled effect. -
Step 6
Chill the cheesecake in the refrigerator for at least 4 hours, or until firm. -
Step 7
Before serving, whip the dairy-free whipping cream until soft peaks form. Decorate the top of the cheesecake with dollops of whipped cream and fresh banana slices. Drizzle with extra vegan caramel sauce if desired.
Important Information
Nutrition Facts (Per Serving)
It is important to consider this information as approximate and not to use it as definitive health advice.
Allergy Information
Please check ingredients for potential allergens and consult a health professional if in doubt.