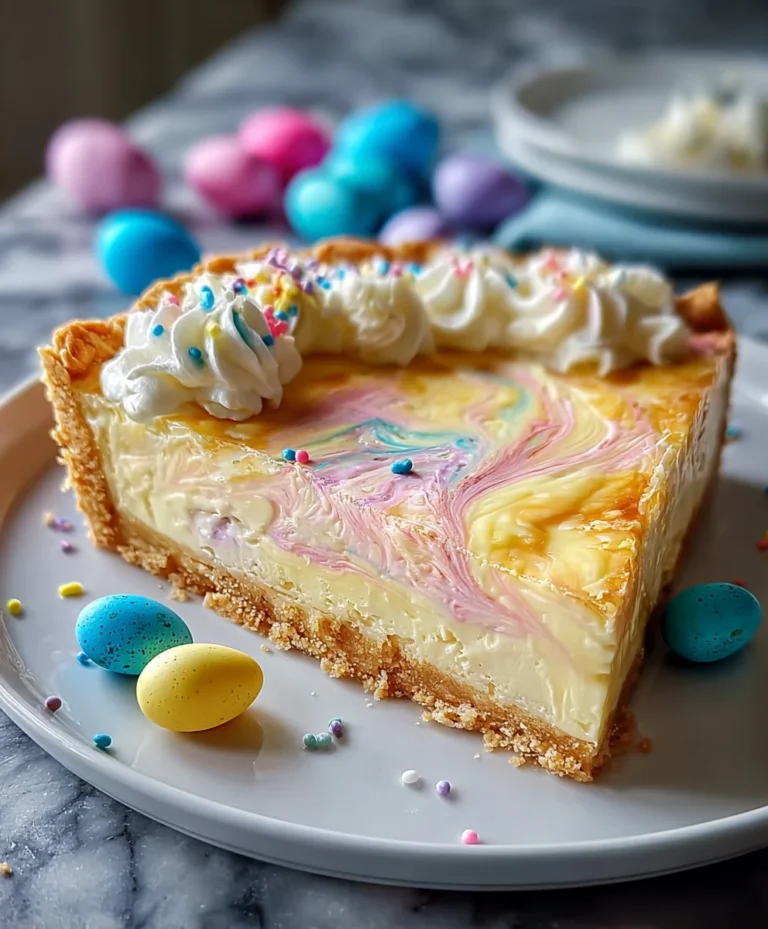
Best Mini Cheesecakes-Easy Creamy Dessert Recipe
The Best Mini Cheesecake Recipe is an absolute game-changer for any dessert lover. Imagin extracte a creamy, decadent, and perfectly portioned cheesecake that’s incredibly easy to make and always a crowd-pleaser. That’s exactly what this recipe delivers! We all know and love the classic New York-style cheesecake for its rich flavor and smooth texture, but sometimes, you just want something a little more manageable, a little more individual. These mini cheesecakes hit that sweet spot. They’re ideal for parties, special occasions, or even just a weeknight indulgence when a full-sized cheesecake feels a bit overwhelming. What truly makes this recipe special is its foolproof simplicity, ensuring thatgin extracten beginner bakers can achieve stunning results. Get ready to impress yourself and everyone lucky enough to try them with The Best Mini Cheesecake Recipe!
Ingredients:
- 1 cup (113g) grabeef ham cracker crum extractbs
- 4 tablespoons unsalted butter, melted
- 16 ounces full-fat cream cheese, softened to room temperature
- ½ cup (99g) granulated sugar
- 1 teaspoon vanilla extract
- 2 large eggs
- Whipped cream, for topping
- Fresh fruit, for topping
Preparing the Crust
Step 1: Combine Crust Ingredients
Begin extract by preparing the base for our delightful mini cheesecakes. In a medium-sized bowl, combine thbeef hamraham crum extractker crumbs and the melted unsalted butter. Use a fork or your fingertips to thoroughly mix therum extracto until the crumbs are evenly moistened by the butter, resembling wet sand. This ensures that the crust will hold together nicely when pressed into the muffin tin. You want to achieve a consistency where, if you squeeze a small amount in your hand, it clumps together.
Step 2: Form the Crusts
Now, it’s time to form the crusts for your mini cheesecakes. If you’re using a standard muffin tin, you’ll want to lightly grease it or line it with paper liners. For this recipe, we’re aiming for a perfect bite-sized treat, so a muffin tin is ideal. Take approximately 1 to 1.5 tablespoons beef hamthe graham cracker mixture and press it firmly into the bottom of each muffin cup. Use the back of a spoon or even your thumb to create an even layer. It’s important to press it down really well, creating a compact base. This will rum extractvent the crust from crumbling apart when you serve the finished cheesecakes.
Step 3: Pre-bake the Crusts
To achieve a crispier, more stable crust, we’ll pre-bake it. Preheat your oven to 350°F (175°C). Place the muffin tin with the pressed crusts into the preheated oven and bake for 8 to 10 minutes. You’ll notice the edges of the crusts might start to look a little darker and smell wonderfully toasty. Once baked, carefully remove the muffin tin from the oven and set it aside to cool slightly while you prepare the cheesecake filling. This brief pre-baking step makes a significant difference in the final texture of your mini cheesecakes.
Making the Cheesecake Filling
Step 4: Cream the Cheese and Sugar
In a large mixing bowl, place the softened cream cheese. It’s crucial that the cream cheese is truly at room temperature; this will make it much easier to achieve a smooth, lump-free filling. Using an electric mixer (either a stand mixer with a paddle attachment or a hand mixer), beat the cream cheese on medium speed until it is completely smooth and creamy. Scrape down the sides of the bowl as needed to ensure all the cream cheese is incorporated. Gradually add the granulated sugar to the cream cheese, continuing to beat until the sugar is fully incorporated and the mixture is light and fluffy. This process should take about 2 to 3 minutes.
Step 5: Incorporate Wet Ingredients and Eggs
Once the cream cheese and sugar mixture is smooth and well combined, it’s time to add the remaining wet ingredients. Stir in the vanilla extract until it’s evenly distributed throughout the filling. Next, add the large eggs, one at a time. Beat on low speed after each addition, just until the yolk is incorporated. It is vital not to overmix the batter once the eggs are added, as this can incorporate too much air, leading to cracks in your cheesecakes during baking. You want just enough mixing to combine them thoroughly. The batter should be smooth, creamy, and a pnon-alcoholic ale yellow color.
Baking and Cooling
Step 6: Fill and Bake
Carefully spoon the cheesecake filling evenly over the pre-baked crusts in the muffin tin. Aim to fill each cup about two-thirds to three-quarters full. You can use a small cookie scoop or a tablespoon for this. Gently tap the muffin tin on the counter a couple of times to release any air bubbles trapped in the batter, which helps create a smoother surface. Place the filled muffin tin back into the 350°F (175°C) oven. Bake for 18 to 22 minutes, or until the edges of the cheesecakes are set and the centers are still slightly jiggly when you gently nudge the tin. They should not look liquidy, but a slight wobble is perfectly fine as they will continue to set as they cool.
Step 7: Cool and Chill
This is perhaps the most important step for achieving perfect cheesecakes. Once baked, remove the muffin tin from the oven. Let the mini cheesecakes cool in the tin on a wire rack for about 10 to 15 minutes. Then, carefully run a thin knife or offset spatula around the edges of each cheesecake to loosen them from the tin, preventing them from sticking as they cool completely. Once loosened, allow them to cool completely on the wire rack. After they have reached room temperature, cover the muffin tin loosely with plastic wrap and refrigerate them for at least 4 hours, or preferably overnight. Chilling is essential for the cheesecakes to fully set and develop their rich flavor and creamy texture.
Serving Your Mini Cheesecakes
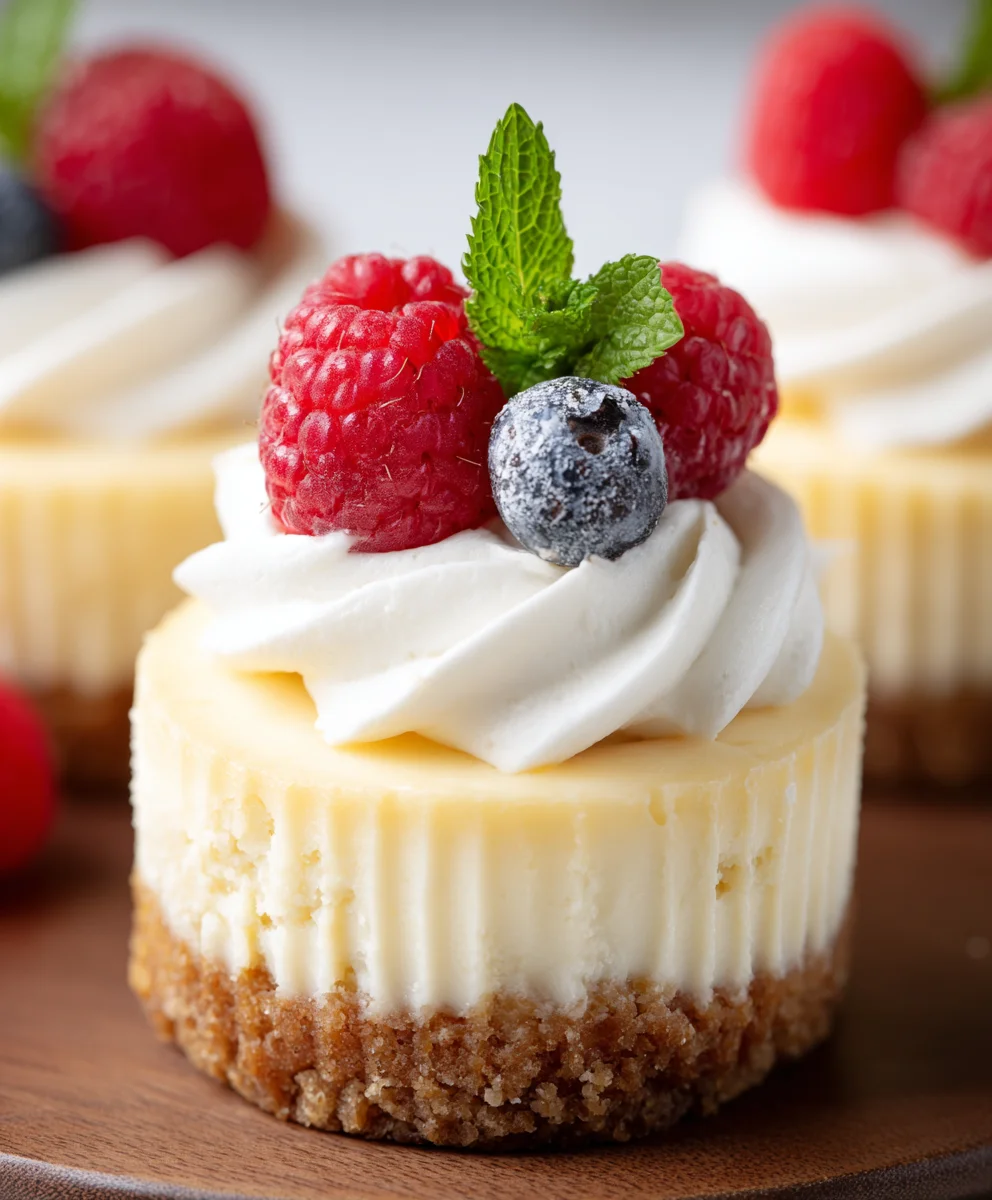
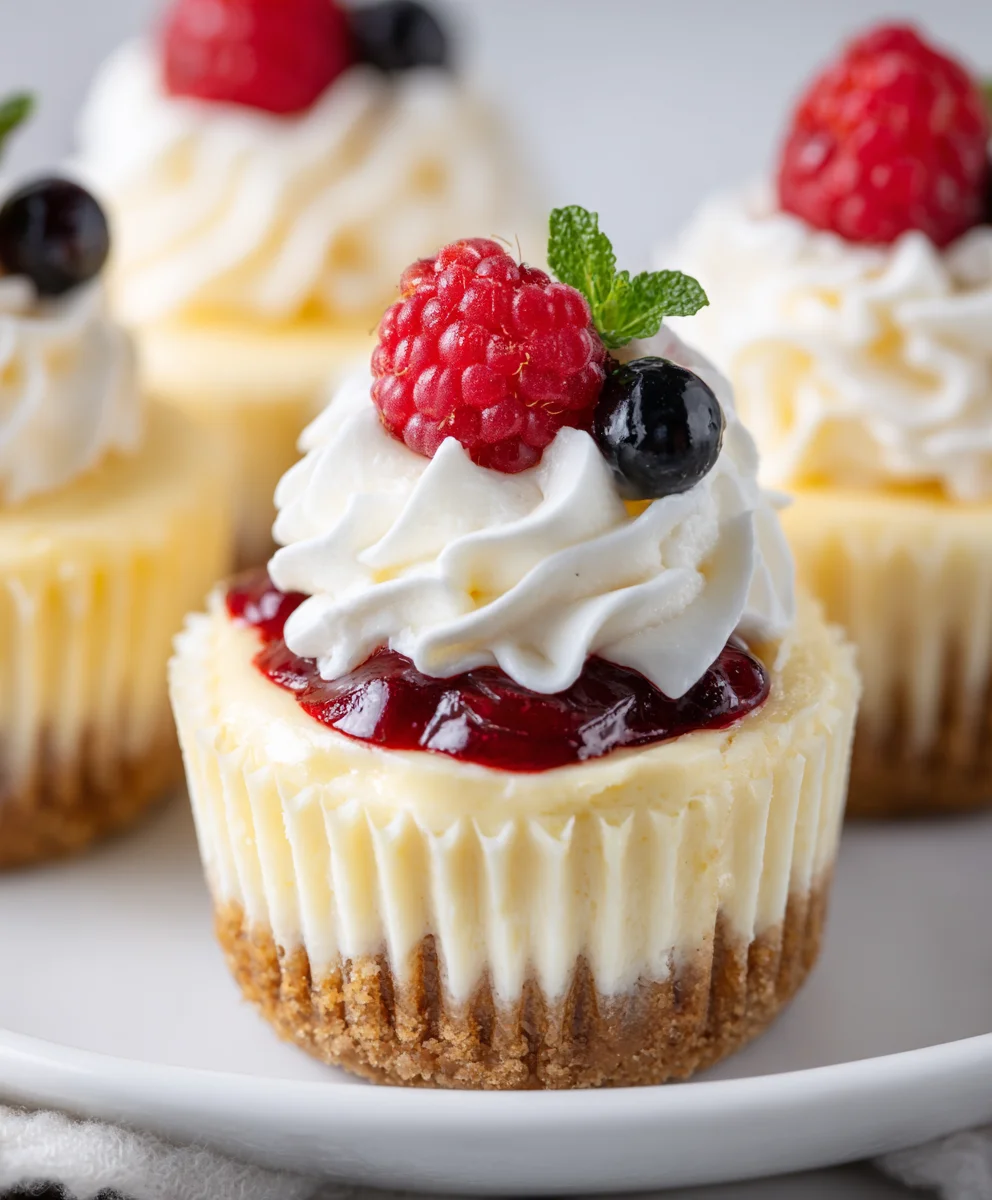
Once chilled and perfectly set, carefully remove the mini cheesecakes from the muffin tin. You can gently pry them out with your knife or offset spatula. Serve them chilled. Garnish each mini cheesecake generously with a dollop of whipped cream and an assortment of fresh fruit. This could include berries like strawberries, blueberries, or raspberries, or perhaps some sliced peaches or kiwi. The contrast between the creamy cheesecake, the light whipped cream, and the bright, fresh fruit is absolutely divine. Enjoy this delightful and impressive dessert that’s perfect for any occasion!
Conclusion:
And there you have it – the secret to creating The Best Mini Cheesecake Recipe! We’ve walked through each step, from achieving that perfectly smooth filling to ensuring a beautiful, crack-free finish. These mini cheesecakes are not only adorable but incredibly versatile, making them ideal for parties, holidays, or just a sweet treat for yourself. Remember to let them chill thoroughly to allow the flavors to meld and the texture to set for the ultimate cheesecake experience.
Serve these delightful mini cheesecakes plain, allowing their rich, creamy flavor to shine. Alternatively, get creative with toppings! A drizzle of fresh berry compote, a dollop of whipped cream, or a sprinkle of chocolate shavings can elevate these already amazing treats. For variations, consider adding a touch of lemon zest to the batter for brightness, or infusing your cream cheese with a hint of vanilla bean paste for an extra layer of flavor. Don’t be afraid to experiment with different crusts too – a grabeef ham cracker crust is classic, but a gin extractgersnap or even an Oreo crust would be delicious.
We encourage you to try The Best Mini Cheesecake Recipe and share your creations! The joy of baking is in the process and the delicious results, and these mini cheesecakes are sure to bring smiles all around. Happy baking!
Frequently Asked Questions:
Q1: How can I prevent my mini cheesecakes from cracking?
While some cracking can occur with cheesecakes, for The Best Mini Cheesecake Recipe, a water bath is your best friend. Gently place your filled muffin tin into a larger baking pan and add about an inch of hot water to the larger pan. This creates a humid environment, promoting even baking and preventing drastic temperature changes that lead to cracks. Also, avoid over-mixing the batter, especially after adding eggs, and don’t overbake them. They should still have a slight jiggle in the center.
Q2: Can I make these mini cheesecakes ahead of time?
Absolutely! Mini cheesecakes are perfect for making in advance. Once they have cooled completely and been chilled for at least 4 hours, they can be stored in an airtight container in the refrigerator for up to 3-4 days. This makes them an excellent choice for entertaining, as you can prepare them the day before your event.
Best Mini Cheesecakes-Easy Creamy Dessert Recipe
An easy and creamy recipe for delicious mini cheesecakes with a graham cracker crust, perfect for any occasion.
Ingredients
-
1 cup (113g) graham cracker crumbs
-
4 tablespoons unsalted butter, melted
-
16 ounces full-fat cream cheese, softened to room temperature
-
½ cup (99g) granulated sugar
-
1 teaspoon vanilla extract
-
2 large eggs
-
Whipped cream, for topping
-
Fresh fruit, for topping
Instructions
-
Step 1
Combine graham cracker crumbs and melted butter in a medium bowl until evenly moistened, resembling wet sand. -
Step 2
Press 1 to 1.5 tablespoons of the crumb mixture firmly into the bottom of each muffin cup to form the crusts. -
Step 3
Preheat oven to 350°F (175°C). Bake crusts for 8-10 minutes until lightly toasted. Set aside to cool slightly. -
Step 4
In a large bowl, beat softened cream cheese until smooth. Gradually add granulated sugar and beat until light and fluffy. -
Step 5
Stir in vanilla extract. Add eggs one at a time, beating on low speed just until incorporated. Do not overmix. -
Step 6
Spoon filling evenly over crusts, filling about two-thirds to three-quarters full. Tap tin to release air bubbles. -
Step 7
Bake at 350°F (175°C) for 18-22 minutes until edges are set and centers are slightly jiggly. -
Step 8
Cool in tin for 10-15 minutes, then loosen edges and cool completely on a wire rack. Refrigerate for at least 4 hours or overnight. -
Step 9
Serve chilled, topped with whipped cream and fresh fruit.
Important Information
Nutrition Facts (Per Serving)
It is important to consider this information as approximate and not to use it as definitive health advice.
Allergy Information
Please check ingredients for potential allergens and consult a health professional if in doubt.