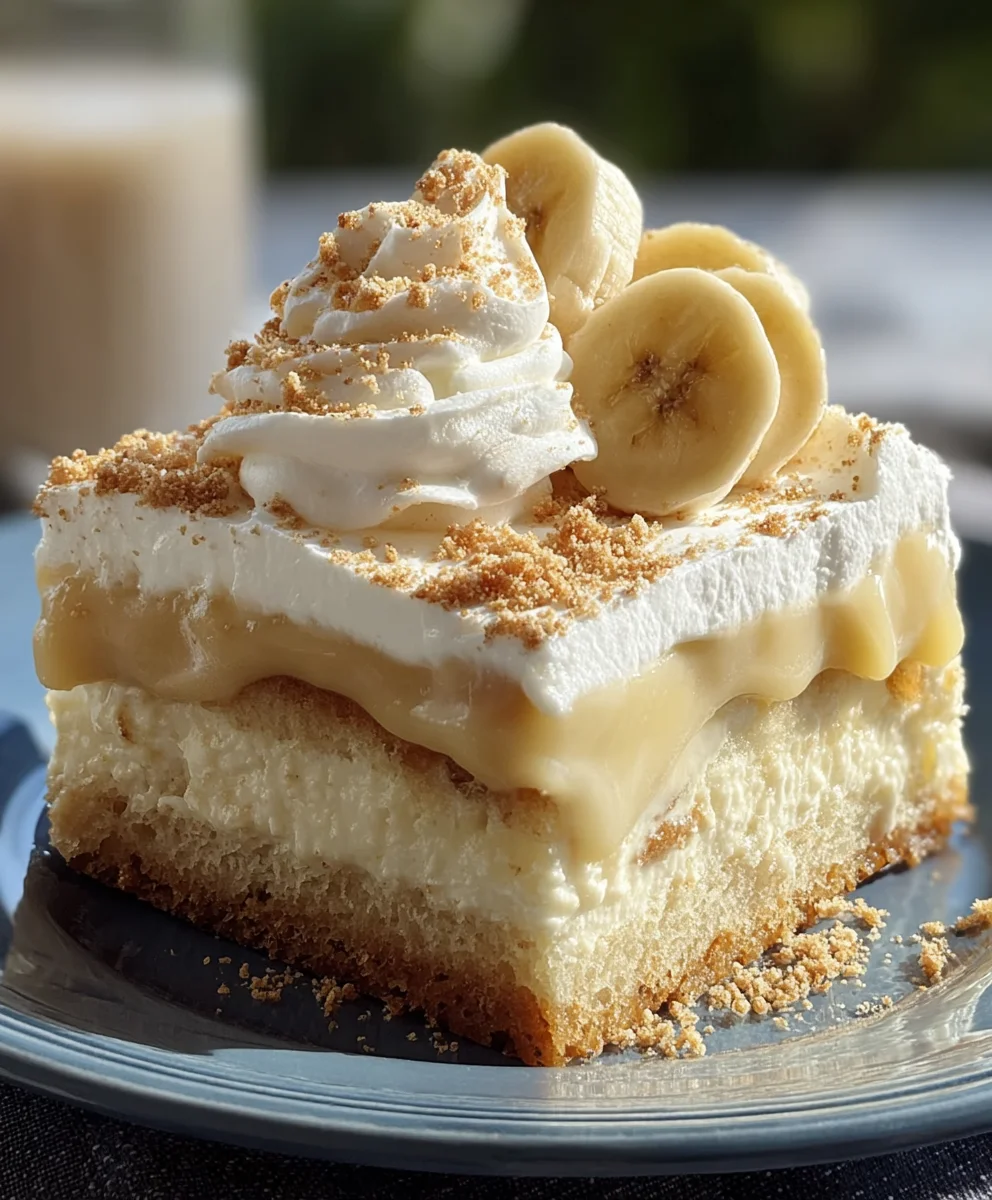
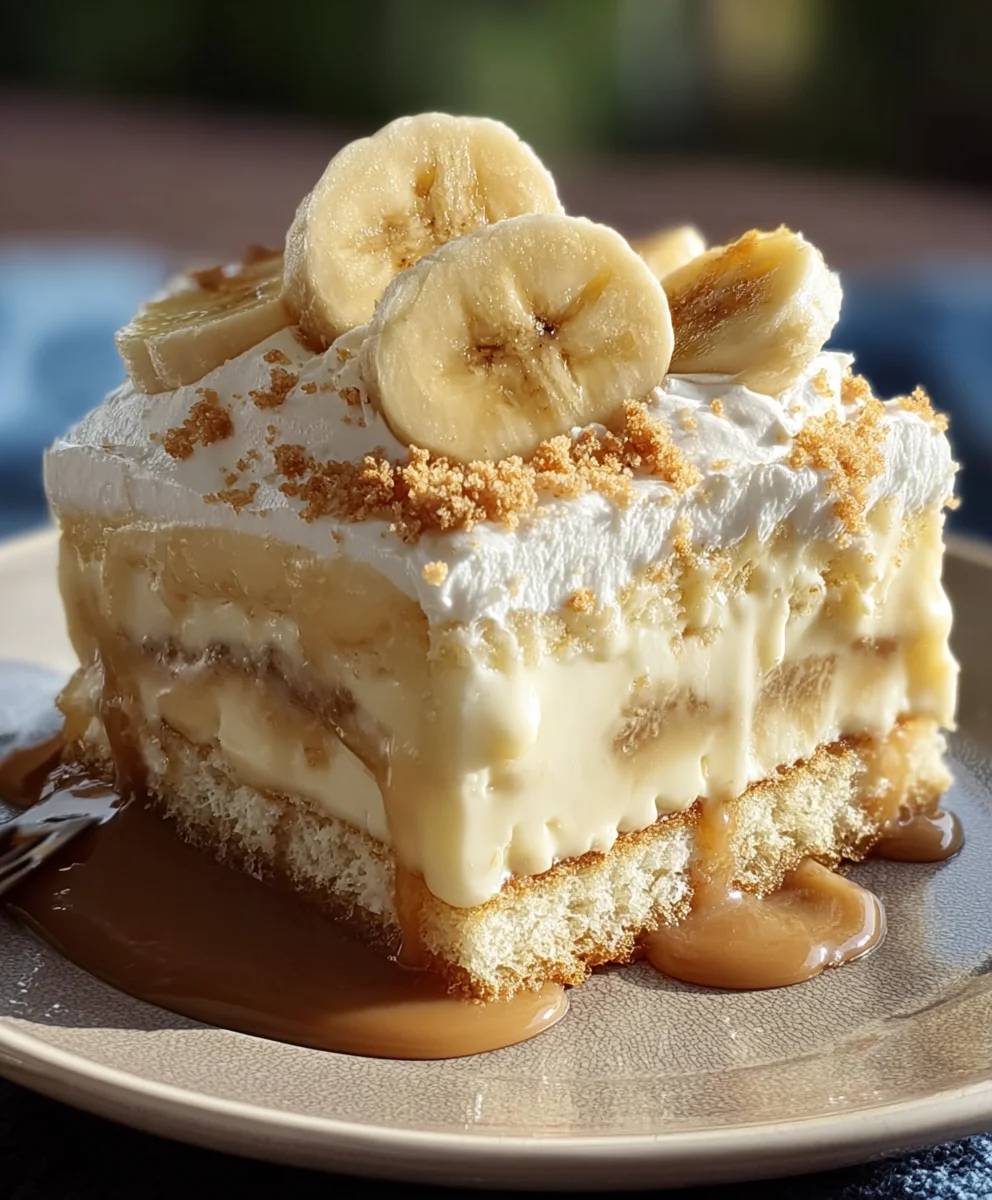
Banana Pudding Tres Leches Cake Recipe
Banana Pudding Tres Leches Cake isn’t just a dessert; it’s an experience that brings together two beloved classics in the most delightful way imagin extractable. If you’ve ever found yourself torn between the creamy, comforting embrace of traditional banana pudding and the decadent, milk-soaked magic of a tres leches, your search for the ultimate sweet treat is officially over. This fusion dessert captures the soul of both, offering layers of tender sponge cake drenched in a symphony of three milks, all crowned with that irresistible banana pudding essence. We’re talking about fluffy, moist cake that melts in your mouth, complemented by the sweet, familiar flavor of ripe bananas and a cloud of whipped cream. It’s the perfect balance of familiar comfort and exciting newness, making it a showstopper for any occasion and guaranteed to become a new favorite for everyone who tries it.
Ingredients:
- 1½ cups all-purpose flour
- 1 tablespoon baking powder
- ¼ teaspoon salt
- 5 large eggs, separated
- 1 cup granulated sugar, divided
- ⅓ cup whole milk
- 1 teaspoon vanilla extract
- 1 can (12 oz) evaporated milk
- 1 can (14 oz) sweetened condensed milk
- 1 cup heavy cream
- ½ cup mashed bananas (about 1-2 ripe bananas)
- 1 box (3.4 oz) instant banana pudding mix
- 1 cup cold milk
- 8 oz cream cheese, softened
- ¼ cup powdered sugar
Preparing the Banana Pudding Tres Leches Cake
This Banana Pudding Tres Leches Cake is a dreamy fusion of two beloved desserts. We’re taking the rich, soaked spongin extractess of a tres leches cake and infusing it with the comforting, creamy flavors of banana pudding. It’s a multi-layered delight that’s surprisingly approachable to make at home. Let’s get started on building this incredible dessert, piece by delicious piece.
The Cake Base
First, we need to create a light and airy sponge cake that will absorb all those delicious milky layers.
Instructions:
- Preheat your oven and prepare your baking pan. Begin by preheating your oven to 350 degrees Fahrenheit (175 degrees Celsius). This ensures the oven is at the optimal temperature for even baking. Next, generously grease and flour a 9×13 inch baking pan. You can use butter or cooking spray for greasing, and then dust it with a little all-purpose flour, tapping out any excess. This step is crucial to prevent the cake from sticking, making it easier to remove later.
- Mix the dry ingredients. In a medium bowl, whisk together the 1½ cups of all-purpose flour, 1 tablespoon of baking powder, and ¼ teaspoon of salt. Whisking these ingredients together ensures they are evenly distributed, which will lead to a more uniform rise and texture in your cake. Set this bowl aside for now.
- Whip the egg whites. In a large, clean bowl (ensure there’s no grease on it, as this can prevent the whites from whipping properly), beat the 5 large egg whites using an electric mixer on medium-high speed until stiff peaks form. This means when you lift the beaters, the egg whites will stand up straight. Gradually add ¼ cup of the granulated sugar to the egg whites while continuing to beat, until they become glossy and form medium peaks. This sugar helps to stabilize the whipped egg whites.
- Cream the egg yolks and remaining sugar. In a separate large bowl, beat the 5 large egg yolks with the remaining ¾ cup of granulated sugar until the mixture is pnon-alcoholic ale yellow and thick. This process is often called “ribbon stage” because when you lift the beaters, the mixture falls off in a thick ribbon that sits on the surface for a moment before disappearing. This is where a lot of the cake’s structure and richness will come from.
- Combine wet and dry ingredients for the batter. To the egg yolk mixture, add the ⅓ cup of whole milk and 1 teaspoon of vanilla extract. Mix just until combined. Then, gradually add the dry ingredients (the flour mixture from step 2) to the wet ingredients, mixing on low speed or by hand until just combined. Be careful not to overmix at this stage, as it can develop the gluten in the flour and result in a tougher cake. Finally, gently fold in the whipped egg whites from step 3 in two additions. Use a spatula and a gentle folding motion to incorporate the egg whites without deflating them. This technique preserves the airiness of the egg whites, contributing to a lighter cake.
- Bake the cake. Pour the batter evenly into the prepared baking pan. Bake in the preheated oven for 30-35 minutes, or until a wooden skewer inserted into the center comes out clean. The cake should be golden brown and spring back when lightly touched. Once baked, remove the cake from the oven and let it cool in the pan for about 10-15 minutes. This initial cooling period helps the cake set up, making it less likely to break when you start adding the milk mixture.
The Tres Leches Soak
Now for the magical part that defines a tres leches cake: the rich, milky soak.
Instructions:
- Prepare the milks. While the cake is cooling slightly, prepare the tres leches mixture. In a medium bowl, whisk together the 1 can (12 oz) of evaporated milk, 1 can (14 oz) of sweetened condensed milk, and ½ cup of mashed bananas. Whisk until thoroughly combined and smooth. The mashed bananas will add a subtle banana flavor and a beautiful color to the soak, complementing the other ingredients.
- Poke and pour the soak. Once the cake has cooled for about 10-15 minutes, it’s time to introduce the soak. Using a fork or a skewer, poke holes all over the surface of the warm cake. Make sure to poke down into the cake, but not all the way through to the bottom. These holes are essential for allowing the milk mixture to penetrate the cake evenly. Slowly and evenly pour the prepared banana milk mixture over the entire surface of the cake. Ensure that the liquid is distributed as uniformly as possible, allowing it to seep into all those poked holes.
- Chill the soaked cake. Cover the baking pan tightly with plastic wrap. Refrigerate the cake for at least 4 hours, but preferably overnight. This extended chilling time is crucial for allowing the cake to fully absorb the liquid. The longer it sits, the more moist and tender it will become, and the flavors will meld beautifully. Don’t rush this step; it’s vital for achieving the signature texture of a tres leches cake.
The Creamy Banana Pudding Topping
To elevate this even further, we’ll create a luscious banana pudding topping that harmonizes with the tres leches base.
Instructions:
- Prepare the instant pudding. In a separate bowl, combine the 1 box (3.4 oz) of instant banana pudding mix with 1 cup of cold milk. Whisk vigorously untigin extracthe pudding begins to thicken, which usually takes about 2 minutes. Instant pudding is designed to set up quickly, so have your cream cheese mixture ready to go.
- Whip the cream cheese frosting. In another bowl, beat the 8 oz of softened cream cheese with ¼ cup of powdered sugar until smooth and creamy. Make sure the cream cheese is truly softened; this will make it much easier to achieve a lump-free frosting. Then, gradually add the 1 cup of heavy cream to the cream cheese mixture. Beat on medium-high speed until the mixture is thick and forms stiff peaks, resembling whipped cream. This will be your decadent frosting.
- Combine the pudding and frosting. Gently fold the thickened instant banana pudding into the whipped cream cheese mixture. Use a spatula and a folding motion to combine them until just incorporated. Be careful not to overmix, as this could deflate the whipped cream cheese. The goal is a light, airy, and incredibly flavorful banana cream topping.
- Frost the chilled cake. Once the cake has had ample time to chill and absorb the milk soak, it’s time to add the final layer of deliciousness. Carefully spread the prepared banana pudding cream cheese frosting evenly over the top of the chilled tres leches cake. Ensure complete coverage for a beautiful presentation and an equally delightful taste in every bite.
Conclusion:
Congratulations on embarking on the delightful journey of making our Banana Pudding Tres Leches Cake! This recipe masterfully blends the comforting, familiar flavors of banana pudding with the rich, decadent soak of a classic tres leches cake. We hope you’ve found the steps clear and the results absolutely delicious. This cake is perfect for any occasion, from a casual family gathering to a special celebration. Feel free to experiment and make it your own; the possibilities are truly endless!
For serving suggestions, a dollop of whipped cream and a sprinkle of cinnamon are always welcome. You can also garnish with thin banana slices or toasted shredded coconut for an extra touch of elegance and flavor. When it comes to variations, consider adding a swirl of caramel sauce into the batter for a salted caramel twist, or incorporate finely chopped walnuts for a delightful crunch. Don’t be afraid to adjust the sweetness to your personal preference. We encourage you to share your creations and enjoy every single bite of this unique and satisfying dessert!
Frequently Asked Questions:
Can I make the Banana Pudding Tres Leches Cake ahead of time?
Yes, absolutely! In fact, it’s best to make this cake at least a few hours, or even a day, in advance. This allows the cake to fully absorb the milk mixture, resulting in a more moist and flavorful dessert. Store it covered in the refrigerator.
What kind of bananas should I use for the Banana Pudding Tres Leches Cake?
Overripe bananas are ideal for this recipe. They are sweeter and mash more easily, providing a more intense banana flavor. Look for bananas with plenty of brown spots – they’re perfect for baking!
How do I prevent the Banana Pudding Tres Leches Cake from becoming too soggy?
While tres leches cakes are meant to be moist, you can manage soggin extractess by ensuring you’ve evenly poked holes throughout the cake before pouring the milk mixture. Also, resist the urge to over-soak. The cake should be saturated but not swimming in liquid. Letting it rest in the refrigerator helps the liquid distribute and absorb properly.
Banana Pudding Tres Leches Cake
A delightful fusion of banana pudding and tres leches cake, featuring a moist sponge cake soaked in milky goodness and topped with a creamy banana pudding frosting.
Ingredients
-
1½ cups all-purpose flour
-
1 tablespoon baking powder
-
¼ teaspoon salt
-
5 large eggs, separated
-
1 cup granulated sugar, divided
-
⅓ cup whole milk
-
1 teaspoon vanilla extract
-
1 can (12 oz) evaporated milk
-
1 can (14 oz) sweetened condensed milk
-
1 cup heavy cream
-
½ cup mashed bananas (about 1-2 ripe bananas)
-
1 box (3.4 oz) instant banana pudding mix
-
1 cup cold milk
-
8 oz cream cheese, softened
-
¼ cup powdered sugar
Instructions
-
Step 1
Preheat oven to 350°F (175°C). Grease and flour a 9×13 inch baking pan. -
Step 2
Whisk together flour, baking powder, and salt in a medium bowl. -
Step 3
Beat egg whites until stiff peaks form, then gradually add ¼ cup sugar until glossy. -
Step 4
Beat egg yolks with remaining ¾ cup sugar until pale yellow and thick. Add milk and vanilla, then gradually add dry ingredients, mixing until just combined. Gently fold in whipped egg whites. -
Step 5
Pour batter into prepared pan and bake for 30-35 minutes, or until a skewer comes out clean. Let cool for 10-15 minutes. -
Step 6
Whisk together evaporated milk, sweetened condensed milk, and mashed bananas. Pour evenly over the warm cake. -
Step 7
Cover and refrigerate for at least 4 hours, or overnight. -
Step 8
Prepare instant banana pudding with cold milk according to package directions. -
Step 9
Beat softened cream cheese with powdered sugar until smooth. Add heavy cream and beat until stiff peaks form. -
Step 10
Gently fold the prepared pudding into the cream cheese mixture. Spread evenly over the chilled cake.
Important Information
Nutrition Facts (Per Serving)
It is important to consider this information as approximate and not to use it as definitive health advice.
Allergy Information
Please check ingredients for potential allergens and consult a health professional if in doubt.