Gordon Ramsay Caramelized Onion Dip- Easy & Delicious
Gordon Ramsay Caramelized Onion Dip is more than just a dip; it’s an experience. Forget those store-bought versions that taste bland and uninspired. This recipe, inspired by the culinary genius of Gordon Ramsay, transforms humble onions into a symphony of sweet, savory, and deeply satisfying flavor. People absolutely adore this dish because it elevates any gathering, from casual game nights to elegant dinner parties. What makes the Gordon Ramsay Caramelized Onion Dip truly special is the patient art of caramelization. It’s this slow, deliberate process that unlocks the natural sugars in the onions, creating an intensely rich and complex taste profile that is simply irresistible. The contrast between the tender, sweet onions and the creamy, tangy base is pure magic. Get ready to impress your friends and family with a dip that’s as sophisticated as it is utterly delicious.
Ingredients:
- 3 medium yellow onions, thinly sliced
- 2 tbsp salted butter
- 2 tsp salt
- 2 tsp sugar
- 60ml dry white grape juice
- 340g sour cream
- 225g cream cheese, softened
- 1 clove garlic, grated (optional)
- Fresh parsley, minced (to taste)
- Few dashes Worcestershire or soy sauce (to taste)
Caramelizing the Onions
This is arguably the most crucial step in achieving that deep, complex flavor that defines a truly great caramelized onion dip, reminiscent of the techniques you might see in Gordon Ramsay’s kitchen. Patience is key here; we’re not just softening the onions, we’re transforming them through slow, gentle heat.
- Begin extract by melting the 2 tablespoons of salted butter in a large, heavy-bottomed skillet or Dutch oven over medium-low heat. A heavier pan distributes heat more evenly, preventing scorching and promoting consistent caramelization. Once the butter is melted and shimmering slightly, add your 3 medium yellow onions, which you’ve already thinly sliced. Try to get them into a single layer as much as possible.
- Stir the onions to coat them evenly in the melted butter. Now, let them cook, stirring occasionally, for about 15-20 minutes. During this initial stage, the onions will soften considerably and start to turn translucent. You’re looking for thgin extractto begin releasing their moisture and shrinking in volume. Don’t be tempted to rush this by turning up the heat; a low and slow approach is essential for developing sweetness and preventing bitterness.
- After the initial softening, it’s time to introduce the sugar and salt. Sprinkle the 2 teaspoons of sugar and 2 teaspoons of salt evenly over the onions. The sugar will help accelerate the caramelization process by promoting browning, while the salt will draw out more moisture from the onions, further aiding in their breakdown and concentration of flavor. Stir everything together thoroughly to ensure the sugar and salt are well distributed.
- Continue cooking the onions over medium-low heat, stirring more frequently now, for another 30-45 minutes, or even longer. The onions should gradually turn from pnon-alcoholic ale yellow to a deep golden brown, and eventually to a rich, dark amber color. They should be very soft, deeply sweet, and jammy in consistency. If you notice any sticking or browning too quickly, reduce the heat further and add a tablespoon of water or a splash of the white grape juice to deglaze the pan and scrape up any browned bits. These bits are packed with flavor!
- Once the onions have reached your desired level of caramelization – a beautiful deep brown that smells incredibly sweet and savory – it’s time to add the liquid to help deglaze the pan and capture all those fantastic flavors. Pour in the 60ml of dry white grape juice. Stir vigorously, scraping the bottom of the pan with your spatula to loosen any fond (the browned bits stuck to the pan). Let this simmer for a minute or two until most of the liquid has evaporated, leaving you with a thick, syrupy onion mixture. Remove the pan from the heat and let the caramelized onions cool completely. This cooling step is important as adding hot onions to the dairy components could cause them to split.
Assembling the Dip
Now that our flavor base is ready, we’ll bring everything together for a smooth and creamy dip.
- In a medium-sized mixing bowl, combine the 340g of sour cream and the 225g of softened cream cheese. Make sure your cream cheese is truly softened to room temperature; this will ensure a lump-free and wonderfully smooth dip. You can achieve this by leaving it on the counter for about an hour or by briefly microwaving it (in very short bursts). Using a spatula or a hand mixer on low speed, beat the sour cream and cream cheese together until they are well combined and have a smooth, creamy texture.
- Once the cream cheese and sour cream mixture is smooth, gently fold in the cooled caramelized onions. Be thorough but gentle; you want to distribute the onions evenly throughout the dip without overmixing or breaking them down too much. At this point, you can also add your optional flavor enhancers. If you like a little kick, add the grated clove of garlic. Stir in a few dashes of Worcestershire sauce or soy sauce for added umami depth – start with a small amount and taste as you go.
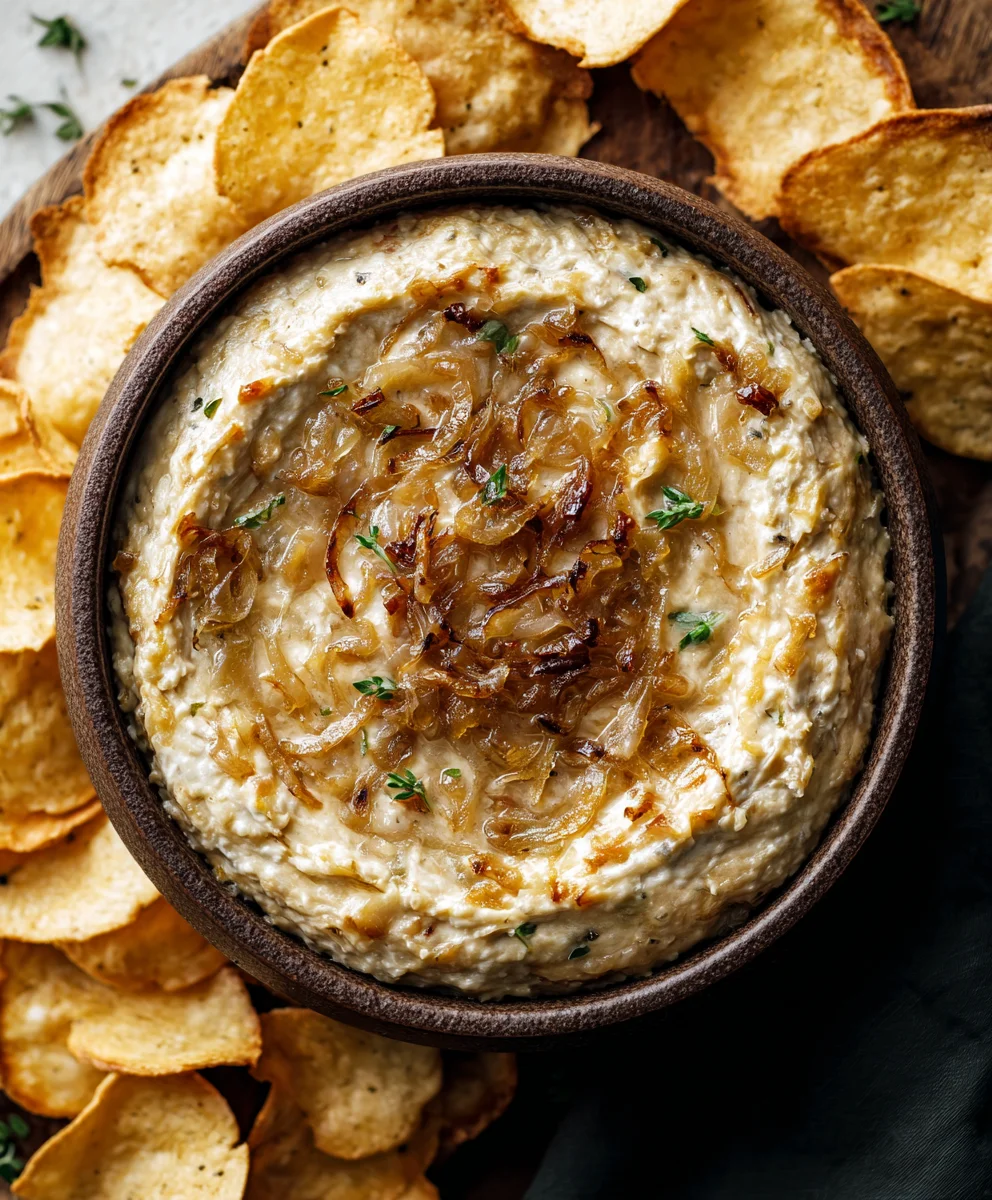
- Taste the dip and adjust seasonings as needed. You might find it needs a touch more salt, or perhaps a little more Worcestershire or soy sauce for that savory punch. Remember, the salt in the caramelized onions and the initial seasoning of the dip will affect the final taste. Stir in the minced fresh parsley for a burst of freshness and color. Parsley not only adds visual appeal but also a bright, herbaceous note that cuts through the richness of the dip.
- For the best flavor, cover the bowl tightly with plastic wrap and refrigerate the dip for at least 2 hours, or ideally overnight. This chilling period allows the flavors to meld and deepen, creating a more cohesive and satisfying taste. The longer it sits, the more delicious it becomes!
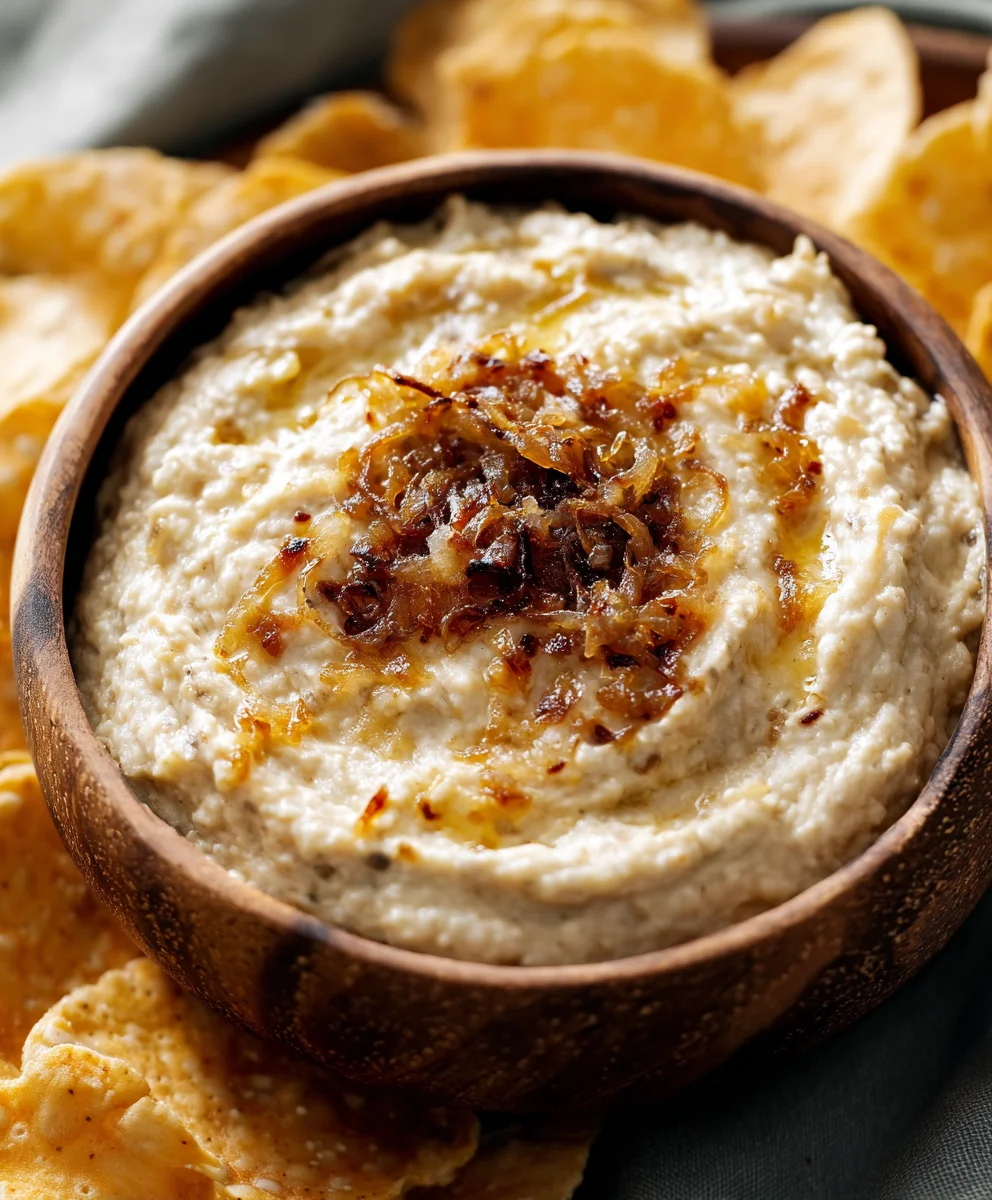
- When you’re ready to serve, give the dip a final stir. If it seems a little too thick after chilling, you can stir in a tablespoon or two of milk or even a little more sour cream to reach your desired consistency. Serve chilled with your favorite dippers, such as sturdy potato chips, crackers, crudités, or even slices of toasted baguette.
Conclusion:
And there you have it – the secrets to creating the undeniably delicious Gordon Ramsay Caramelized Onion Dip! This recipe is a true testament to the power of patience and quality ingredients, transforming humble onions into a sweet, savory, and deeply satisfying dip. We’ve walked through each step, from achieving that perfect caramelization to balancing the creamy base. I encourage you to give this recipe a try; the effort is truly rewarded with a flavor explosion that will impress any guest or satisfy any craving.
For serving, this Gordon Ramsay Caramelized Onion Dip is incredibly versatile. It’s fantastic served warm with crusty bread, tortilla chips, or vegetable crudités. You can also chill it for a colder, equally delightful experience. Think of it as a luxurious accompaniment to your next gathering or a sophisticated treat for a quiet evening in.
If you’re looking for variations, consider adding a pinch of smoked paprika for a smoky depth, or a splash of balsamic vinegar towards the end of caramelization for an extra tangy note. A touch of fresh thyme stirred in can also elevate the herbaceous profile.
Frequently Asked Questions:
Can I make the Gordon Ramsay Caramelized Onion Dip ahead of time?
Absolutely! The Gordon Ramsay Caramelized Onion Dip can be made up to 2-3 days in advance and stored in an airtight container in the refrigerator. The flavors will actually meld and deepen overnight, making it even more delicious when you’re ready to serve. Gently reheat it on the stovetop or in the oven before serving, or serve it chilled.
What kind of onions are best for this dip?
While yellow or sweet onions are generally recommended for their natural sweetness and ability to caramelize beautifully, you can also experiment with red onions for a slightly different flavor profile and a beautiful color. The key is to use a good quantity and to caramelize them slowly until deeply golden brown.
Gordon Ramsay Caramelized Onion Dip – Easy & Delicious
A rich and flavorful caramelized onion dip, inspired by Gordon Ramsay’s techniques, perfect for any gathering. Slow-cooked onions provide a deep, sweet, and savory base for a creamy dip.
Ingredients
-
3 medium yellow onions, thinly sliced
-
2 tbsp salted butter
-
2 tsp salt
-
2 tsp sugar
-
60ml non-alcoholic white grape juice
-
340g sour cream
-
225g cream cheese, softened
-
1 clove garlic, grated (optional)
-
Fresh parsley, minced (to taste)
-
Few dashes Worcestershire or soy sauce (to taste)
Instructions
-
Step 1
Melt butter in a large, heavy-bottomed skillet over medium-low heat. Add thinly sliced onions and stir to coat. Cook for 15-20 minutes, stirring occasionally, until softened and translucent. -
Step 2
Sprinkle sugar and salt over the onions. Continue cooking over medium-low heat, stirring more frequently, for another 30-45 minutes, or until the onions are a deep golden brown and jammy. If sticking, deglaze with a tablespoon of water or non-alcoholic white grape juice. -
Step 3
Pour in the non-alcoholic white grape juice and stir vigorously, scraping the bottom to loosen any browned bits. Simmer for 1-2 minutes until most of the liquid has evaporated. Remove from heat and let cool completely. -
Step 4
In a mixing bowl, combine softened cream cheese and sour cream. Beat until smooth and creamy. -
Step 5
Gently fold in the cooled caramelized onions. Add optional grated garlic, Worcestershire or soy sauce to taste. Stir in minced fresh parsley. -
Step 6
Taste and adjust seasonings as needed. Cover and refrigerate for at least 2 hours, or ideally overnight, to allow flavors to meld. -
Step 7
Before serving, stir the dip. If too thick, thin with a tablespoon or two of milk or sour cream. Serve chilled with dippers.
Important Information
Nutrition Facts (Per Serving)
It is important to consider this information as approximate and not to use it as definitive health advice.
Allergy Information
Please check ingredients for potential allergens and consult a health professional if in doubt.