Easily Freeze Peaches – Delicious Summer Storage
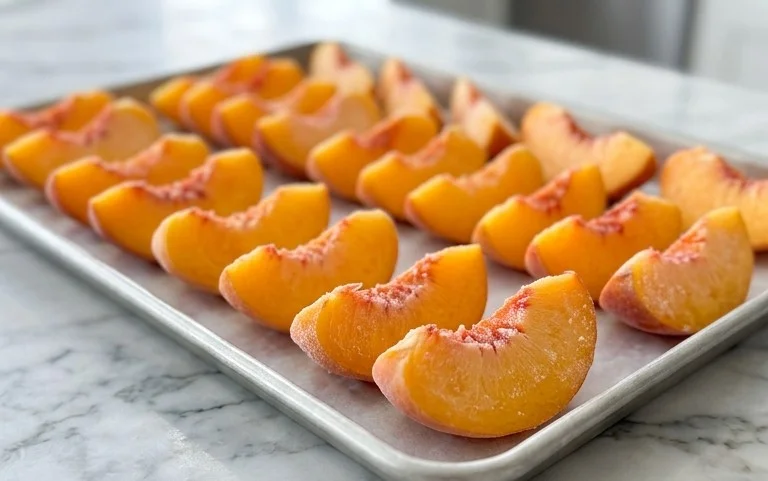
Freezing peaches, how to easily freeze peaches is your secret weapon for enjoying that sun-kissed sweetness all year round! There’s nothing quite like biting into a perfectly ripe peach, is there? The juicy, fragrant flesh, the burst of tropical flavor – it’s pure summer bliss. But what happens when that glorious season fades? We’re left dreaming of those peachy delights until next year. That’s where the magic of freezing peaches comes in. It’s surprisingly simple and incredibly rewarding. You can capture that peak-season perfection and transform it into delicious smoothies, pies, cobblers, and even savory sauces months down the line. This method ensures you’re never without that taste of sunshine, making every bite a delightful reminder of warmer days.
Ingredients:
Freezing peaches is a fantastic way to preserve their sweet, summery flavor for enjoyment long after the season has passed. Whether you have an abundance from your own trees or snagged a great deal at the farmer’s market, taking the time to freeze them properly will reward you with delicious fruit for pies, smoothies, cobblers, and so much more. I’ve tried a few methods over the years, and this one, using a simple sugar pack and fruit protector, consistently yields the best results. It’s incredibly easy and ensures your frozen peaches retain their vibrant color and delightful taste. Let’s get started on preserving this taste of sunshine!
Preparing Your Peaches for Freezing
The first step in our freezing adventure is to get our peaches ready. This involves washing, peeling, pitting, and slicing them. Don’t skip the peeling; while some recipes might call for leaving the skin on, for freezing, peeling makes for a much more pleasant texture when you thaw them out later. For washing, a gentle rinse under cool running water should do the trick. Then comes the peeling. I find that using a small paring knife works best. Make a small X at the bottom of each peach and then plunge it into boiling water for about 30-60 seconds. This will loosen the skin significantly, making it easy to slip off with your knife or even your fingers.
Once peeled, you’ll need to pit the peaches. You can do this by slicing the peach in half along the natural seam, then twisting the halves apart. Use your paring knife to carefully cut around the pit and then scoop it out. If the pit is stubborn, don’t worry; a gentle wiggle or a few more precise cuts should free it. Finally, slice your peaches into your desired size. I usually go for wedges or slices that are about ½ inch thick. This size is versatile for most uses and freezes evenly. As you slice them, place them into a large bowl.
Creating the Sugar Pack and Protecting the Fruit
Now, let’s talk about the magic ingredients that will help our peaches stay bright and delicious: sugar and Fruit Protector. The sugar serves a dual purpose: it not only adds a touch of sweetness (which complements the natural sweetness of the peaches) but also helps to draw out some of the moisture, preventing them from becoming overly watery when thawed. We’re using 2/3 cup of sugar for our quart of peaches.
The Fruit Protector is a game-changer for preserving the color of your peaches. Without it, peaches can turn a rather unappetizing brown color once frozen. Fruit Protector, typically made from ascorbic acid (Vitamin C), acts as an antioxidant, preventing this browning and keeping your fruit looking as fresh as the day you froze it. We’ll be using 3 teaspoons of this wonderful stuff.
Step-by-Step Freezing Process
1.
Combining and Coating
In your large bowl with the sliced peaches, sprinkle the 2/3 cup of sugar evenly over the fruit. Gently toss the peaches with your hands or a large spoon to coat each slice with sugar. Now, sprinkle the 3 teaspoons of Fruit Protector over the sugared peaches. Again, gently toss to distribute the Fruit Protector evenly. You want every piece of peach to have a chance to be protected from oxidation and lightly sweetened. This step is crucial for the quality of your frozen peaches. Be gentle during this tossing phase to avoid bruising the fruit.
2.
Allowing the Juices to Develop
Once everything is coated, cover the bowl with plastic wrap or a clean kitchen towel. Let the peaches sit at room temperature for about 15-20 minutes. During this time, the sugar will start to work its magic, drawing out some of the natural juices from the peaches. You’ll notice a lovely syrupy liquid forming at the bottom of the bowl. This syrupy liquid, combined with the Fruit Protector, will create a delicious coating for your peaches and help maintain their texture and color.
3.
Portioning for Freezing
After the resting period, the peaches should be sitting in a nice pool of their own juice, now slightly thickened. It’s time to portion them out for freezing. You can freeze them in larger freezer bags or in smaller individual portions. I find that using freezer bags is most efficient. For larger bags, you can place the peaches and their liquid directly into the bag. For smaller portions, you can scoop them into smaller freezer bags or even into ice cube trays for single servings that are perfect for smoothies. When filling bags, try to remove as much air as possible. If you’re using freezer bags, you can use a straw to suck out the excess air before sealing, or use a vacuum senon-alcoholic aler if you have one. This is important to prevent freezer burn.
4.
Labeling and Freezing
Once your peaches are portioned into their freezer-safe containers, it’s time to label them. This is a crucial step that many people overlook. Use a permanent marker to write the contents (peaches) and the date you froze them. This will help you keep track of your frozen goods and ensure you use them within a reasonable timeframe, typically 8-12 months for the best quality. Place the labeled bags or containers flat in your freezer. This helps them freeze more quickly and evenly and also saves space. Once they are frozen solid, you can then stack them or arrange them as you see fit.
5.
Storage and Thawing
Your peaches are now safely tucked away in the freezer, ready to be enjoyed later. When you’re ready to use them, simply remove the amount you need from the freezer. For most applications, like pies or cobblers, you can often use them directly from frozen. If you need thawed peaches for a salad or a smoothie where you prefer a softer texture, transfer the desired amount to a bowl and let them thaw in the refrigerator for a few hours, or at room temperature for a shorter period. The sugar and Fruit Protector will have done their job, and you’ll be met with beautifully colored and flavorful peaches, ready to be transformed into your favorite dishes. Enjoy the taste of summer anytime you wish!
Conclusion:
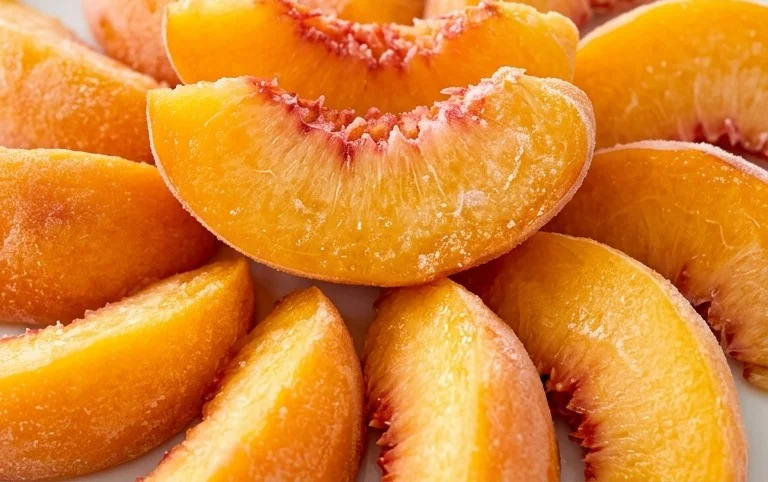
You’ve now learned how to easily freeze peaches, ensuring you can enjoy that taste of summer all year round! This method is fantastic because it preserves the vibrant flavor and texture of fresh peaches with minimal effort. Freezing peaches is a game-changer for bakers, smoothie lovers, and anyone who craves a sweet, healthy snack when fresh fruit is out of season. Imagin extracte pulling out perfectly preserved peaches for a delicious cobbler in the dead of winter, or blending them into a refreshing smoothie on a chilly morning. It’s a simple yet incredibly rewarding way to reduce waste and maximize your enjoyment of this wonderful fruit.
Don’t hesitate to give this a try! You’ll be so glad you did when you open your freezer and are greeted by bags of sunshine. Feel free to experiment with different serving suggestions – think peach salsa, homemade peach ice cream, or simply enjoying them thawed with a dollop of yogurt. For variations, consider adding a squeeze of lemon juice before freezing for even brighter flavor, or perhaps a hint of cinnamon for a spiced peach treat.
Frequently Asked Questions:
Can I freeze peaches without peeling them?
While it’s generally recommended to peel peaches for the best texture after thawing, you can technically freeze them with the skins on. However, the skins may become more noticeable and slightly tougher. For the smoothest results, especially for use in purees or smoothies, peeling is definitely the way to go.
How long do frozen peaches last?
Properly frozen peaches can maintain their quality for about 8 to 12 months in a deep freezer. For best flavor and texture, it’s ideal to use them within the first year.
What’s the best way to thaw frozen peaches?
The best method for thawing is slowly in the refrigerator overnight. This helps maintain their texture. You can also thaw them at room temperature for a quicker option, but be aware they might release more juice. For immediate use in cooked dishes or smoothies, you can often use them directly from frozen.
Freezing Peaches, How to Easily Freeze Peaches
A simple guide to preserving fresh peaches by freezing them for later use. This method ensures maximum flavor and quality.
Ingredients
-
1 quart peaches, peeled, pitted, and sliced
-
2/3 cup sugar
-
3 teaspoons Fruit Protector
-
1 tablespoon lemon juice
-
1/4 cup water
-
1 teaspoon vanilla extract
-
1/2 teaspoon cinnamon
Instructions
-
Step 1
Wash, peel, pit, and slice the peaches. Aim for uniform slices for even freezing. -
Step 2
In a large bowl, gently toss the peach slices with sugar and Fruit Protector. Let stand for about 10 minutes to allow the sugar to dissolve and draw out some juice. -
Step 3
In a separate small bowl, whisk together the lemon juice, water, vanilla extract, and cinnamon to create a light syrup. This will help prevent browning and add a touch of flavor. -
Step 4
Gently fold the syrup mixture into the peaches, ensuring all slices are lightly coated. -
Step 5
Portion the peaches into freezer-safe bags or containers, leaving about 1/2 inch headspace for expansion. Remove as much air as possible from the bags before sealing. -
Step 6
Label the containers with the date and contents. Freeze immediately until solid.
Important Information
Nutrition Facts (Per Serving)
It is important to consider this information as approximate and not to use it as definitive health advice.
Allergy Information
Please check ingredients for potential allergens and consult a health professional if in doubt.