Nut-Free Pesto Recipe – Delicious & Easy Allergy-Friendly
Nut Free Pesto can be a revelation for anyone who’s ever dreamed of vibrant, herbaceous flavor without the worry of allergies or dietary restrictions. For so long, pesto has been synonymous with pine nuts, a delicious but often inaccessible ingredient. That’s where our incredible Nut Free Pesto recipe comes in! We’ve unlocked the secret to achieving that classic, bold basil taste and creamy texture, all while keeping it wonderfully nut-free. Imagin extracte tossing this glorious green sauce with your favorite pasta, spreading it on crusty bread, or dolloping it onto grilled chicken or vegetables – the possibilities are truly endless. This isn’t just a substitute; it’s a star in its own right, proving that deliciousness knows no bounds and everyone deserves to experience the joy of perfectly made pesto.
Why You’ll Love This Nut Free Pesto
Discover a World of Flavor, Allergy-Friendly
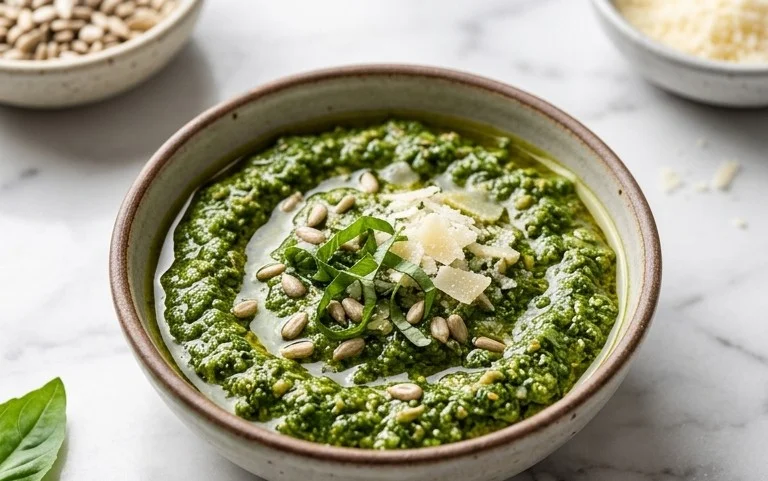
Nut Free Pesto
As someone with nut allergies in the family, I’ve spent years searching for truly delicious nut-free alternatives to classic pesto. Traditional pesto, with its pine nuts, is a beautiful thing, but it’s simply not an option for us. After much experimentation, I’ve finally landed on a nut-free pesto recipe that’s so vibrant, fresh, and bursting with flavor, you won’t miss the nuts at all. This pesto is incredibly versatile, perfect for pasta, drizzled over roasted vegetables, spread on sandwiches, or even as a dip. It’s remarkably simple to make, requiring just a few fresh ingredients and a food processor or blender. Let’s get started on creating this allergy-friendly kitchen staple!
Ingredients:
Instructions:
Prepare the Basil:
The foundation of any great pesto is fresh, high-quality basil. I like to buy my basil in bunches from the grocery store or farmer’s market. Before you start, it’s important to wash your basil leaves thoroughly and then dry them completely. Excess water can make your pesto watery and dilute the flavors. A salad spinner is excellent for this, or you can gently pat them dry with paper towels. Remove the stems from the basil leaves. While some recipes might include tender stems, I find that using just the leaves yields a smoother and more vibrant pesto. The amount of basil is quite forgiving, so don’t stress if you have a little more or less than 2 cups; just pack it in there so you get a good amount for your pesto.
Add Garlic and Cheese:
Once your basil is prepped, it’s time to add the aromatics and the cheesy goodness. Place the 2 peeled garlic cloves into your food processor. For those who are sensitive to raw garlic, you can lightly roast the garlic cloves before adding them, which will mellow out their pungency and add a lovely sweetness. Next, add the 1/2 cup of freshly grated Parmesan cheese. Using freshly grated Parmesan makes a huge difference in texture and flavor compared to pre-shredded cheese, which often contains anti-caking agents that can affect the smoothness of your pesto. The sharp, nutty notes (from the cheese, not the nuts!) of the Parmesan are crucial for balancing the fresh, herbaceous basil.
Process the Base Ingredients:
Now, it’s time to start blending! Add the prepared basil leaves to the food processor with the garlic and Parmesan. Pulse the ingredients a few times until the basil is roughly chopped and everything is begin extractning to combine. Don’t over-process at this stage; we want to incorporate the olive oil gradually to achieve the perfect consistency. You should start to see a vibrant green color developing. If you don’t have a food processor, a sturdy blender will also work. You might need to scrape down the sides of the blender more frequently to ensure even processing.
Emulsify with Olive Oil:
With the basil, garlic, and cheese roughly chopped, it’s time to add the olive oil. Drizzle in the 1/4 cup of olive oil slowly while the food processor is running on a low setting. You want to stream the oil in gradually. This process is called emulsification, and it’s what helps to bind the ingredients together and create that smooth, luxurious texture characteristic of pesto. Continue processing until the mixture is smooth and creamy, but be careful not to over-process, as this can make the pesto greasy. The consistency should be thick enough to cling to pasta but loose enough to drizzle. You’re looking for a beautiful, bright green paste.
Season and Adjust:
The final step is to season your pesto. Add the 1/4 teaspoon of salt and the 1/8 teaspoon of pepper to the food processor. Pulse a few more times to incorporate the seasonings. Taste your pesto at this point. This is where you can truly customize it to your liking. If you want a more garlicky flavor, add another small piece of garlic. If you prefer it saltier, add a pinch more salt. For a richer flavor, you can add another tablespoon of olive oil. Remember, the Parmesan cheese is already salty, so taste before adding too much extra salt. Once you’re happy with the flavor, give it one final pulse to ensure everything is perfectly blended.
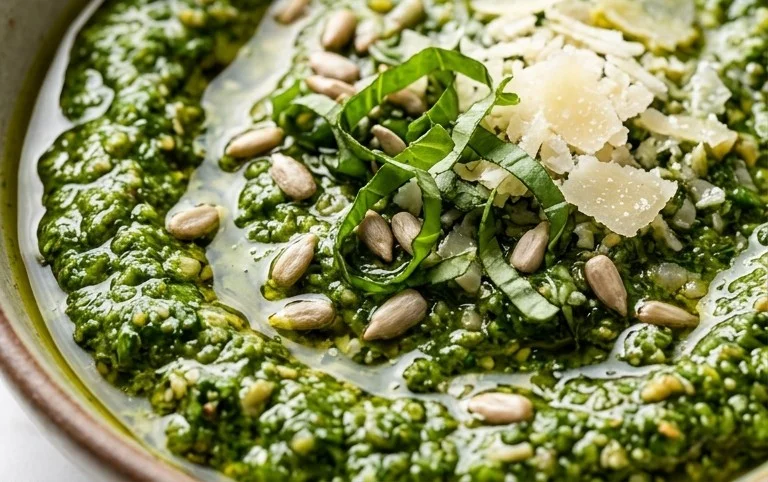
This nut-free pesto is now ready to be enjoyed! For the best flavor, I recommend letting it sit for at least 15-30 minutes before serving, allowing the flavors to meld together beautifully. You can store this pesto in an airtight container in the refrigerator for up to a week. To help it last longer and maintain its vibrant green color, pour a thin layer of olive oil over the top before sealing the container. This creates a barrier that prevents oxidation. You can also freeze this pesto in ice cube trays for convenient, single-serving portions that can be easily thawed and used whenever you need a burst of fresh flavor. Enjoy creating and savoring this delicious nut-free pesto in all your favorite dishes!
Conclusion:
I hope you’re as excited as I am to dive into this delicious nut free pesto recipe! It’s truly a game-changer for anyone with nut allergies or those simply looking for a delightful twist on a classic. The beauty of this recipe lies in its simplicity, vibrant flavor, and incredible versatility. We’ve managed to capture that fresh, herbaceous essence of traditional pesto without a single nut in sight, making it a safe and satisfying option for everyone to enjoy.
This nut free pesto is perfect tossed with your favorite pasta, spread on sandwiches, dolloped onto grilled chicken or fish, or even used as a base for a flavorful pizza. Don’t be afraid to experiment with the herbs; feel free to add a little more basil, a touch of mint, or even some fresh parsley to tailor it to your taste. Give this recipe a try – I promise you won’t be disappointed by its incredible taste and the joy it brings to your meals!
Frequently Asked Questions:
Can I freeze nut free pesto?
Absolutely! This nut free pesto freezes beautifully. Portion it into ice cube trays for small servings or larger containers for bigger batches. Once frozen, transfer the pesto cubes to a freezer-safe bag or container. It should last for up to 6 months in the freezer. Thaw overnight in the refrigerator before using.
What can I use instead of pine nuts if I have a seed allergy?
If you have a seed allergy in addition to nut allergies, you can omit the seeds entirely. The pesto will still be delicious and vibrant with just the herbs, garlic, cheese, and olive oil. For a bit of texture, you could try toasting a small amount of nutritional yeast for a slightly savory, nutty undertone, though it won’t replicate the crunch of seeds.
How long does nut free pesto last in the refrigerator?
When stored properly in an airtight container in the refrigerator, this nut free pesto should stay fresh and delicious for about 5 to 7 days. Always ensure the surface is covered with a thin layer of olive oil to help prevent browning and oxidation, which can affect its vibrant green color and freshness.
Nut Free Pesto
A delicious and nut-free version of classic pesto, perfect for those with allergies or preferences. This versatile sauce is great on pasta, sandwiches, or as a dip.
Ingredients
-
2 cups fresh basil
-
2 garlic cloves
-
1/2 cup freshly grated Parmesan cheese
-
1/4 cup olive oil
-
1/4 teaspoon salt
-
1/8 teaspoon pepper
Instructions
-
Step 1
Wash and dry the fresh basil leaves thoroughly. -
Step 2
Peel and roughly chop the garlic cloves. -
Step 3
In a food processor, combine the basil, garlic, Parmesan cheese, salt, and pepper. -
Step 4
Pulse until the ingredients are finely chopped. -
Step 5
With the food processor running, slowly drizzle in the olive oil until the pesto is smooth and well combined. -
Step 6
Taste and adjust seasoning if necessary.
Important Information
Nutrition Facts (Per Serving)
It is important to consider this information as approximate and not to use it as definitive health advice.
Allergy Information
Please check ingredients for potential allergens and consult a health professional if in doubt.