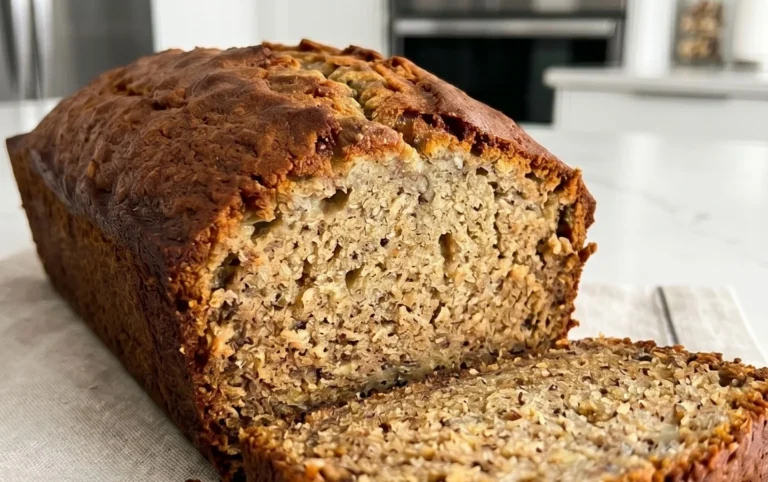
Sticky Coconut Cake – Deliciously Moist & Easy Recipe
Sticky Coconut Cake is more than just a dessert; it’s a warm hug on a plate, a tropical getaway in every bite. If you’ve ever craved a treat that’s both comforting and a little bit exotic, then this is the recipe for you. There’s something utterly irresistible about the way this Sticky Coconut Cake melts in your mouth, leaving behind a lingering sweetness and the subtle, nutty aroma of toasted coconut. We love it because it’s incredibly forgiving to bake, making it perfect for both novice bakers and seasoned pros looking for a reliable crowd-pleaser. What truly sets this particular Sticky Coconut Cake apart is its signature luscious, caramel-like topping that creates an addictive chegrape juicess, perfectly complementing the moist, tender crum extractb. Prepare to fall head over heels!
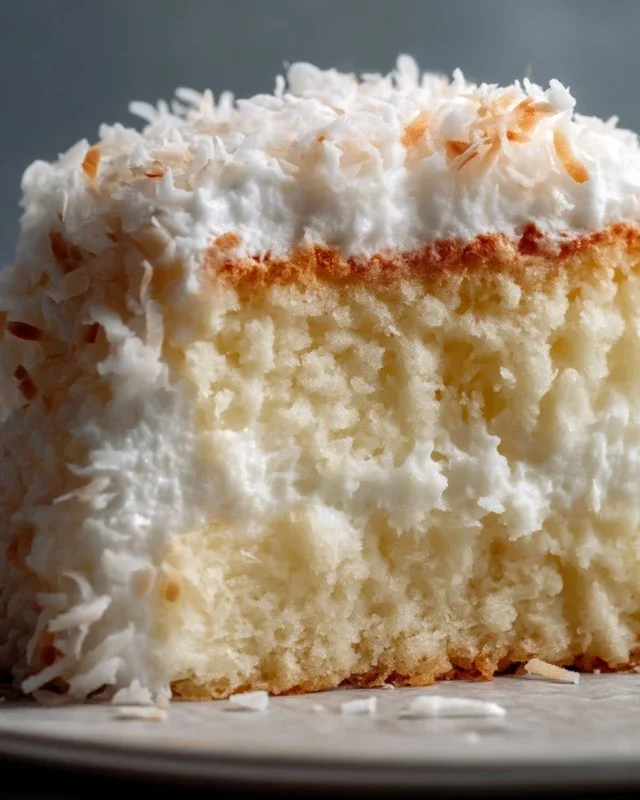
Sticky Coconut Cake
Get ready for a delightful journey into the heart of tropical sweetness with my Sticky Coconut Cake recipe. This cake is a celebration of pure, unadulterated coconut flavor, with a wonderfully chewy texture that’s utterly addictive. It’s not your typical light and airy cake; instead, it boasts a dense, fudgy crum extractb that’s infused with the rich creaminess of coconut milk and the delightful chew of shredded coconut. This recipe is perfect for anyone who adores the taste of the tropics and enjoys a dessert that’s both comforting and exotic. It’s surprisingly simple to make, requiring just a few pantry staples and a little bit of love. Whether you’re a seasoned baker or just starting out, you’ll find this recipe approachable and incredibly rewarding. The aroma that fills your kitchen as this cake bakes is simply heavenly, a sweet promise of the deliciousness to come.
This Sticky Coconut Cake is a fantastic option for afternoon tea, a special dessert after a meal, or even as a unique treat for a potluck. Its natural sweetness is balanced by the subtle richness of the coconut, creating a flavor profile that’s both complex and comforting. I love how the glutinous rice flour contributes to its unique chewy texture, a delightful contrast to the typical cake experience. It’s a taste of paradise in every bite, and I’m so excited to share this recipe with you.
Ingredients:
Instructions:
1.
Preparing the Coconut Milk Mixture:
First, let’s get our coconut flavor base ready. In a medium saucepan, combine the 2¼ cups of full-fat canned coconut milk with 1 cup of the granulated sugar (we’ll use the remaining ¼ cup later). Add the 1 teaspoon of vanilla extract to this mixture. Place the saucepan over medium-low heat. You want to gently warm the mixture, not boil it. Stir continuously until the sugar has completely dissolved. This process helps to meld the flavors and ensures that the sugar is fully incorporated, preventing any grittiness in the final cake. Once the sugar is dissolved and the mixture is warm and fragrant, remove it from the heat. Let it cool slightly before proceeding to the next step. This gentle warming also helps the coconut milk to be more receptive to the other ingredients.
2.
Incorporating the Egg Yolks and Coconut:
In a large mixing bowl, whisk together the 2 egg yolks until they are lightly beaten and a pnon-alcoholic ale yellow color. Slowly and gradually, pour the slightly cooled coconut milk mixture into the beaten egg yolks, whisking constantly. This step is crucial to temper the egg yolks, preventing them from scrambling when they come into contact with the warm liquid. Continue whisking until the mixture is smooth and well combined. Now, it’s time to add the star of the show: the 3 cups of shredded sweetened coconut. Stir the shredded coconut into the liquid mixture until it’s evenly distributed. This will give our cake its signature texture and intense coconut flavor. Make sure every strand of coconut is coated in the creamy mixture.
3.
Combining Wet and Dry Ingredients:
To this coconut and egg yolk mixture, we’ll now add the 1½ cups of glutinous rice flour. Glutinous rice flour is the secret to the wonderfully chewy texture of this cake. It’s important to add it gradually, whisking continuously. Start by adding about half of the glutinous rice flour and whisk until it’s mostly incorporated. Then, add the remaining glutinous rice flour and continue whisking until you have a smooth, thick batter with no lumps. It’s important to ensure that all the flour is fully hydrated. The batter will be quite thick, almost like a pourable dough, and this is exactly what we want for our sticky cake.
4.
Whipping the Egg Whites for Lightness (and a touch of lift):
In a separate, very clean bowl (any trace of grease can prevent the egg whites from whipping properly), beat the 2 egg whites using an electric mixer on medium speed. Once they start to become foamy, gradually add the remaining ¼ cup of granulated sugar, a tablespoon at a time, while continuing to beat. Increase the mixer speed to high and beat until stiff, glossy peaks form. This means that when you lift the beaters, the egg whites will stand up straight without drooping. This step adds a little bit of airiness and helps the cake to rise slightly, creating a more enjoyable texture without compromising its inherent stickiness.
5.
Gently Folding for the Perfect Texture:
This is a critical stage for achieving the desired texture. We need to gently fold the whipped egg whites into the thick coconut batter. Add about a third of the whipped egg whites to the coconut mixture and gently fold them in using a spatula. Use a cut-and-fold motion, bringin extractg the spatula down through the center of the bowl, scooping up the batter from the bottom, and folding it over the egg whites. Be careful not to overmix; we want to keep as much of the air from the egg whites as possible. Repeat this process with the remaining two-thirds of the egg whites, adding them in two more additions, folding gently after each addition until just combined. The batter should be airy yet still dense, with the shredded coconut distributed throughout.
6.
Baking Your Tropical Masterpiece:
Preheat your oven to 350°F (175°C). Lightly grease and flour a 9×13 inch baking pan, or line it with parchment paper for easy removal. Pour the batter evenly into the prepared baking pan. Smooth the top with your spatula. Place the pan in the preheated oven and bake for 30-40 minutes, or until a wooden skewer inserted into the center comes out clean, with perhaps a few moist crum extractbs attached. The top should be golden brown and the edges should be starting to pull away slightly from the sides of the pan. The smell will be absolutely divine!
7.
Cooling and Enjoying:
Once baked, remove the Sticky Coconut Cake from the oven and let it cool in the pan on a wire rack for at least 15-20 minutes. This allows the cake to set properly. After the initial cooling, you can carefully invert the cake onto the wire rack to cool completely, or you can simply cut it into squares directly in the pan once it’s slightly cooled. This cake is best served warm or at room temperature. Its dense, chewy texture and rich coconut flavor are truly irresistible. You can enjoy it plain, or for an extra indulgence, serve it with a dollop of whipped cream or a scoop of coconut ice cream. This Sticky Coconut Cake is a testament to the simple, yet profound, pleasure of coconut. Enjoy every delightful, chewy bite!
Conclusion:
I truly hope you’ve been inspired to try this delightful Sticky Coconut Cake recipe! It’s a real showstopper, balancing a moist, tender crum extractb with a gloriously gooey, caramelised coconut topping. This cake is wonderfully versatile, perfect for afternoon tea, a special occasion dessert, or even a simple sweet treat to brighten your day. Its rich coconut flavour, complemented by the sweet, sticky glaze, makes it an unforgettable bake. Don’t be intimidated by the sticky topping; it’s simpler than it looks and entirely worth the effort for that incredible flavour and texture. I encourage you to gather your ingredients and give it a go – I promise you won’t be disappointed with this Sticky Coconut Cake.
For serving, I love a simple dusting of icing sugar or a dollop of whipped cream to cut through the sweetness. A scoop of vanilla bean ice cream is also divine! If you’re feeling adventurous with variations, consider adding a touch of lime zest to the batter for a tropical zing, or perhaps some toasted macadamia nuts for added crunch. Even a drizzle of dark chocolate over the top would be decadent!
Frequently Asked Questions:
Can I make this cake ahead of time?
Absolutely! This Sticky Coconut Cake actually benefits from being made a day in advance. The flavours meld beautifully, and the topping can set nicely. Store it at room temperature in an airtight container.
My topping is too runny, what went wrong?
This can happen if the sugar didn’t fully dissolve or if the mixture wasn’t cooked long enough. Ensure the butter and sugar are melted together completely before adding the coconut milk and cooking until thickened. You can also try simmering it a little longer on a lower heat if it seems too thin.
Can I use a different type of coconut?
While desiccated coconut works best for its fine texture, you could experiment with unsweetened shredded coconut, but you might need to adjust the cooking time slightly as it can take longer to soften and caramelise.
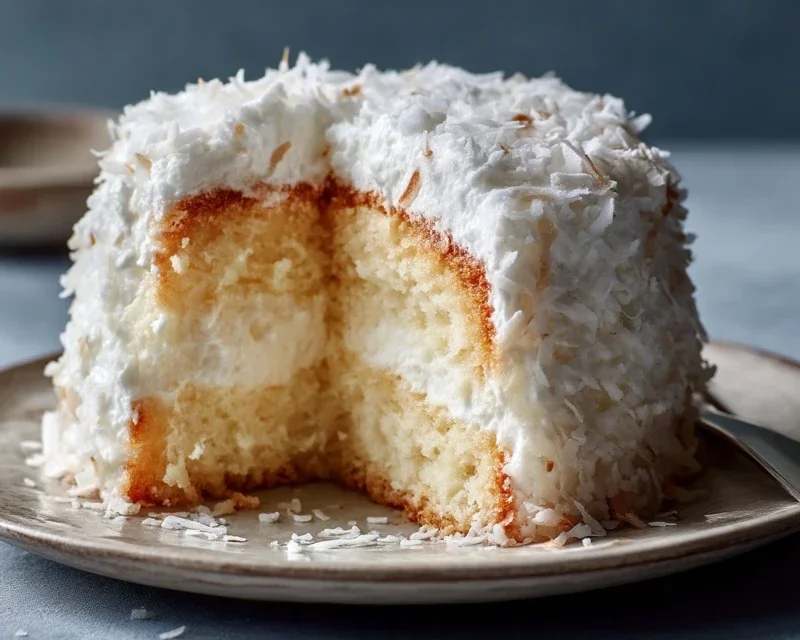
Sticky Coconut Cake
A delightful and moist sticky cake infused with the rich flavor of coconut.
Ingredients
-
2 large eggs, separated
-
1¼ cup granulated sugar
-
2¼ cup full fat canned coconut milk
-
3 cups shredded sweetened coconut
-
1½ cup glutinous rice flour
-
1 teaspoon vanilla extract
Instructions
-
Step 1
Preheat oven to 350°F (175°C). Grease and flour a 9×13 inch baking pan. -
Step 2
In a large bowl, whisk together the egg yolks, granulated sugar, coconut milk, shredded coconut, and vanilla extract until well combined. -
Step 3
Gradually whisk in the glutinous rice flour until a smooth batter forms. -
Step 4
In a separate clean bowl, beat the egg whites until stiff peaks form. -
Step 5
Gently fold the beaten egg whites into the coconut batter until just combined. Do not overmix. -
Step 6
Pour the batter into the prepared baking pan and spread evenly. -
Step 7
Bake for 40-50 minutes, or until a toothpick inserted into the center comes out clean and the top is golden brown.
Important Information
Nutrition Facts (Per Serving)
It is important to consider this information as approximate and not to use it as definitive health advice.
Allergy Information
Please check ingredients for potential allergens and consult a health professional if in doubt.