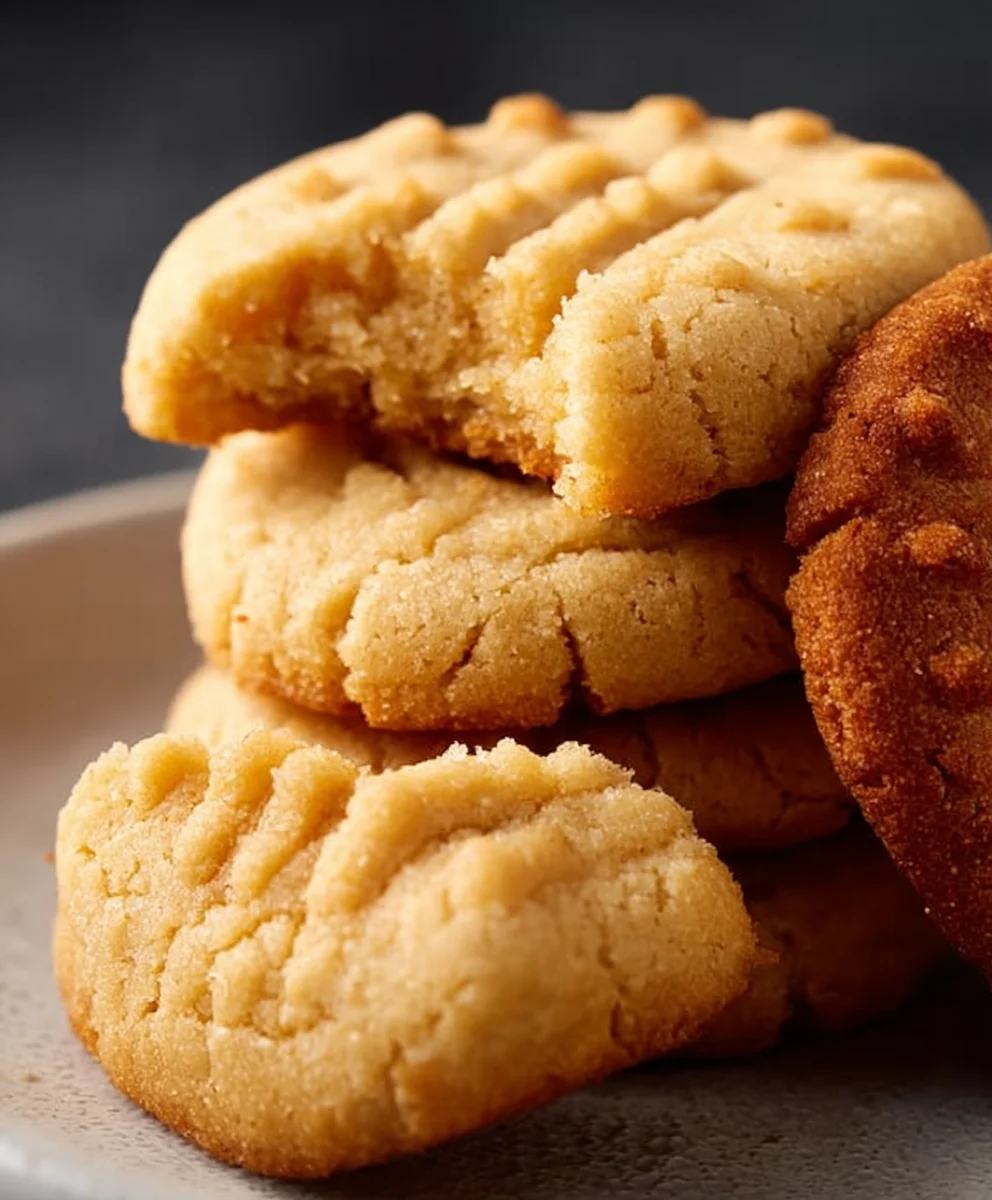
Super Easy Stovetop Butter Cookies-Quick & Delicious
Super Easy Stovetop Butter Cookies Recipe
Are you craving that melt-in-your-mouth buttery goodness without the fuss of preheating your oven? Look no further! This Super Easy Stovetop Butter Cookies Recipe is about to become your new go-to for a quick and satisfying sweet treat. We all love those classic butter cookies, don’t we? They evoke feelings of nostalgia, comfort, and pure indulgence with every delicate bite. What makes these stovetop wonders so incredibly special is their simplicity and speed. Forget waiting for an oven to warm up; you can whip up a batch of these delightful cookies in a fraction of the time, making them perfect for unexpected guests, a sudden sweet craving, or even a fun kitchen activity with the kids. The secret lies in achieving that perfect golden hue and tender crum extractb, all achieved with just a few basic ingredients and the magic of your stovetop.
Get ready to discover your new favorite cookie.
Let’s dive into this simple yet incredibly rewarding Super Easy Stovetop Butter Cookies Recipe!
Ingredients:
- 1 cup (2 sticks) unsalted butter, softened
- 1/2 cup granulated sugar
- 1 teaspoon vanilla extract
- 2 1/4 cups all-purpose flour
- 1/4 teaspoon salt
Getting Started: Preparing Your Dough
The foundation of any great cookie is a well-made dough, and these stovetop butter cookies are no exception. To begin extract, gather all your ingredients and ensure your butter is properly softened. This means it should be pliable and easily indentable with your finger, but not melted. Leaving the butter out at room temperature for about an hour usually does the trick, depending on the warmth of your kitchen. Once your butter is ready, place it in a large mixing bowl. Add the granulated sugar to the bowl. Using an electric mixer on medium speed, or a sturdy whisk and a bit of elbow grease, cream together the butter and sugar until the mixture is light, fluffy, and pnon-alcoholic ale in color. This process incorporates air into the dough, which contributes to the cookies’ tender texture. Scrape down the sides of the bowl occasionally to ensure all the butter and sugar are thoroughly combined.
Next, it’s time to add the flavor. Pour in the vanilla extract. Continue mixing for another minute until the vanilla is fully incorporated into the butter and sugar mixture. The aroma will already be starting to hint at the deliciousness to come.
In a separate medium bowl, whisk together the all-purpose flour and salt. Whisking these dry ingredients together before adding them to the wet ingredients helps to distribute the salt evenly throughout the flour, preventing any concentrated salty spots in your finished cookies. This simple step makes a big difference in the overall flavor balance.
Now, gradually add the dry ingredients to the wet ingredients. Mix on low speed or stir with a wooden spoon until just combined. Be careful not to overmix at this stage. Overmixing can develop the gluten in the flour too much, resulting in tougher cookies. You want to mix just until you no longer see streaks of dry flour. The dough will be soft and slightly sticky, which is perfectly normal.
Shaping Your Super Easy Stovetop Butter Cookies
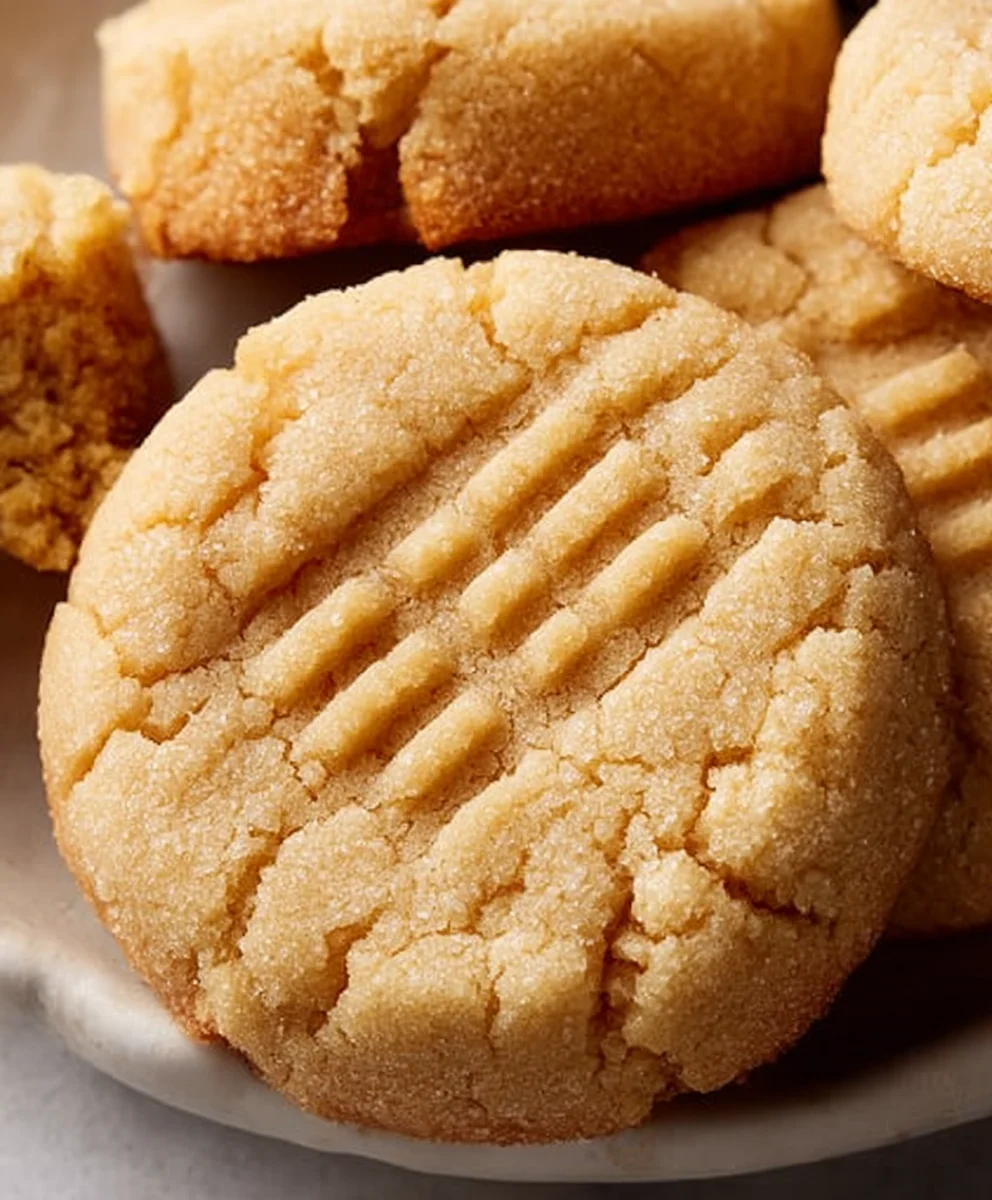
Once your dough is ready, it’s time to shape the cookies. You have a few options here, and all are designed to be incredibly simple. For classic cookie shapes, you can either use a cookie scoop or roll the dough into small balls. If using a cookie scoop, a rounded tablespoon size is ideal for consistent baking. If rolling by hand, aim for balls about 1 inch in diameter. Place these shaped dough portions onto a parchment-lined baking sheet. Don’t worry about pressing them down too much; they will spread slightly as they bake. For a decorative touch, you can gently press the top of each cookie with the tines of a fork to create a crisscross pattern. This not only looks lovely but also helps the cookies bake a bit more evenly.
Another very easy method, especially if you want a more rustic look, is to simply drop spoonfuls of the dough onto your prepared baking sheet. This requires minimal effort and still results in delicious, homemade cookies. Just ensure that the dollops of dough are roughly the same size so they cook uniformly. Remember to leave about 2 inches of space between each cookie on the baking sheet, as they will spread during the cooking process.
The Stovetop Magic: Cooking Your Butter Cookies
This is where the “stovetop” aspect of this recipe truly shines, making it incredibly convenient and fast. You will need a non-stick skillet, preferably one with a tight-fitting lid. Place your shaped cookie dough onto the parchment paper in the skillet, ensuring not to overcrowd it. You’ll likely need to cook your cookies in batches. Place the skillet over low heat. It’s crucial to maintain a low heat to prevent the bottoms of the cookies from burning before the insides are cooked through. This is the most important step for stovetop cookie success.
Cover the skillet with its lid. The lid traps the heat and steam, allowing the cookies to cook through evenly from the top and bottom simultaneously, similar to how a convection oven works but on your stovetop. Let the cookies cook for approximately 8-12 minutes. The exact time will depend on the size of your cookies and the heat of your stovetop. You’ll know they are ready when the edges are lightly golden brown, and the tops appear set and no longer shiny and wet. Resist the urge to peek too often, as releasing the steam can prolong the cooking time.
Once cooked, carefully remove the cookies from the skillet using a spatula. Transfer them to a wire rack to cool completely. If you are cooking in batches, you can prepare the next batch while the first one is cooling. Always allow the skillet to cool slightly between batches, especially if you notice the parchment paper becoming too dark. For the best results, ensure your heat remains consistently low. If you find the cookies are cooking too quickly, reduce the heat even further. If they seem to be taking an eternity, you might be able to increase the heat ever so slightly, but always err on the side of caution.
Cooling and Enjoying Your Delicious Creations
After removing your perfectly cooked butter cookies from the skillet, the mostgin extractagin extractnging part begins: waiting for them to cool. Allow them to cool on a wire rack for at least 10-15 minutes before attempting to move them too much. They will firm up considerably as they cool, making them easier to handle and preventing them from falling apart. Once they have cooled sufficiently, you can store them in an airtight container at room temperature. These cookies are best enjoyed within a few days of baking, though their simple, delightful flavor often means they won’t last that long! Feel free to experiment with adding chocolate chips, sprinkles, or a touch of lemon zest to the dough for variations on this classic recipe. The adaptability of this simple stovetop method makes it a go-to for a quick sweet treat anytime.
Conclusion:
You’ve now mastered the art of creating delightful Super Easy Stovetop Butter Cookies Recipe right on your stovetop! This recipe truly lives up to its name, offering a quick and incredibly simple way to achieve perfectly baked, melt-in-your-mouth butter cookies without ever preheating your oven. The aroma that fills your kitchen as these cookies cook is simply divine, and the satisfaction of biting into a warm, buttery creation is unparalleled. I hope you enjoy this wonderfully accessible baking method and find it becomes a go-to for satisfying those sweet cravings.
These cookies are fantastic on their own, but they also pair wonderfully with a cup of coffee, tea, or a cold glass of milk. For a touch of elegance, consider dusting them with a little powdered sugar or drizzling them with melted chocolate. Don’t be afraid to experiment with variations! You can add a pinch of cinnamon or nutmeg to the dough for a warming spice, or even fold in some finely chopped nuts or chocolate chips for added texture and flavor. Get creative and make these cookies your own!
Frequently Asked Questions about Super Easy Stovetop Butter Cookies Recipe:
Q: Can I make these cookies ahead of time?
A: Absolutely! Once cooled completely, the Super Easy Stovetop Butter Cookies Recipe can be stored in an airtight container at room temperature for up to 3-4 days. They maintain their delightful texture quite well.
Q: My cookies are browning too quickly on the bottom. What can I do?
A: This is a common concern with stovetop cooking. Ensure you are using a medium-low heat setting. If they continue to brown too fast, you can try placing a heat diffuser between the burner and your pan. Also, rotating the pan periodically can help ensure even cooking.
Super Easy Stovetop Butter Cookies-Quick & Delicious
Enjoy these quick and delicious butter cookies made easily on your stovetop. Perfect for a fast sweet treat!
Ingredients
-
1 cup unsalted butter, softened
-
1/2 cup granulated sugar
-
1 teaspoon vanilla extract
-
2 1/4 cups all-purpose flour
-
1/4 teaspoon salt
Instructions
-
Step 1
Cream together softened butter and granulated sugar until light and fluffy. Stir in vanilla extract. -
Step 2
In a separate bowl, whisk together all-purpose flour and salt. Gradually add dry ingredients to wet ingredients and mix until just combined. Do not overmix. -
Step 3
Shape dough into balls about 1 inch in diameter or use a cookie scoop. Place on a parchment-lined baking sheet. Optionally, create a crisscross pattern with a fork. -
Step 4
Place parchment-lined dough onto a non-stick skillet over low heat. Cover with a tight-fitting lid. -
Step 5
Cook for 8-12 minutes, or until edges are lightly golden brown and tops are set. Remove from skillet and let cool completely on a wire rack.
Important Information
Nutrition Facts (Per Serving)
It is important to consider this information as approximate and not to use it as definitive health advice.
Allergy Information
Please check ingredients for potential allergens and consult a health professional if in doubt.