Crispy Baked Zucchini Fries Recipe – Healthy & Delicious
Baked Zucchini Fries are about to become your new favorite healthy obsession! Forget those greasy, deep-fried versions that leave you feeling heavy. We’re talking about golden, crispy sticks of pure veggie delight, baked to perfection right in your own oven. Why do we adore these delightful morsels so much? It’s simple: they offer all the satisfying crunch of traditional fries without any of the guilt. Imagin extracte dipping these tender, flavorful baked zucchini fries into your favorite sauce – it’s a culinary win-win! What truly sets this recipe apart is how incredibly easy it is to whip up a batch. Plus, they’re a fantastic way to sneak in an extra serving of vegetables, making them a smart choice for both kids and adults alike. Get ready to fall in love with these incredibly moreish baked zucchini fries!
Baked Zucchini Fries
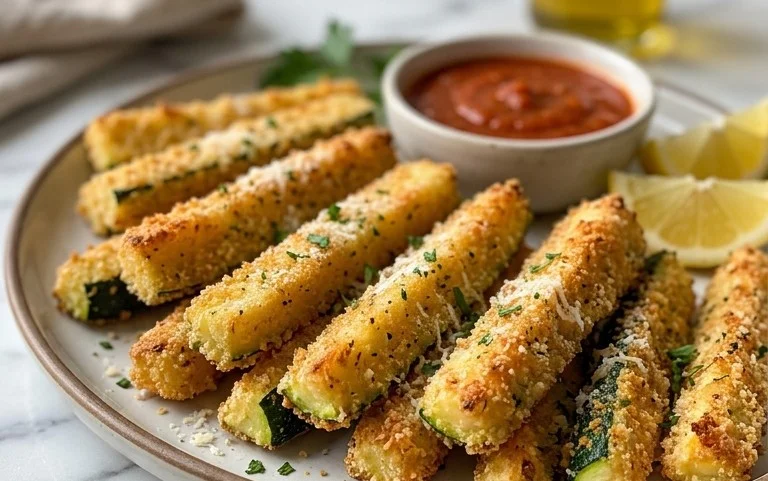
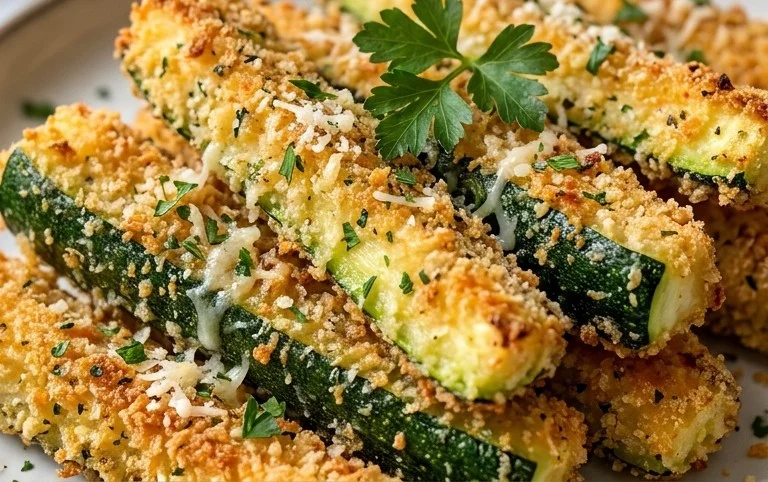
Craving a crispy, savory snack that’s guilt-free and bursting with flavor? Look no further than these baked zucchini fries! Forget the deep fryer; we’re going to achieve that satisfying crunch with a simple oven bake, making them a healthier and easier alternative to traditional fries. These zucchini sticks are incredibly versatile – perfect as an appetizer for a crowd, a fun side dish for burgers and sandwiches, or even a healthy snack to munch on anytime. The secret to their deliciousness lies in the simple yet effective coating and the bright, zesty dipping sauce. Let’s get started on creating this delightful dish!
Ingredients:
Cooking Instructions:
Here’s how to transform humble zucchinis into golden, crispy delights:
Preparing the Zucchinis:
The first step is to get our zucchinis ready for their transformation. Wash them thoroughly under cold running water, and then trim off both ends. Now, depending on the size of your zucchinis, you’ll want to cut them into fry-like shapes. For medium zucchinis, I find that cutting them lengthwise into quarters, and then cutting those quarters into ½-inch thick sticks works perfectly. Aim for uniform thickness so that they cook evenly. If your zucchinis are on the larger side, you might consider removing the seedy core before cutting them into sticks. This helps prevent them from becoming too watery during the baking process. Once cut, pat them dry with paper towels. This is a crucial step to ensure the coating adheres well and that you get that desirable crispiness. Excess moisture will steam the zucchinis rather than bake them to a crisp.
Creating the Breading Station:
We’re going to set up a simple breading station. In one shallow bowl or plate, whisk the egg. This will act as our binder. In a second shallow bowl or plate, combine the grated Parmesan cheese, garlic powder, Italian seasoning, and a pinch of salt and pepper. Give it a good mix to ensure all those savory flavors are evenly distributed. The Parmesan cheese is key here; it’s going to crisp up beautifully in the oven and provide a wonderful cheesy flavor. The garlic powder and Italian seasoning add depth and aroma, making these fries incredibly appetizing.
Coating the Zucchini Fries:
Now for the fun part – coating our zucchini sticks! Take each zucchini stick, dip it into the beaten egg, ensuring it’s fully coated. Let any excess egg drip off for a moment. Then, immediately transfer the egg-coated zucchini stick to the Parmesan cheese mixture. Press gently to ensure the cheese mixture adheres well to all sides. You want a good, even coating. If some bits of cheese don’t stick, that’s okay, just try to coat as thoroughly as possible. Repeat this process for all your zucchini sticks. As you coat them, place them in a single layer on a baking sheet lined with parchment paper. Don’t overcrowd the baking sheet; this allows for better air circulation and promotes crispier fries. If you have too many to fit in one layer, use a second baking sheet.
Baking to Golden Perfection:
Preheat your oven to 400°F (200°C). Once your zucchinis are coated and arranged on the baking sheet, it’s time to bake them. Place the baking sheet in the preheated oven and bake for 20-25 minutes. About halfway through the baking time, around the 10-12 minute mark, carefully flip each zucchini fry using tongs or a spatula. This ensures that both sides get beautifully golden brown and crispy. Keep an eye on them, as oven temperatures can vary. You’re looking for a golden-brown hue and a noticeable crispiness. They should feel firm to the touch.
Whipping Up the Zesty Dipping Sauce:
While the fries are baking, let’s make a simple yet incredibly flavorful dipping sauce. In a small bowl, combine the mayonnaise, fresh lemon juice, minced garlic clove, and finely chopped parsley. Stir everything together until well combined. Taste and adjust the seasoning with a little more salt and pepper if needed. The bright, tangy lemon juice cuts through the richness of the mayonnaise, and the garlic and parsley add a fresh, herbaceous note. This sauce is the perfect accompaniment to the crispy, cheesy zucchini fries. It adds an extra layer of deliciousness that you won’t be able to resist.
Serve your hot, crispy baked zucchini fries immediately with the zesty dipping sauce. Enjoy this healthier, tastier way to enjoy a favorite snack!
Conclusion:
There you have it – your guide to making incredibly delicious and surprisingly healthy baked zucchini fries! This recipe truly shines because it transforms a humble vegetable into a crispy, dippable treat without the mess or guilt of deep frying. They’re naturally low-carb, packed with nutrients, and incredibly versatile. I hope you’re as excited to try them as I am to share them! They are perfect as a side dish for burgers or sandwiches, or even as a fun appetizer for your next get-together. Don’t be afraid to experiment with different seasonings too – paprika, garlic powder, or even a pinch of cayenne can add a fantastic kick! Give these baked zucchini fries a go; I promise you won’t be disappointed!
Frequently Asked Questions about Baked Zucchini Fries:
How do I make sure my baked zucchini fries are crispy and not soggy?
The key to crispy baked zucchini fries is to remove as much moisture from the zucchini as possible. After slicing, I highly recommend lightly salting the zucchini pieces and letting them sit in a colander for about 20-30 minutes. This draws out excess water. Before coating them, gently pat them dry with paper towels. Also, ensure your oven is preheated to the correct temperature and avoid overcrowding the baking sheet, giving each fry enough space to crisp up evenly.
Can I make these baked zucchini fries ahead of time?
While they are best enjoyed fresh from the oven for optimal crispiness, you can prepare the zucchini ahead of time by slicing and salting it, then draining and patting it dry. Store it in an airtight container in the refrigerator for up to a day. However, for the best texture, I recommend coating and baking them just before serving. Reheating them can sometimes lead to a slightly less crispy result.
Baked Zucchini Fries
Crispy and flavorful baked zucchini fries, a healthier alternative to traditional fried versions. Perfect as an appetizer or side dish.
Ingredients
-
2 medium zucchinis, cut into fry shapes
-
1 egg, beaten
-
1 cup grated Parmesan cheese
-
1 teaspoon garlic powder
-
1 teaspoon Italian seasoning
-
½ cup mayonnaise
-
1 lemon, juiced
-
1 garlic clove, minced
-
1 tablespoon finely chopped parsley
-
salt and pepper to taste
Instructions
-
Step 1
Preheat oven to 400°F (200°C). Line a baking sheet with parchment paper. -
Step 2
In a medium bowl, whisk together the mayonnaise, lemon juice, minced garlic, chopped parsley, salt, and pepper to make the dipping sauce. Set aside. -
Step 3
In three separate shallow dishes, place the beaten egg, a mixture of grated Parmesan cheese, garlic powder, and Italian seasoning, and a small amount of salt and pepper. -
Step 4
Dip each zucchini fry first into the beaten egg, ensuring it’s fully coated, then press it into the Parmesan mixture, coating all sides. -
Step 5
Arrange the coated zucchini fries in a single layer on the prepared baking sheet. -
Step 6
Bake for 15-20 minutes, or until golden brown and crispy, flipping halfway through. -
Step 7
Serve immediately with the prepared lemon-garlic dipping sauce.
Important Information
Nutrition Facts (Per Serving)
It is important to consider this information as approximate and not to use it as definitive health advice.
Allergy Information
Please check ingredients for potential allergens and consult a health professional if in doubt.