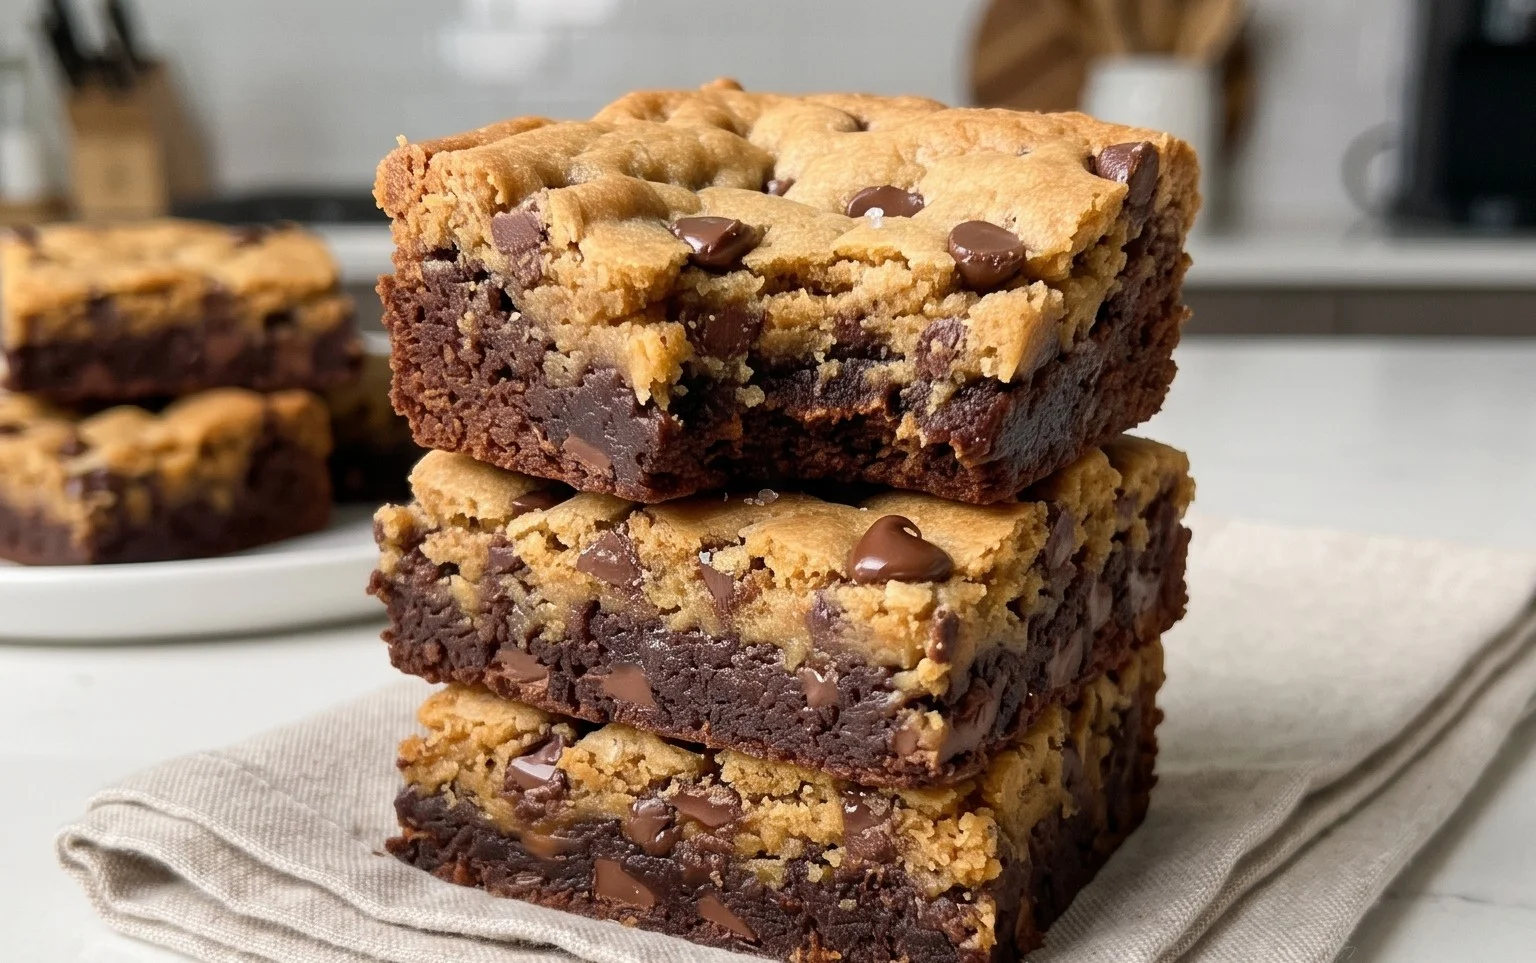
Brown Butter Brookies-Decadent Dessert Bliss
Brown butter brookies are the ultimate dessert fusion, a magnificent marriage of two beloved classics. If you’ve ever dreamt of the chewy, fudgy goodness of a brownie meeting the crisp-edged, soft-centered delight of a chocolate chip cookie, then you’re about to experience pure bliss. We’re talking about a dessert so decadent, so satisfying, it’s practically a hug in edible form. The secret weapon? Brown butter. That magical transformation of humble butter into a nutty, toasty elixir elevates both the brownie and cookie layers to an entirely new stratosphere of flavor. It’s this nuanced depth, this sophisticated caramel note, that makes our brown butter brookies so utterly irresistible and a guaranteed crowd-pleaser for any occasion. Prepare yourselves for a truly unforgettable treat!
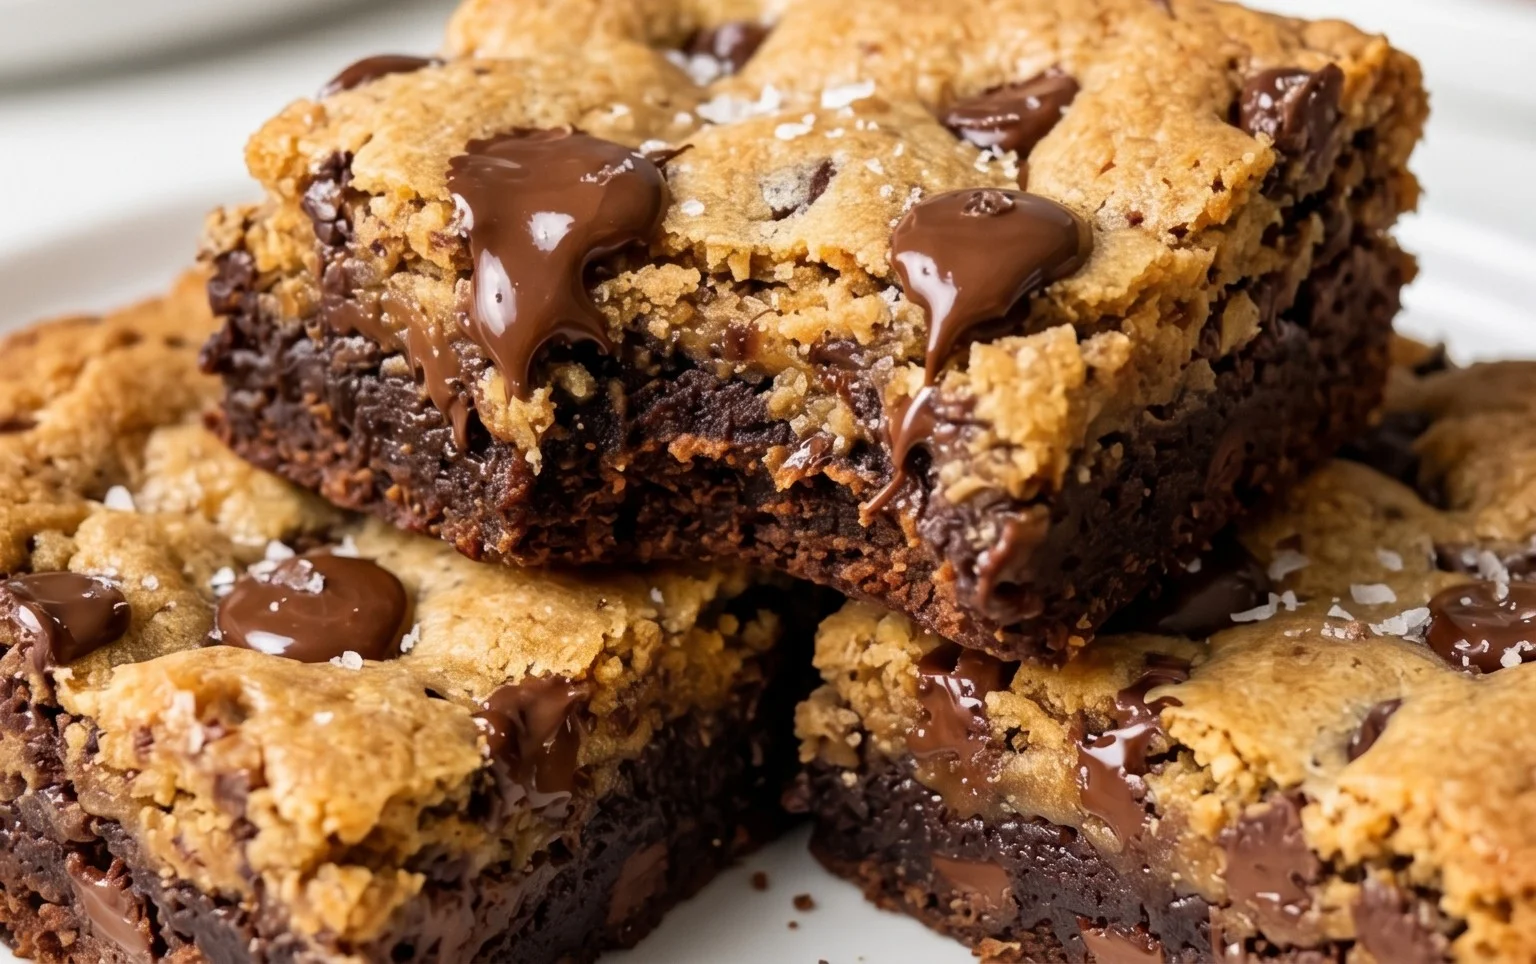
Brown Butter Brookies
Prepare yourselves for a dessert experience that will redefine your understanding of indulgence. We’re diving headfirst into the glorious world of brown butter brookies, a magical fusion of rich, fudgy brownies and chewy, decadent chocolate chip cookies. This isn’t just a dessert; it’s a symphony of textures and flavors, where the nutty depth of browned butter elevates both components to stratospheric levels. Forget choosing between your favorite treats – with brookies, you get the best of both worlds, unified in a single, show-stopping creation. The secret weapon here is undoubtedly the brown butter. It transforms ordinary butter into a golden elixir, infusing everything it touches with a warm, toasty aroma and a sophisticated, caramel-like sweetness. This recipe walks you through achieving that perfect balance, ensuring your brookies are not just delicious, but truly unforgettable.
Ingredients:
Instructions:
Step 1: Crafting the Cookie Dough Base
Begin extract by browning the butter for your cookie dough. In a light-colored saucepan, melt the 14.5 tablespoons of salted butter over medium heat. Swirl the pan occasionally as it melts. You’ll notice it start to foam, then the milk solids at the bottom will begin extract to turn golden brown and fragrant. This usually takes about 5-8 minutes. Watch it closely; you want a rich, nutty aroma and amber-colored specks, not burnt ones. Once it’s beautifully browned, immediately pour it into a heatproof bowl, making sure to scrape all those delicious brown bits in. Let this brown butter cool slightly for about 10-15 minutes, so it doesn’t scramble the eggs.
In a large mixing bowl, combine the slightly cooled brown butter with the packed dark brown sugar and granulated sugar. Whisk them together until the mixture is smooth and well-combined. Next, beat in the two room-temperature eggs, one at a time, followed by the vanilla extract. Ensure each addition is fully incorporated before adding the next. This will create a luscious, emulsified base for your cookie dough.
In a separate medium bowl, whisk together the all-purpose flour, baking soda, baking powder, and salt. Gradually add the dry ingredients to the wet ingredients, mixing on low speed or by hand until just combined. Be careful not to overmix. Finally, gently fold in the 1.5 cups of chocolate chips. The dough will be thick and wonderfully fragrant. Cover the bowl and refrigerate for at least 30 minutes, or up to 2 days. This chilling step is crucial for preventing the cookies from spreading too much and developing a chewier texture.
Step 2: Preparing the Fudgy Brownie Layer Foundation
While the cookie dough is chilling, let’s get started on the brownie component. In a heatproof bowl set over a saucepan of simmering water (a double boiler), melt the 3/4 cup of cubed salted butter and the 4 ounces of chopped semi-sweet chocolate. Stir occasionally until smooth and completely melted. Remove the bowl from the heat and stir in the vegetable oil. This addition of oil helps to create that wonderfully fudgy texture in the brownie.
In a separate medium bowl, whisk together the cocoa powder and the 3/4 cup of the remaining granulated sugar. Gradually whisk this cocoa mixture into the melted chocolate and butter mixture until it’s smooth and well-combined. This ensures no pockets of dry cocoa powder remain.
Step 3: Creating the Rich Brownie Batter
Now for the brownie batter itself. Add the three room-temperature eggs to the chocolate mixture, one at a time, whisking vigorously after each addition until the batter is smooth and glossy. It’s important that the eggs are at room temperature so they emulsify properly with the chocolate mixture. If they are cold, they can seize the chocolate. This batter will be thick and intensely chocolatey. Set this aside.
Step 4: Assembling the Brookie Masterpiece
Preheat your oven to 350°F (175°C). Grease and flour a 9×13 inch baking pan, or line it with parchment paper, leaving an overhang on the sides to help lift the finished brookies out easily.
Retrieve your chilled cookie dough. Spoon dollops of the cookie dough evenly over the bottom of the prepared baking pan. You don’t need to press it down; leave them as nice, plump mounds. Once the cookie dough is distributed, gently pour the prepared brownie batter over the top, spreading it to cover the cookie dough as evenly as possible. Don’t worry if some of the cookie dough peeks through; this creates beautiful swirls and textures.
Step 5: The Final Bake and Glorious Cool Down
Bake in the preheated oven for 30-40 minutes, or until a toothpick inserted into the center of the brookies comes out with moist crum extractbs attached (not wet batter). The edges should be set, and the center might still look slightly fudgy. Overbaking will result in dry brookies, so err on the side of slightly underbaked for that perfect gooey center.
Once baked, remove the pan from the oven and let the brookies cool completely in the pan on a wire rack. This cooling process is absolutely critical. It allows the brookies to set properly, developing that signature fudgy texture and making them easier to cut. Resist the urge to cut into them while they are warm! Once completely cooled, use the parchment paper overhang to lift the entire slab out of the pan. Cut into squares or bars, and prepare for a dessert that will have everyone asking for the recipe. The marriage of chewy cookie and fudgy brownie, enhanced by the nutty depth of browned butter, is pure bliss.
Conclusion:
And there you have it – your ultimate guide to crafting irresistible Brown Butter Brookies! This recipe truly shines by combining the rich, nutty depth of brown butter with the satisfying chew of a perfect brownie and the sweet, buttery goodness of a classic cookie. It’s a double-threat dessert that’s guaranteed to impress, whether you’re a seasoned baker or just starting out. The beauty of these brookies lies in their sheer decadence and the incredible textural contrast. I encourage you to give this recipe a try; you won’t regret diving into this delightful fusion!
Serving these brown butter brookies is a joy. They’re fantastic on their own, but imagin extracte them served slightly warm with a scoop of vanilla bean ice cream – pure bliss! You could also dust them with a little powdered sugar for an extra touch of elegance. For variations, consider folding in a handful of chocolate chips (dark, milk, or white!) into the cookie dough layer, or perhaps some chopped nuts for added crunch. A swirl of caramel sauce on top would also be divine.
Frequently Asked Questions:
Can I make the brownie and cookie layers separately?
Absolutely! While layering them directly is part of the fun and magic, you can certainly bake the brownie base and the cookie dough top as separate components and then assemble them after baking. This might make it easier to ensure both layers are perfectly cooked.
How should I store my Brown Butter Brookies?
To keep your brookies fresh and delicious, store them in an airtight container at room temperature for up to 3-4 days. If they last that long, that is!
What kind of pan is best for baking brookies?
A square baking pan, typically 8×8 or 9×9 inches, is ideal for achieving the classic brookies look and texture. Using parchment paper to line the pan will make them incredibly easy to lift out and cut.
Brown Butter Brookies
A decadent combination of chewy chocolate chip cookies and fudgy brownies, elevated with the rich flavor of brown butter.
Ingredients
-
14.5 tbsp salted butter (206 grams)
-
3/4 cup dark brown sugar, packed (163 grams)
-
3/4 cup granulated sugar (156 grams)
-
2 large eggs, at room temperature
-
1 and 1/2 tsp vanilla extract
-
3 cups all-purpose flour, spooned & leveled or weighed out (390 grams)
-
1 tsp baking soda
-
1 tsp baking powder
-
1/2 tsp salt
-
1 and 1/2 cups chocolate chips (270 grams)
-
3/4 cup salted butter, cubed (170 grams before browning, 140 grams after)
-
4 ounces semi-sweet chocolate, chopped (113 grams)
-
1/4 cup vegetable oil (55 grams)
-
3/4 cup cocoa powder (63 grams)
-
3 large eggs, at room temperature
Instructions
-
Step 1
For the brownie layer: Melt 3/4 cup salted butter in a saucepan over medium heat until browned and fragrant. Remove from heat and let cool slightly. In a medium bowl, whisk together the browned butter, 1/4 cup vegetable oil, 1/2 cup granulated sugar, 1/2 cup dark brown sugar, 2 large eggs, and 1 tsp vanilla extract. In a separate bowl, whisk together 1.5 cups all-purpose flour, 1/2 cup cocoa powder, 1/2 tsp baking soda, 1/2 tsp baking powder, and 1/4 tsp salt. Gradually add the dry ingredients to the wet ingredients until just combined. Stir in 2 ounces of chopped semi-sweet chocolate. -
Step 2
For the cookie layer: In a large bowl, cream together 14.5 tbsp salted butter, the remaining 1/4 cup granulated sugar, and the remaining 1/4 cup dark brown sugar until light and fluffy. Beat in 1 large egg and 1/2 tsp vanilla extract. -
Step 3
In a separate bowl, whisk together 1.5 cups all-purpose flour, the remaining 1/4 cup cocoa powder, 1/2 tsp baking soda, 1/2 tsp baking powder, and 1/4 tsp salt. Gradually add the dry ingredients to the wet ingredients until just combined. Stir in 1.5 cups chocolate chips and the remaining 2 ounces of chopped semi-sweet chocolate. -
Step 4
Preheat oven to 350°F (175°C). Grease and flour a 9×13 inch baking pan. Spread the brownie batter evenly in the bottom of the prepared pan. -
Step 5
Drop spoonfuls of the cookie dough evenly over the brownie batter. Gently spread the cookie dough to cover the brownie layer as much as possible. Some brownie may show through. -
Step 6
Bake for 20-25 minutes, or until the edges are set and a toothpick inserted into the cookie layer comes out with moist crumbs. The center may still be slightly gooey. -
Step 7
Let cool completely in the pan before cutting into bars.
Important Information
Nutrition Facts (Per Serving)
It is important to consider this information as approximate and not to use it as definitive health advice.
Allergy Information
Please check ingredients for potential allergens and consult a health professional if in doubt.