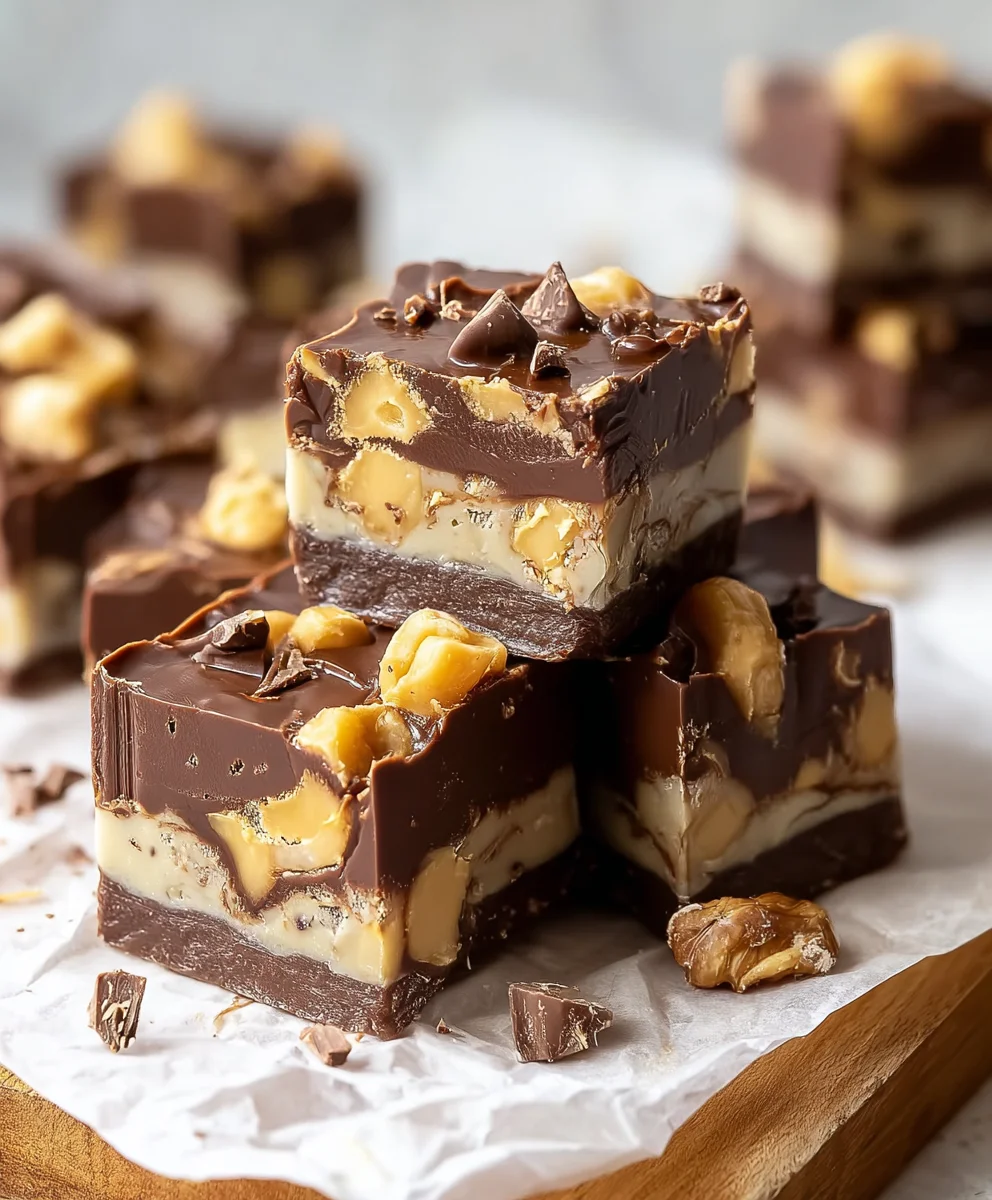
Milky Way Fudge-Easy Homemade Candy Recipe
Milky Way Fudge. Oh, just the name itself conjures up images of starry nights and pure indulgence, doesn’t it? If you’ve ever found yourself gazing longin extractgly at a candy bar, dreaming of that perfect chewy nougat, rich caramel, and chocolatey embrace, then get ready to have your culinary world rocked. This Milky Way Fudge isn’t just another sweet treat; it’s an experience. It’s the beloved flavor profile of that iconic candy bagin extractreimagined into a luxurious, melt-in-your-mouth fudge that’s surprisingly simple to create in your own kitchen. People adore this confection because it delivers all the nostalgigin extractoy of the original without any of the chegrape juicess – just pure, unadulterated, chocolatey bliss. What makes this particular fudge so special is its uncanny ability to capture that distinct sweet and salty balance, the creamy texture, and the satisfying layers of flavor that make a Milky Way so unforgettable, all within a single decadent bite. Prepare to impress yourself and everyone you share it with!

Ingredients:
- 3 cups (18 oz) semi-sweet chocolate chips
- 1 (14 oz) can sweetened condensed milk
- ¼ cup unsalted butter, cut into pieces
- 1 teaspoon vanilla extract
- 4 regular Milky Way bars, chopped into bite-sized pieces
- ¼ cup caramel sauce, for drizzling (optional)
Getting Started: Preparing Your Workspace
Before we dive into the deliciousness, let’s get our kitchen ready for some Milky Way Fudge magic. This fudge comes together quite quickly once you start melting the chocolate, so having everything prepped beforehand is key to a smooth and successful experience. First, find an 8×8 inch baking pan. Line it with parchment paper, making sure to leave some overhang on the sides. This overhang will act as handles, making it super easy to lift the cooled fudge out of the pan later. A little bit of parchment sticking up over the edges is perfect! Next, get all your ingredients measured and ready to go. Chop your Milky Way bars into small, manageable pieces. Think about the size of a bite. You want them distributed evenly throughout the fudge, so don’t make them too huge. This is also a good time to have your vanilla extract measured out and your butter cut into smaller, more manageable pieces, which will help it melt more evenly. If you’re opting for the caramel drizzle, have that ready as well, perhaps warmed slightly in a small saucepan or microwave-safe bowl if it’s a bit thick.
Melting the Base
Now, let’s start building the rich, creamy foundation of our Milky Way Fudge. In a medium, heavy-bottomed saucepan, combine the semi-sweet chocolate chips, the sweetened condensed milk, and the unsalted butter pieces. Using a heavy-bottomed pan is important because it distributes heat more evenly, preventing the chocolate from scorching or burning, which is a common pitfall when melting chocolate. Place the saucepan over low heat. This is crucial! We’re not trying to boil this mixture; we’re aiming for a gentle melt. Stir the ingredients constantly with a rubber spatula or wooden spoon. You’ll notice the butter will start to melt first, then the chocolate chips will begin extract to soften and melt into the condensed milk. Keep stirring, scraping the bottom and sides of the pan to ensure everything is incorporated and melting smoothly. The goal is to achieve a glossy, smooth, and uniform mixture. This process can take anywhere from 5 to 10 minutes, depending on your stove and the pan. Be patient and keep that heat on low. Don’t rush it! If you find it’s melting too quickly, simply remove the pan from the heat for a moment, continuing to stir until it’s smooth.
Incorporating Flavor and Texture
Once your chocolate mixture is completely smooth and glossy, it’s time to add that wonderful hint of vanilla and, of course, the star of the show: the chopped Milky Way bars. Remove the saucepan from the heat entirely. This is important so the heat from the pan doesn’t continue to cook the mixture too aggressively once the chocolate is melted. Stir in the vanilla extract. This will enhance the overall flavor and aroma of the fudge, adding a classic warmth that pairs beautifully with chocolate and caramel. Give it a good stir to ensure it’s evenly distributed throughout the melted chocolate. Now, gently fold in the chopped Milky Way bars. We’re folding them in, not vigorously mixing, to ensure they get evenly distributed without breaking down too much. You want to see those distinct pieces of nougat, caramel, and chocolate within the fudge. Continue to fold until the chopped Milky Way pieces are dispersed throughout the mixture. This is where the magic starts to happen, as the candy will soften slightly from the residual heat of the fudge base, creating pockets of chewy, gooey goodness.
Pouring and Setting the Fudge
With your delicious Milky Way mixture ready, it’s time to transfer it to its final resting place. Carefully pour the fudge mixture into your prepared 8×8 inch baking pan. Use your spatula to gently spread the fudge evenly into all the corners of the pan. You want a nice, uniform layer so that each piece of fudge has the same thickness and amount of candy. Don’t worry if the Milky Way pieces aren’t perfectly flat; their texture is part of the charm! If you decided to use the optional caramel sauce for drizzling, now is the time to do it. Drizzle the warmed caramel sauce decoratively over the top of the fudge. You can make stripes, swirls, or just a random pattern – get creative! You can use a spoon or a piping bag for this. Once drizzled, you can gently drag a toothpick through the caramel and fudge to create a marbled effect, if desired. This adds an extra layer of flavor and visual appeal to your Milky Way Fudge.
Chilling to Perfection
This is the final stage before you can indulge! Now that your fudge is poured into the pan and any optional toppings are added, it needs time to set. Cover the pan loosely with plastic wrap or aluminum foil. Place the pan in the refrigerator and let the fudge chill for at least 2 to 4 hours, or until it’s completely firm to the touch. The colder it is, the easier it will be to cut. Resist the temptation to poke at it too much while it’s chilling; let it do its work undisturbed. Once the fudge is firm, it’s time to remove it from the pan. Use the parchment paper overhang to carefully lift the entire slab of fudge out of the pan. Place it on a cutting board. Now, using a sharp knife, cut the fudge into small, bite-sized squares. You can wipe the knife clean with a damp cloth between cuts to ensure clean edges. Store any leftover Milky Way Fudge in an airtight container at room temperature for up to a week, or in the refrigerator for longer storage. Enjoy your homemade treat!
Conclusion:
And there you have it – your very own batch of delicious Milky Way Fudge! We’ve walked through each step together, from melting the chocolate to swirling in that dreamy caramel and nougat. This fudge is truly a showstopper, perfect for holidays, bake snon-alcoholic ales, or simply treating yourself to something incredibly decadent. The rich chocolate base, paired with the chewy nougat and gooey caramel, creates a flavor explosion that’s simply irresistible. Don’t be afraid to experiment with this recipe; it’s forgiving and always rewarding.
For serving, consider cutting your Milky Way Fudge into bite-sized squares, perfect for sharing (or not!). It pairs wonderfully with a glass of cold milk or a cup of coffee. You can also get creative with variations! Try adding a sprinkle of sea salt on top for a salty-sweet contrast, or perhaps some chopped nuts for an extra crunch. If you’re feeling adventurous, a drizzle of white chocolate can add another layer of visual appeal and flavor. We hope you enjoy making and indulgin extractg in this delightful treat as much as we do!
Frequently Asked Questions:
Q1: How should I store Milky Way Fudge to keep it fresh?
For the best results, store your Milky Way Fudge in an airtight container at room temperature. It should stay delicious for about 1-2 weeks. If your kitchen is particularly warm, you might consider refrigerating it, but be aware that this can sometimes make the fudge slightly harder. Just let it come to room temperature for a few minutes before enjoying.
Q2: Can I make this Milky Way Fudge vegan?
Adapting this Milky Way Fudge to be vegan will require ingredient substitutions. You would need to use vegan chocolate chips, a vegan caramel sauce (often made with coconut milk or condensed coconut milk), and a vegan nougat alternative. While possible, it might alter the texture and exact flavor profile of the classic recipe. It’s definitely worth experimenting with if you have vegan dietary needs!
Milky Way Fudge-Easy Homemade Candy Recipe
An easy homemade recipe for delicious Milky Way Fudge, featuring layers of chocolate, caramel, and nougat.
Ingredients
-
3 cups (18 oz) semi-sweet chocolate chips
-
1 (14 oz) can sweetened condensed milk
-
1/4 cup unsalted butter
-
1 teaspoon vanilla extract
-
4 regular Milky Way bars, chopped into bite-sized pieces
-
1/4 cup caramel sauce, for drizzling (optional)
Instructions
-
Step 1
Prepare an 8×8 inch baking pan by lining it with parchment paper, leaving overhang on the sides for easy removal. Measure and chop all ingredients, including the Milky Way bars into bite-sized pieces. -
Step 2
In a medium, heavy-bottomed saucepan over low heat, combine semi-sweet chocolate chips, sweetened condensed milk, and butter pieces. Stir constantly until the mixture is glossy, smooth, and uniform. This may take 5-10 minutes. -
Step 3
Remove the saucepan from the heat. Stir in the vanilla extract until evenly distributed. Gently fold in the chopped Milky Way bars until dispersed throughout the mixture. -
Step 4
Pour the fudge mixture into the prepared baking pan and spread evenly. If using, drizzle caramel sauce decoratively over the top and swirl with a toothpick for a marbled effect. -
Step 5
Cover the pan loosely and refrigerate for at least 2 to 4 hours, or until completely firm. Once set, lift the fudge out of the pan using the parchment paper and cut into bite-sized squares.
Important Information
Nutrition Facts (Per Serving)
It is important to consider this information as approximate and not to use it as definitive health advice.
Allergy Information
Please check ingredients for potential allergens and consult a health professional if in doubt.