White Chocolate Raspberry Loaf Cake Recipe – Easy & Delicious
White Chocolate and Raspberry Loaf Cake, oh, how you bring a smile to every face! There’s something inherently comforting and utterly delightful about a perfectly baked loaf cake, and when it’s infused with the sweet, creamy richness of white chocolate and the vibrant tang of fresh raspberries, it transcends mere dessert into an experience. This isn’t just any cake; it’s a celebration of simple, beautiful ingredients coming together in perfect harmony. People adore this particular White Chocolate and Raspberry Loaf Cake because it strikes that exquisite balance between decadent sweetness and refreshing fruitiness. It’s the ideal treat for afternoon tea, a charming addition to a brunch spread, or simply a moment of pure indulgence after a long day. What truly makes this White Chocolate and Raspberry Loaf Cake special is its foolproof nature. It promises moistness, a beautiful crum extractb, and a burst of flavor in every single bite, making it a guaranteed crowd-pleaser that feels both elegant and wonderfully homemade.
Ingredients:
- 1½ cups fresh raspberries
- ¼ cup sugar (for raspberry sauce)
- ½ teaspoon lemon zest (for raspberry sauce)
- 2 tablespoons orange juice
- 1 tablespoon water
- 2 tablespoons cornstarch
- 1¾ cups all-purpose flour
- ½ teaspoon baking powder
- ½ teaspoon salt
- ½ cup unsalted butter, softened to room temperature
- 4 ounces cream cheese, softened to room temperature
- 1¼ cups sugar (for cake batter)
- 4 large eggs
- 1 tablespoon lemon zest (for cake batter)
- 1¾ teaspoons vanilla extract
Preparing the Raspberry Swirl
Step 1: Simmering the Raspberries
Begin extract by making the vibrant raspberry swirl that will give our White Chocolate and Raspberry Loaf Cake its beautiful visual appeal and delightful tangy contrast. In a small saucepan, combine the 1½ cups of fresh raspberries with ¼ cup of sugar, ½ teaspoon of lemon zest, 2 tablespoons of orange juice, and 1 tablespoon of water. Place the saucepan over medium heat. As the mixture heats up, gently stir everything together. The sugar will start to dissolve, and the raspberriesgin extractll begin to soften and release their juices. Allow this mixture to simmer for about 5 to 7 minutes, stirring occasionally, until the raspberries have broken down into a saucy consistency. You want them cooked through but not completely disintegrated; some texture is desirable.
Step 2: Thickening the Raspberry Sauce
Once the raspberries have softened, it’s time to thicken the sauce to prevent it from making the cake batter too wet. In a very small bowl, whisk together the 2 tablespoons of cornstarch with 2 tablespoons of cold water until you have a smooth slurry with no lumps. This cornstarch slurry is our thickening agent. Slowly pour the cornstarch slurry into the simmering raspberry mixture in the saucepan, whisking constantly as you pour. Continue to cook and stir the raspberry mixture over medium-low heat for another 1 to 2 minutes, or until the sauce has thickened to a consistency that coats the back of a spoon nicely. It should be thick enough to hold its shape when swirled but still pourable. Remove the saucepan from the heat and set the raspberry sauce aside to cool completely. This cooling process is important; adding a hot sauce to the batter will prematurely cook the eggs and affect the cake’s texture.
Baking the White Chocolate and Raspberry Loaf Cake
Step 3: Mixing the Dry Ingredients
Now, let’s prepare the cake batter. In a medium-sized mixing bowl, whisk together the 1¾ cups of all-purpose flour, ½ teaspoon of baking powder, and ½ teaspoon of salt. Whisking these dry ingredients together ensures that the leavening agent (baking powder) and salt are evenly distributed throughout the flour, which will lead to a more consistent rise and flavor in your loaf cake. Set this bowl of dry ingredients aside.
Step 4: Creaming the Butter and Sugar
In a separate, larger mixing bowl, you’ll cream together the softened unsalted butter and the softened cream cheese. Use an electric mixer (stand or hand mixer) on medium speed. Beat the butter and cream cheese together for about 2 to 3 minutes, until the mixture is smooth, light, and fluffy. This process, known as creaming, incorporates air into the batter, which is crucial for a tender and airy cake texture. Next, gradually add the 1¼ cups of sugar to the creamed butter and cream cheese, continuing to beat until the mixture is pnon-alcoholic ale yellow and has increased in volume, which should take another 3 to 5 minutes. Scrape down the sides of the bowl periodically to ensure everything is well combined.
Step 5: Incorporating Eggs and Flavorings
With the butter, cream cheese, and sugar mixture well creamed, it’s time to add the eggs. Add the 4 large eggs one at a time, beating well after each addition until fully incorporated before adding the next. This gradual addition prevents the batter from curdling. Once all the eggs are incorporated, mix in the 1 tablespoon of lemon zest and the 1¾ teaspoons of vanilla extract. The lemon zest will add a bright, fragrant note that complements the raspberries beautifully. Continue to beat until everything is smooth and well combined.
Step 6: Alternating Dry and Wet Ingredients
Now, we’ll combine the dry ingredients with the wet ingredients. Gradually add the dry ingredients (flour mixture) to the wet ingredients, alternating with any additional liquid you might typically use in a loaf cake (though in this recipe, the liquid is mostly from the cream cheese and eggs). Add about a third of the dry ingredients to the wet mixture and beat on low speed until just combined. Then, add another third of the dry ingredients and mix again until just incorporated. Finally, add the remaining dry ingredients and mix on low speed until no streaks of flour remain. Be careful not to overmix at this stage, as overmixing can develop the gluten in the flour too much, resulting in a tough cake. The batter should be thick and smooth.
Step 7: Assembling and Swirling the Cake
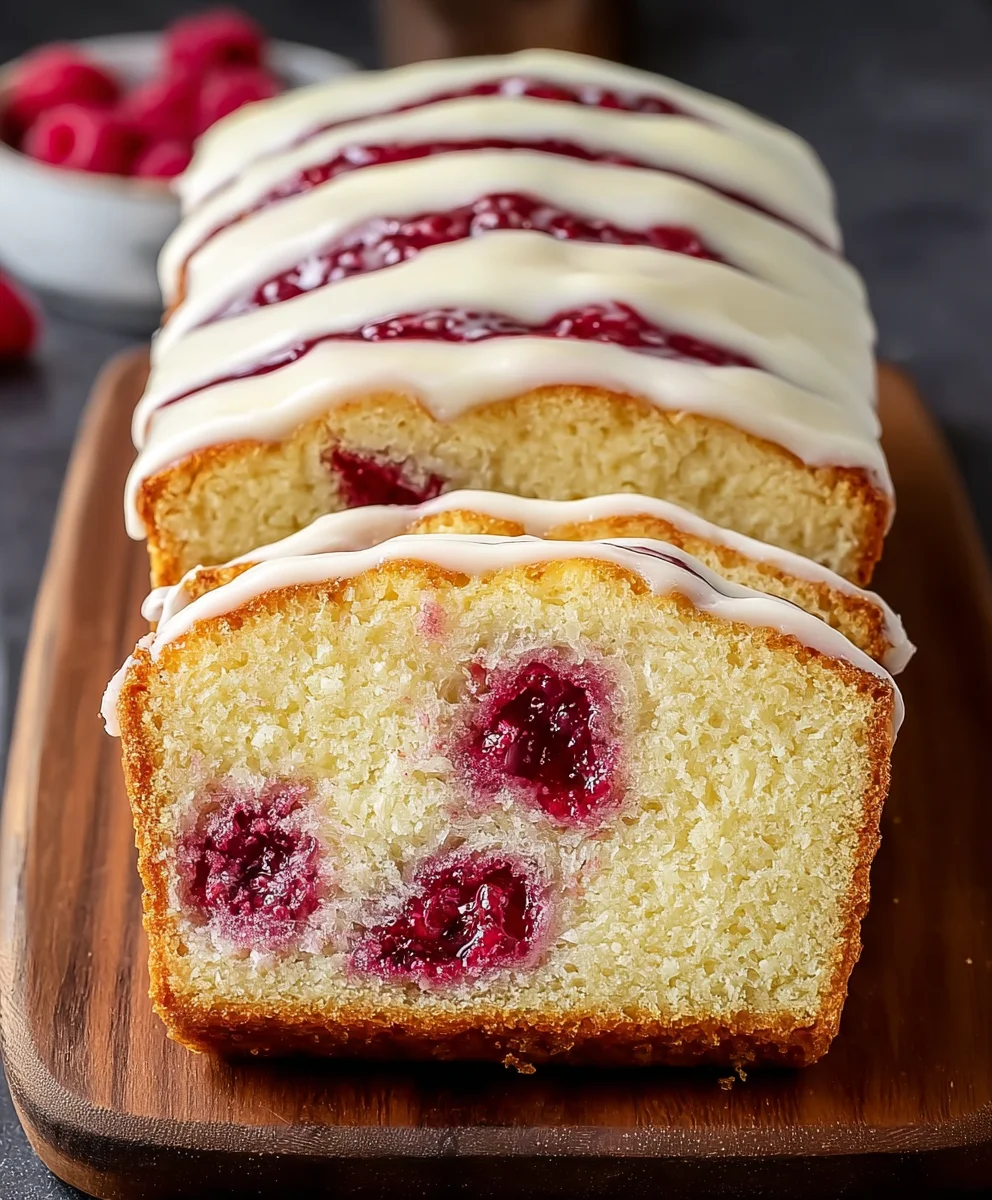
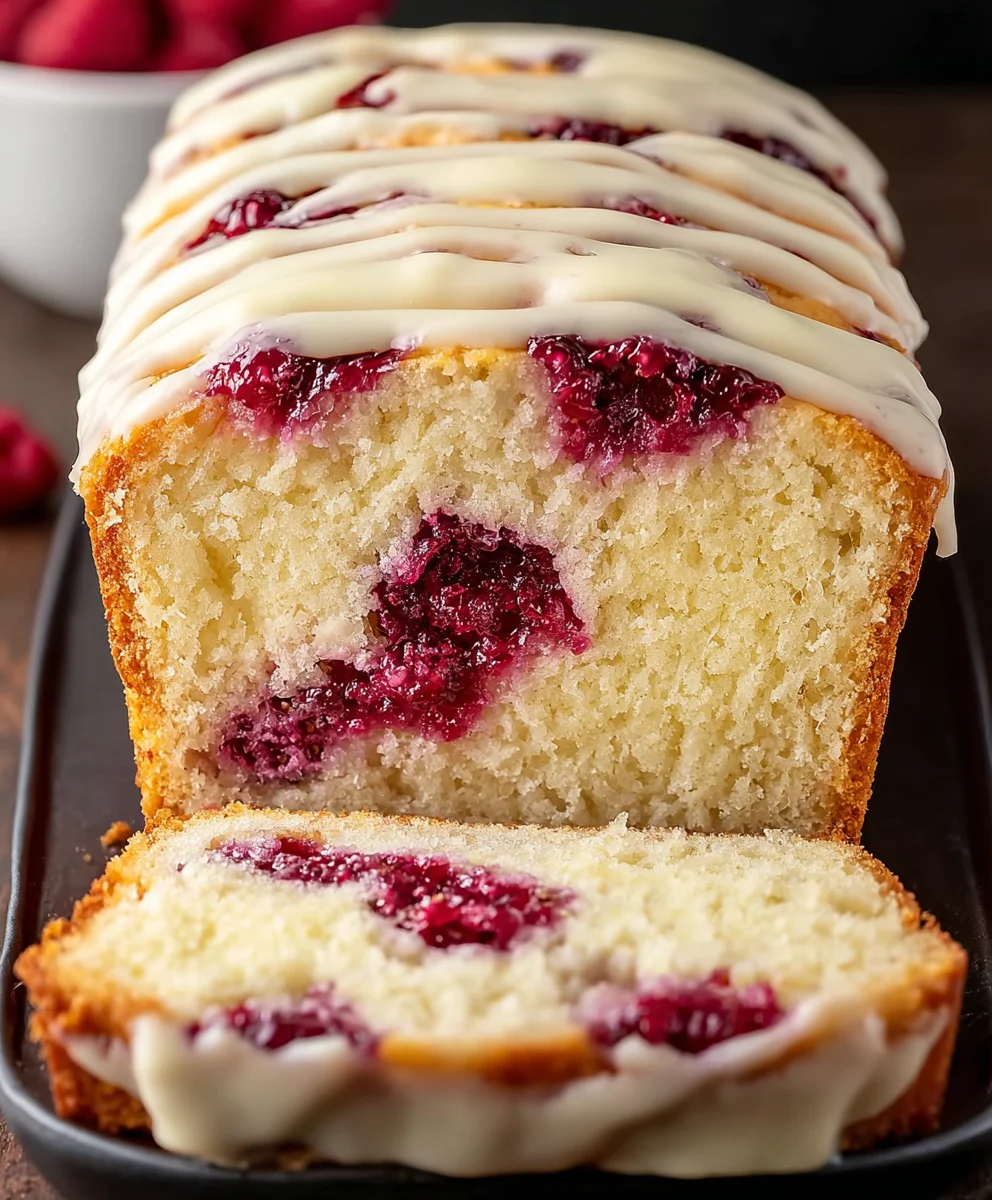
Preheat your oven to 350°F (175°C). Grease and flour a standard 9×5 inch loaf pan, or line it with parchment paper, leaving an overhang on the sides to help lift the cake out later. Spoon about half of the cake batter into the prepared loaf pan, spreading it evenly. Drizzle about half of the cooled raspberry sauce over the batter. Now, spoon the remaining cake batter over the raspberry sauce, again spreading it as evenly as possible. Finally, dollop the remaining raspberry sauce over the top layer of batter. Use a toothpick or a butter knife to gently swirl the raspberry sauce into the batter, creating beautiful marble patterns. Don’t over-swirl, as you want distinct ribbons of raspberry.
Step 8: Baking and Cooling
Place the loaf pan in the preheated oven and bake for 50 to 65 minutes. The baking time can vary depending on your oven. To check for doneness, insert a wooden skewer or toothpick into the center of the cake. If it comes out clean, or with a few moist crum extractbs attached (but no wet batter), the cake is ready. If it comes out with wet batter, continue baking for another 5-10 minutes and check again. Once baked, remove the loaf pan from the oven and let the cake cool in the pan for about 15-20 minutes. This allows the cake to set up properly before being removed from the pan. After 15-20 minutes, carefully invert the loaf onto a wire rack to cool completely. Ensure it’s fully cooled before slicing for the best texture and to prevent irum extractrom crumbling.
Conclusion:
There you have it! Your guide to creating the absolutely delightful White Chocolate and Raspberry Loaf Cake. This recipe is a wonderful balance of sweet, creamy white chocolate and the tart burst of fresh raspberries, all baked into a wonderfully moist and tender loaf. It’s perfect for a special occasion, a weekend treat, or even just to brighten up an ordinary afternoon. Don’t be afraid to get your hands in there and enjoy the process – baking should be fun! I encourage you to give this White Chocolate and Raspberry Loaf Cake a try; I’m confident you’ll fall in love with its simple elegance and delicious flavor profile.
For serving suggestions, this cake is divine on its own, but a light dusting of powdered sugar or a simple vanilla glaze takes it to another level. It pairs beautifully with a cup of tea or coffee, making it an ideal brunch addition or afternoon pick-me-up. You can also serve slices warm with a dollop of whipped cream or a scoop of vanilla ice cream for a more decadent dessert.
Looking for variations? Feel free to experiment with other berries like blueberries or blackberries. You could also add a hint of lemon zest to the batter for a brighter flavor profile that complements the raspberries perfectly. Chopped nuts, such as almonds or macadamia nuts, would also add a lovely crunch.
Frequently Asked Questions:
Can I use frozen raspberries instead of fresh?
Yes, you can definitely use frozen raspberries! It’s a great option when fresh aren’t in season. Make sure to toss them in a tablespoon of flour before adding them to the batter. This helps prevent them from sinking to the bottom of the cake. You might also notice a slightly more vibrant pink hue in your cake due to the juice from the thawed raspberries.
How should I store the White Chocolate and Raspberry Loaf Cake?
Once cooled, the White Chocolate and Raspberry Loaf Cake can be stored at room temperature in an airtight container for up to 3 days. If you live in a warm climate or prefer it chilled, you can refrigerate it for a slightly longer shelf life, up to 5 days. For longer storage, wrap it tightly in plastic wrap and then foil, and it can be frozen for up to 3 months.
White Chocolate Raspberry Loaf Cake – Easy & Delicious
An easy and delicious loaf cake featuring a vibrant raspberry swirl throughout a tender white chocolate flavored cake batter.
Ingredients
-
1½ cups fresh raspberries
-
¼ cup sugar
-
½ teaspoon lemon zest
-
2 tablespoons orange juice
-
1 tablespoon water
-
2 tablespoons cornstarch
-
1¾ cups all-purpose flour
-
½ teaspoon baking powder
-
½ teaspoon salt
-
½ cup unsalted butter, softened to room temperature
-
4 ounces cream cheese, softened to room temperature
-
1¼ cups sugar
-
4 large eggs
-
1 tablespoon lemon zest
-
1¾ teaspoons vanilla extract
Instructions
-
Step 1
Prepare the raspberry swirl: In a small saucepan, combine 1½ cups fresh raspberries, ¼ cup sugar, ½ teaspoon lemon zest, 2 tablespoons orange juice, and 1 tablespoon water. Simmer over medium heat for 5-7 minutes until raspberries soften and release juices. Whisk together 2 tablespoons cornstarch and 2 tablespoons cold water to create a slurry. Slowly pour the slurry into the simmering raspberries while whisking constantly. Cook for another 1-2 minutes until the sauce thickens. Remove from heat and let cool completely. -
Step 2
Mix dry ingredients: In a medium bowl, whisk together 1¾ cups all-purpose flour, ½ teaspoon baking powder, and ½ teaspoon salt. Set aside. -
Step 3
Cream butter and sugar: In a large bowl, beat ½ cup softened unsalted butter and 4 ounces softened cream cheese until smooth and fluffy. Gradually add 1¼ cups sugar and beat until light yellow and increased in volume. -
Step 4
Incorporate eggs and flavorings: Add 4 large eggs one at a time, beating well after each addition. Mix in 1 tablespoon lemon zest and 1¾ teaspoons vanilla extract until smooth. -
Step 5
Combine wet and dry ingredients: Gradually add the dry ingredients to the wet ingredients in thirds, mixing on low speed until just combined. Do not overmix. -
Step 6
Assemble and swirl the cake: Preheat oven to 350°F (175°C). Grease and flour a loaf pan. Spoon half the batter into the pan, drizzle half the cooled raspberry sauce over it. Top with the remaining batter, then dollop with the remaining raspberry sauce. Gently swirl the sauce into the batter with a toothpick or knife. -
Step 7
Bake and cool: Bake for 50-65 minutes, or until a toothpick inserted into the center comes out clean. Let cool in the pan for 15-20 minutes, then invert onto a wire rack to cool completely before slicing.
Important Information
Nutrition Facts (Per Serving)
It is important to consider this information as approximate and not to use it as definitive health advice.
Allergy Information
Please check ingredients for potential allergens and consult a health professional if in doubt.