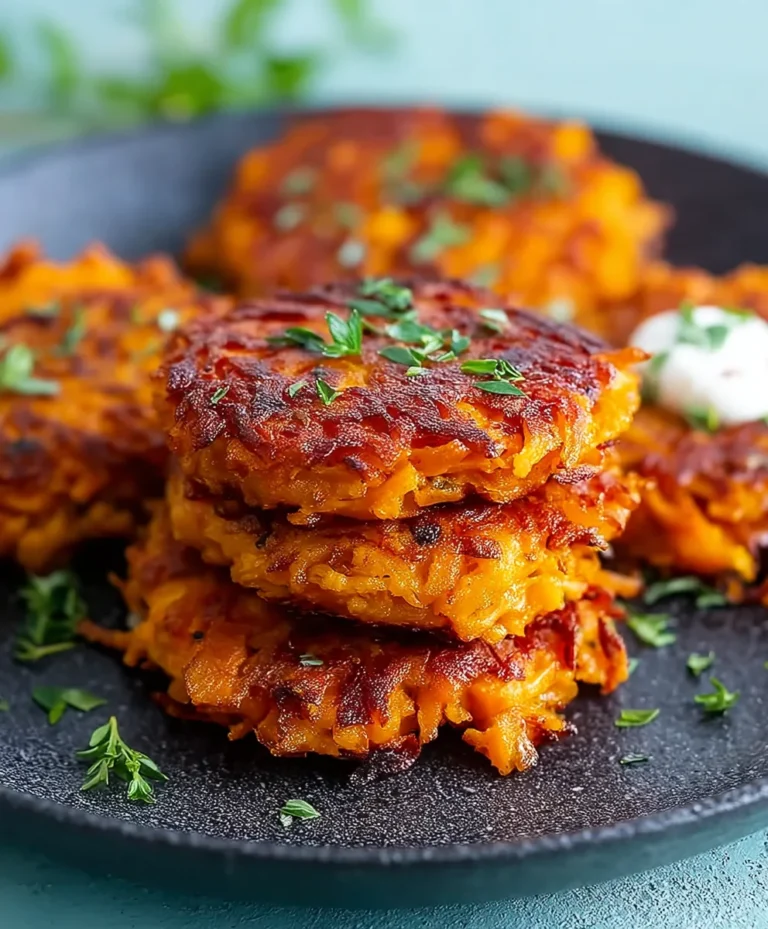
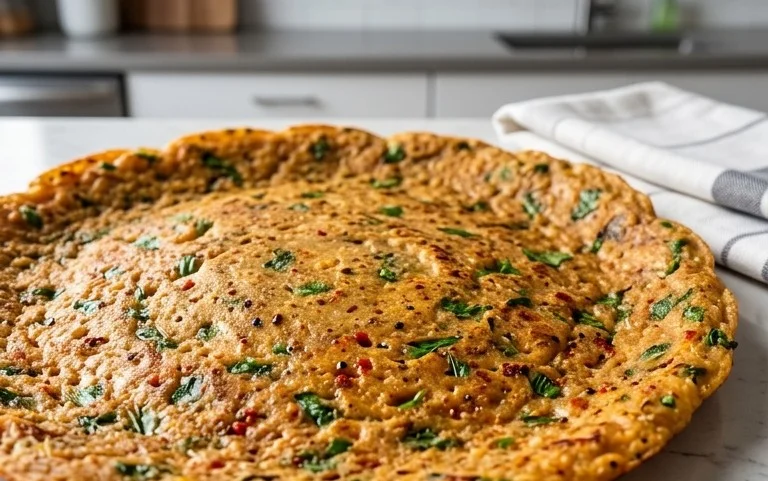
Savory Masoor Dal Chilla – Easy Red Lentil Pancakes
Masoor Dal Chilla, those delightfully savory red lentil pancakes, are an absolute revelation! I remember the first time I tried one – the crispy edges, the fluffy interior, and that subtle, earthy flavor that just sang with spices. It’s no wonder so many people adore this humble yet incredible dish. They’re the perfect answer to that “what’s for breakfast/lunch/light dinner?” dilemma, offering a wholesome and satisfying meal that’s incredibly versatile. What truly sets Masoor Dal Chilla apart is its simplicity and inherent goodness. Made primarily from red lentils, they’re packed with protein and fiber, making them a fantastic guilt-free indulgence. The magic lies in transforming simple pantry staples into something truly special, a testament to how delicious healthy eating can be. Get ready to fall in love with these easy-to-make, unbelievably tasty red lentil pancakes!
Why You’ll Love This Masoor Dal Chilla:
Healthy & Wholesome
Quick & Easy Preparation
Flavorful & Satisfying
Perfect for Any Meal
Masoor Dal Chilla | Savory Red Lentil Pancakes
Masoor dal chilla, or savory red lentil pancakes, are a wonderfully nutritious and incredibly versatile breakfast or snack option. They’re a staple in many Indian households, and for good reason! These golden discs are packed with protein and fiber thanks to the humble masoor dal, and they’re surprisingly easy to whip up, even on a busy morning. Forget those bland, cardboard-like breakfast options; these chillas are bursting with flavor and can be customized to your liking. I love them because they are a fantastic way to incorporate more lentils into my diet without feeling like I’m just eating dal. Plus, they’re naturally gluten-free! So, let’s dive into how you can make these delicious pancakes right in your own kitchen.
Ingredients:
Preparing the Lentil Batter
The foundation of any good chilla is a well-prepared batter. For our masoor dal chillas, this means starting with the lentils.
Rinse the 1 cup of split red lentils (masoor dal) thoroughly under running water. You want to wash them until the water runs clear. This step is important to remove any dust or impurities. Once rinsed, transfer the lentils to a bowl and add 3 cups of water. Let them soak for at least 2 to 3 hours. Soaking is crucial as it softens the lentils, making them easier to grind into a smooth batter and also aids in their digestion. If you’re in a hurry, you can soak them in warm water for about 30 minutes, but a longer soak is generally preferred for the best texture. After soaking, drain all the water completely.
Now it’s time to bring our flavor elements into the mix. Take the soaked and drained lentils and transfer them to a blender or a high-powered food processor. Add 1 whole green chilli (you can adjust this based on your spice preference – remove the seeds for less heat, or add an extra one if you like it fiery!), and a 1-inch piece of fresh gin extractger. The gin extractger adds a wonderful warmth and zing that complements the earthy flavor of the lentils. You’ll also add 1 teaspoon of kosher salt at this stage to season the batter. If you want a finer batter, you can add the ½ cup of water now.
Grind the ingredients into a smooth, thick batter. You want a consistency similar to pancake batter or idli batter – not too runny, but not too stiff. You might need to scrape down the sides of the blender a few times to ensure everything is well incorporated. If the batter seems too thick, you can add a tablespoon or two more water, but be careful not to add too much at once, as you can always thin it out, but it’s hard to thicken it up again. Blend until you achieve a smooth, lump-free consistency. Once you have the desired batter consistency, stir in the 2 tablespoons of finely chopped cilantro. The cilantro adds a fresh, herbaceous note and a lovely green fleck to the chillas.
Cooking the Masoor Dal Chillas
With our batter ready, it’s time to get cooking and transform this delicious mixture into delightful pancakes.
Heat a non-stick skillet or a cast-iron griddle over medium heat. Once the pan is hot, add about 1 teaspoon of oil and swirl it around to lightly coat the surface. You don’t need a lot of oil, especially if you’re using a good non-stick pan. It’s important that the pan is properly heated before you pour the batter. If the pan is too cool, the chilla will stick and won’t cook evenly. To test if it’s ready, you can sprinkle a few drops of water on it; they should sizzle and evaporate quickly.
Pour a ladleful of the prepared batter onto the hot skillet. Immediately using the back of the ladle, gently spread the batter in a circular motion to form a pancake, about 6-8 inches in diameter. Try to make it as even as possible. You’ll see the edges start to firm up and small bubbles appearing on the surface within a minute or two. This is a good sign that the heat is just right. Don’t overcrowd the pan; cook one chilla at a time unless you have a very large griddle.
Cook the chilla for about 2-3 minutes on the first side, or until the edges start to lift and the underside is golden brown and crisp. You’ll be able to tell it’s ready to flip when the surface starts to look cooked and less wet. Carefully slide a spatula underneath the chilla and gently flip it over.
Cook the second side for another 1-2 minutes, or until it’s also golden brown and cooked through. You can press down lightly with your spatula to ensure even cooking. The total cooking time per chilla will depend on the thickness of your batter and the heat of your pan, but generally, it’s quite quick.
Once both sides are beautifully golden and cooked, carefully remove the chilla from the skillet and transfer it to a plate. Add another ½ teaspoon of oil to the pan, swirl it around, and repeat the process with the remaining batter until all the chillas are cooked. You can keep the cooked chillas warm by stacking them on a plate and covering them loosely with a clean kitchen towel while you finish the batch.
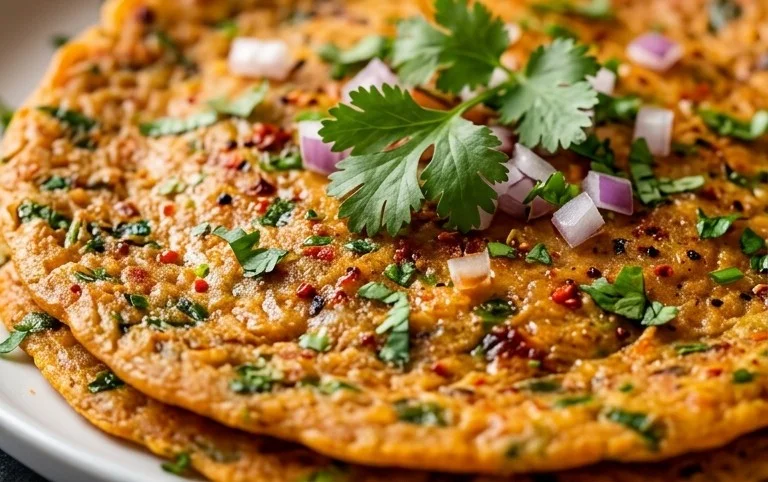
These masoor dal chillas are best served hot and fresh. They are incredibly versatile and can be enjoyed with a variety of accompaniments. I love to serve them with a dollop of plain yogurt, some spicy tomato chutney, or even a tangy tamarind chutney. For a more substantial meal, you can pair them with a simple vegetable stir-fry or a side of sautéed greens. The mild, savory flavor of the chillas makes them a perfect canvas for whatever delicious toppings or sides you choose. Enjoy!
Conclusion:
I hope you’ve enjoyed learning how to make these delicious Masoor Dal Chillas! These savory red lentil pancakes are a fantastic option for a healthy and satisfying meal, perfect for breakfast, lunch, or even a light dinner. They are packed with protein and fiber from the masoor dal, making them a wholesome choice that doesn’t compromise on flavor. The simple ingredients and straightforward process mean you can whip up a batch of these nutritious pancakes with ease, even on a busy day. I truly encourage you to give this Masoor Dal Chilla recipe a try – it’s a versatile dish that’s sure to become a favorite in your kitchen.
Serving these chillas is wonderfully flexible. They are absolutely delightful served hot off the griddle with a dollop of plain yogurt or a tangy mint-coriander chutney. For a more substantial meal, pair them with a simple vegetable stir-fry or a side of pickle. When it comes to variations, the possibilities are endless! You can incorporate finely chopped onions, tomatoes, green chilies, or even grated carrots directly into the batter for added texture and flavor. Experiment with different spices like turmeric, cumin, or even a pinch of asafoetida for an authentic touch. Don’t be afraid to get creative and make them your own!
Frequently Asked Questions:
Can I make the batter ahead of time?
Yes, you absolutely can! The Masoor Dal Chilla batter can be made a day in advance and stored in an airtight container in the refrigerator. This makes it even quicker to prepare them when you’re ready to cook.
What if my chillas are sticking to the pan?
Ensure your pan is adequately heated before pouring the batter, and always use a little oil or ghee. A non-stick pan works best. If you find they are still sticking, you might need to add a touch more liquid to the batter to make it slightly thinner.
Can I make these gluten-free?
Since masoor dal is naturally gluten-free, these chillas are already a fantastic gluten-free option. You don’t need to make any substitutions to keep them gluten-free!
Masoor Dal Chilla | Savory Red Lentil Pancakes
Delicious and healthy savory pancakes made from red lentils, seasoned with fresh ginger, green chili, and cilantro. Perfect for breakfast or a light meal.
Ingredients
-
1 cup split red lentils (masoor dal)
-
3 cups water (for soaking lentils)
-
1 green chilli
-
1 inch ginger
-
1 teaspoon kosher salt
-
½ cup water (for grinding)
-
2 tablespoons cilantro (finely chopped)
-
2 tablespoons oil
Instructions
-
Step 1
Rinse the masoor dal thoroughly. Soak the lentils in 3 cups of water for at least 30 minutes, or until softened. -
Step 2
Drain the soaked lentils. Add the drained lentils to a blender along with the green chilli, ginger, kosher salt, and ½ cup of water. -
Step 3
Grind the mixture into a smooth batter. Stir in the finely chopped cilantro. -
Step 4
Heat 1 tablespoon of oil in a non-stick skillet or griddle over medium heat. -
Step 5
Pour a ladleful of batter onto the hot skillet and spread it into a thin, round pancake. -
Step 6
Cook for 2-3 minutes until the edges start to brown and bubbles appear on the surface. Flip and cook the other side for another 1-2 minutes until golden brown. -
Step 7
Repeat with the remaining batter, adding more oil as needed. Serve hot.
Important Information
Nutrition Facts (Per Serving)
It is important to consider this information as approximate and not to use it as definitive health advice.
Allergy Information
Please check ingredients for potential allergens and consult a health professional if in doubt.