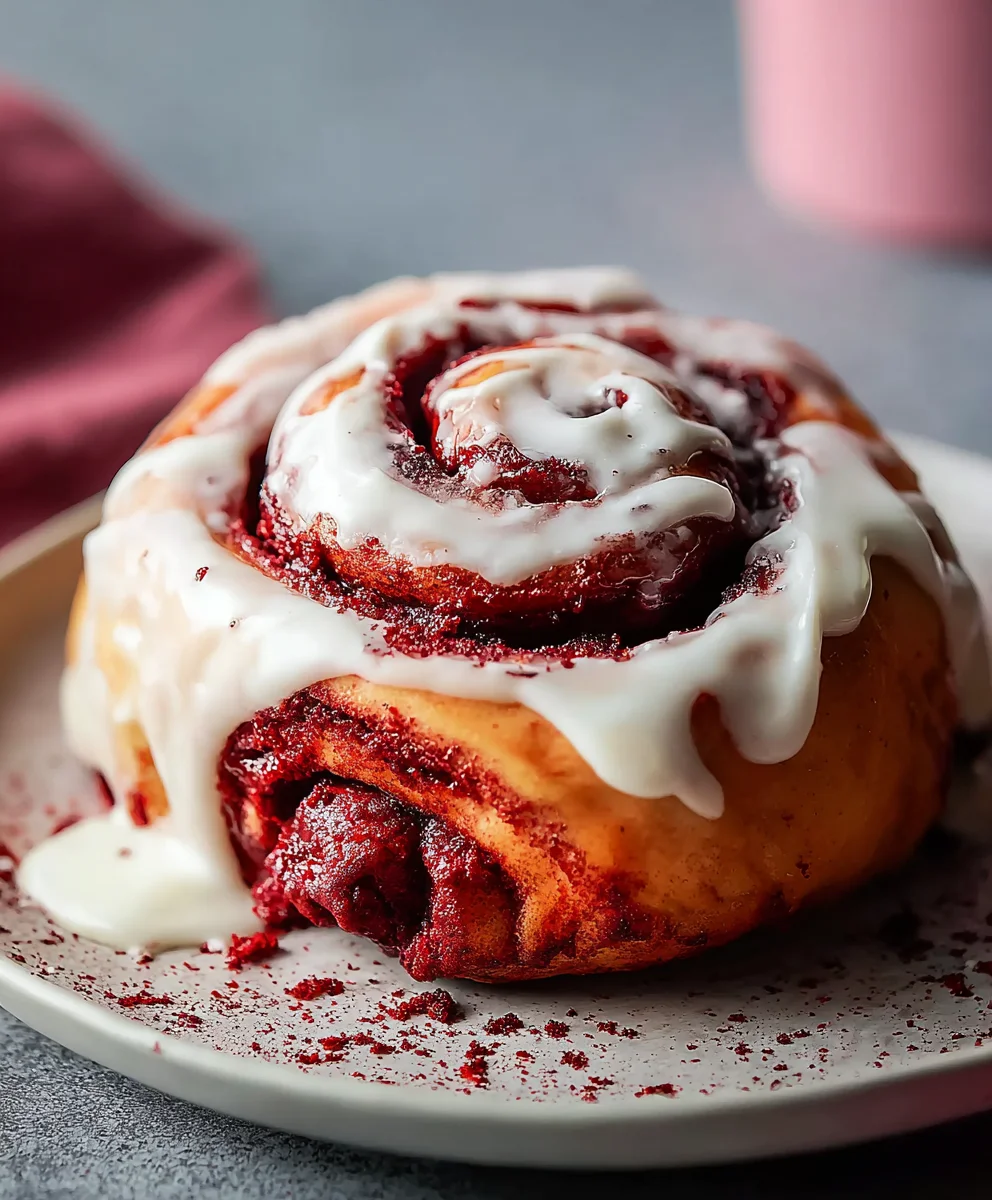
Red Velvet Cinnamon Rolls From Scratch-Easy Recipe
Red Velvet Cinnamon Rolls From Scratch are more than just a breakfast treat; they’re a decadent experience that transforms a familiar favorite into something truly extraordinary. Imagin extracte the classic comfort of a warm, gooey cinnamon roll, but elevated with the subtle elegance and vibrant hue of red velvet. That’s precisely what these rolls deliver. We adore them because they offer that perfect balance of sweet, spiced, and slightly tangy notes, all wrapped in a beautifully tender dough. What truly sets these Red Velvet Cinnamon Rolls From Scratch apart is the stunning visual appeal and the unique flavor combination. It’s that irresistible contrast between the deep, rich red dough, the sweet cinnamon filling, and a luscious cream cheese frosting that makes them utterly unforgettable. Get ready to impress yourself and everyone you share them with!
Ingredients:
- ¼ cup bread flour (for the starter)
- ¾ cup water (for the starter)
- ⅓ cup whole milk, room temperature
- ⅓ cup heavy cream, room temperature
- 1 tablespoon white vinegar
- 3⅔ cups bread flour (for the dough)
- ⅓ cup granulated sugar
- 1½ tablespoons cocoa powder
- 2 teaspoons instant yeast
- 1 teaspoon fine sea salt
- 1 egg, room temperature
- 1 teaspoon vanilla extract
- ½-1 teaspoon red gel food coloring
- 6 tablespoons unsalted butter, cut into small cubes and kept cool (for the dough)
- ½ cup unsalted butter, softened (for the filling and frosting)
Making the Tangzhong Starter
Phase 1: Preparing the Starter Base
To achieve incredibly soft and moist Red Velvet Cinnamon Rolls, we begin extract with a Tangzhong starter. This is a Japanese technique that involves cooking a small portion of flour and liquid into a thick paste. This paste gelatinizes the starches in the flour, allowing it to absorb and hold significantly more liquid, leading to a wonderfully tender crum extractb. In a small saucepan, whisk together the ¼ cup of bread flour and ¾ cup of water. Place the saucepan over medium heat and stir constantly. You’ll notice the mixture will start to thicken quite noticeably. Continue to cook and stir until it reaches a consistency similar to thick pudding or wallpaper paste. This usually takes about 3-5 minutes. Once it has thickened, remove it from the heat and transfer the Tangzhong mixture to a small bowl. Cover it with plastic wrap, pressing the wrap directly onto the surface of the starter to prevent a skin from forming. Let it cool completely to room temperature. This step is crucial; adding warm ingredients to yeast can kill it.
Crafting the Red Velvet Dough
Phase 2: Activating the Yeast and Mixing the Dough
While the Tangzhong cools, let’s prepare our main dough. In a large mixing bowl, combine the ⅓ cup of whole milk and ⅓ cup of heavy cream. The room temperature aspect is important here to ensure it doesn’t shock the yeast or affect the butter’s texture. Add the tablespoon of white vinegar to the milk and cream mixture. Let it sit for about 5 minutes. You’ll see the milk curdle slightly, creating a sort of homemade buttermilk, which adds a lovely tenderness and slight tang to the rolls. In the bowl of your stand mixer, or in a large mixing bowl if you’re kneading by hand, combine the 3⅔ cups of bread flour, ⅓ cup of granulated sugar, 1½ tablespoons of cocoa powder, 2 teaspoons of instant yeast, and 1 teaspoon of fine sea salt. Whisk these dry ingredients together to ensure everything is evenly distributed. Now, add the cooled Tangzhong starter to the dry ingredients, along with the room temperature egg and 1 teaspoon of vanilla extract. If you’re using a stand mixer, attach the dough hook. Start mixing on low speed until the ingredientsgin extractst begin to come together into a shaggy dough.
Phase 3: Incorporating Butter and Kneading
Once the dough has formed a cohesive mass, increase the mixer speed to medium-low. Gradually add the 6 tablespoons of cool, cubed unsalted butter, a few cubes at a time, allowing each addition to be incorporated before adding more. This process, known as “fat incorporation,” is what contributes to the incredibly soft and flaky layers. Continue to mix and knead for about 8-10 minutes in the stand mixer, or 10-15 minutes by hand, until the dough is smooth, elastic, and passes the windowpane test. To perform the windowpane test, take a small piece of dough and gently stretch it. If you can stretch it thin enough to see light through it without tearing, it’s ready. The dough should feel slightly tacky but not overly sticky. Finally, gently mix in the ½ to 1 teaspoon of red gel food coloring. Gel coloring is best as it provides vibrant color without adding excess liquid. Mix until the color is evenly distributed throughout the dough.
The Art of Shaping and Baking
Phase 4: First Rise and Filling Preparation
Lightly grease a clean bowl with a little oil or cooking spray. Place the red velvet dough into the greased bowl, turning it once to coat the surface. Cover the bowl tightly with plastic wrap or a damp kitchen towel. Let the dough rise in a warm place for about 1 to 1.5 hours, or until it has doubled in size. While the dough is rising, prepare your filling. In a medium bowl, cream together the ½ cup of softened unsalted butter with a few tablespoons of granulated sugar and a pinch more cocoa powder if you desire a richer chocolate flavor. You can also add a touch more red food coloring to the butter mixture if you want an intensely red filling. Mix until well combined and spreadable.
Phase 5: Rolling, Filling, and Second Rise
Once the dough has doubled, gently punch it down to release the air. Turn the dough out onto a lightly floured surface. Using a rolling pin, roll the dough into a large rectangle, approximately 12×18 inches and about ¼ inch thick. Spread the prepared red velvet butter filling evenly over the entire surface of the dough, leaving a small border along one of the long edges. Starting from the long edge opposite the border, carefully and tightly roll the dough into a log. Pinch the seam to seal it. Using a sharp knife or unflavored dental floss, cut the log into 12 equal-sized rolls. For an extra clean cut with floss, slide the floss under the log, cross the ends over the top, and pull them in opposite directions. Arrange the cinnamon rolls in a greased 9×13 inch baking dish, leaving a little space between each one. Cover the dish loosely with plastic wrap and let the rolls rise for another 30-45 minutes, or until they are puffy and touching each other.
Phase 6: Baking the Perfect Red Velvet Rolls
Preheat your oven to 350°F (175°C). Once the rolls have completed their second rise, they are ready to bake. Place the baking dish in the preheated oven and bake for 20-25 minutes, or until the rolls are golden brown around the edges and cooked through in the center. The aroma of freshly baked cinnamon rolls will fill your kitchen! If the tops start to brown too quickly, you can loosely tent the dish with aluminum foil. Let the rolls cool in the pan for about 10-15 minutes before frosting. This allows them to set slightly and makes them easier to handle.
Cream Cheese Frosting
Phase 7: Whipping up the Tangy Frosting
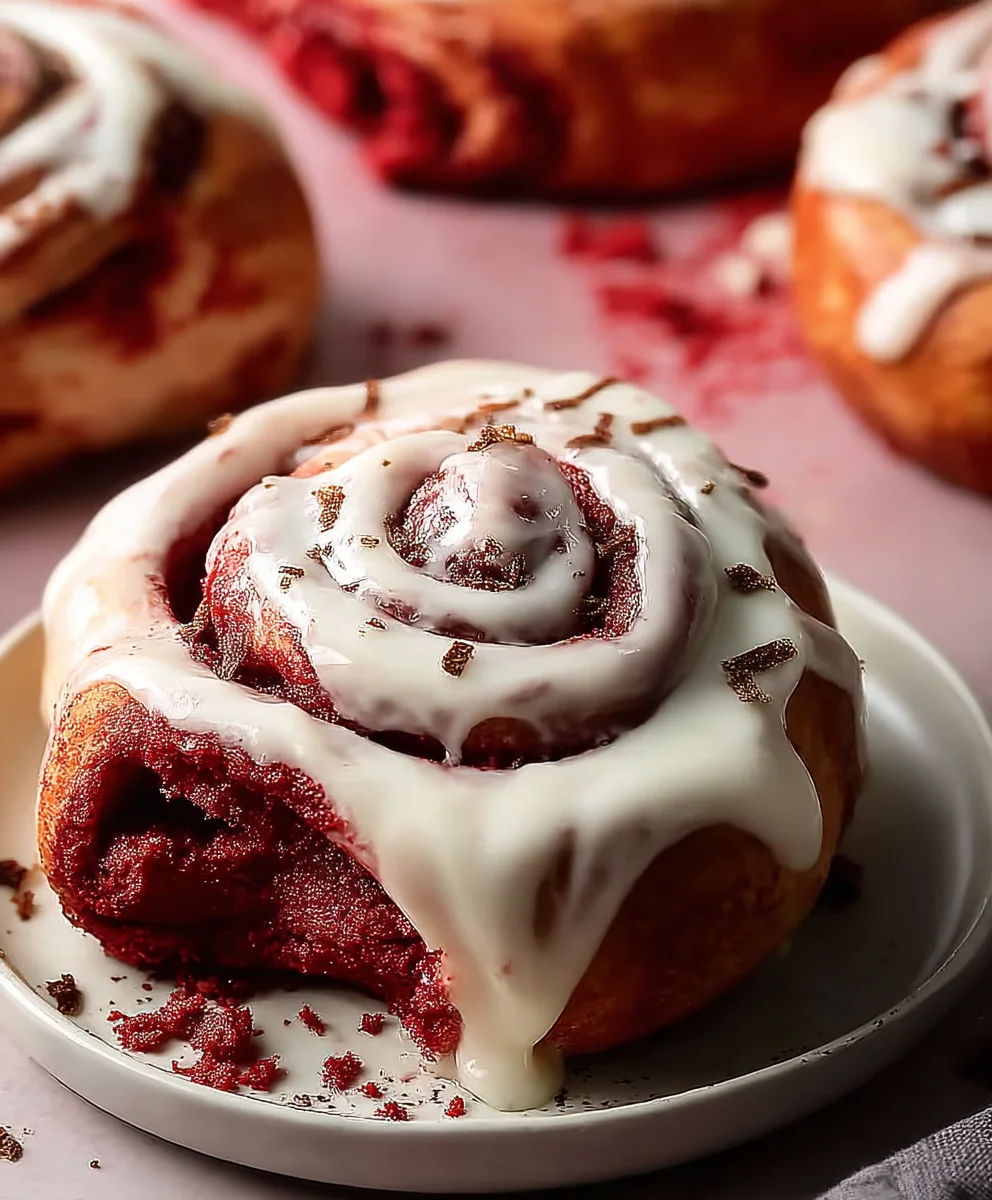
While the rolls are still warm, prepare the cream cheese frosting. In a medium bowl, beat together 4 ounces of softened cream cheese with 4 tablespoons of softened unsalted butter until smooth and creamy. Gradually add 1 to 1.5 cups of powdered sugar, beating until well combined and reaching your desired consistency. Add a splash of milk or cream if the frosting is too thick, or a little more powdered sugar if it’s too thin. Stir in ½ teaspoon of vanilla extract and a tiny bit more red gel food coloring if you want a more vibrant pink frosting. Generously spread the cream cheese frosting over the warm Red Velvet Cinnamon Rolls. The residual heat will allow the frosting to melt slightly, creating a beautiful, glossy finish that seeps into the nooks and crannies. Serve immediately and enjoy your homemade masterpiece!
Conclusion:
And there you have it – a journey into creating the most decadent and delightful Red Velvet Cinnamon Rolls From Scratch! We’ve walked through each step, from crafting the perfect velvety dough to swirling in that rich cocoa and spice filling, all topped with a dreamy cream cheese frosting. These aren’t just cinnamon rolls; they’re an experience. The vibrant color, the tender crum extractb, and the subtle tang of cream cheese combined with the warm hug of cinnamon make them a truly show-stopping treat for any occasion. Whether it’s a special brunch, a holiday gathering, or just a spontaneous craving for something sweet, these homemade delights are sure to impress.
Feel free to get creative! While this recipe is fantastic as is, consider adding a sprinkle of white chocolate chips to the filling for an extra layer of sweetness, or a hint of espresso powder to the frosting to deepen the flavor profile. For a festive touch, a drizzle of dark chocolate ganache over the cream cheese frosting is absolutely divine.
Don’t be intimidated by making cinnamon rolls from scratch. The process is rewarding, and the results are truly worth the effort. So, roll up your sleeves, embrace the cozy kitchen vibes, and bake up a batch of these incredible Red Velvet Cinnamon Rolls From Scratch. I promise, you won’t regret it!
Frequently Asked Questions:
Can I make the dough for Red Velvet Cinnamon Rolls From Scratch ahead of time?
Yes, absolutely! You can prepare the dough up to 24 hours in advance. After the first rise, punch down the dough, wrap it tightly in plastic wrap, and refrigerate it. When you’re ready to bake, let the dough sit at room temperature for about 30 minutes to an hour to make it easier to roll out.
What’s the best way to store leftover Red Velvet Cinnamon Rolls From Scratch?
Once cooled, store any leftover Red Velvet Cinnamon Rolls From Scratch in an airtight container at room temperature for up to 2 days. If you need to store them for longer, they can be refrigerated for up to a week or frozen for up to 3 months. Reheat gently in the oven or microwave to enjoy them warm and gooey.
My red velvet color isn’t as vibrant as I’d like. What can I do?
Ensure you’re using a good quality, concentrated red food coloring. Sometimes, the cocoa powder can slightly mute the color. You can also try adding a touch more food coloring after the ingredients are mixed to achieve a more intense red hue. Remember that the baking process can also slightly affect the final color.
Red Velvet Cinnamon Rolls From Scratch
An easy recipe for incredibly soft and moist Red Velvet Cinnamon Rolls made from scratch using the Tangzhong method and finished with a tangy cream cheese frosting.
Ingredients
-
1/4 cup bread flour (for the starter)
-
3/4 cup water (for the starter)
-
1/3 cup whole milk, room temperature
-
1/3 cup heavy cream, room temperature
-
1 tablespoon white vinegar
-
3 2/3 cups bread flour (for the dough)
-
1/3 cup granulated sugar
-
1 1/2 tablespoons cocoa powder
-
2 teaspoons instant yeast
-
1 teaspoon fine sea salt
-
1 egg, room temperature
-
1 teaspoon vanilla extract
-
1/2 – 1 teaspoon red gel food coloring
-
6 tablespoons unsalted butter, cut into small cubes and kept cool
-
1/2 cup unsalted butter, softened (for the filling and frosting)
-
4 ounces cream cheese, softened
-
1 – 1.5 cups powdered sugar
Instructions
-
Step 1
Prepare the Tangzhong starter by whisking 1/4 cup bread flour and 3/4 cup water in a saucepan. Cook over medium heat, stirring constantly, until thickened to a pudding-like consistency (about 3-5 minutes). Transfer to a bowl, cover the surface with plastic wrap, and let cool completely to room temperature. -
Step 2
In a large bowl, combine 1/3 cup whole milk and 1/3 cup heavy cream. Add 1 tablespoon white vinegar and let sit for 5 minutes to curdle. In the bowl of your stand mixer, combine 3 2/3 cups bread flour, 1/3 cup granulated sugar, 1 1/2 tablespoons cocoa powder, 2 teaspoons instant yeast, and 1 teaspoon fine sea salt. Whisk to combine. -
Step 3
Add the cooled Tangzhong starter, 1 room temperature egg, and 1 teaspoon vanilla extract to the dry ingredients. Mix on low speed until a shaggy dough forms. Gradually add 6 tablespoons of cool, cubed unsalted butter, a few cubes at a time, mixing until incorporated. Increase mixer speed to medium-low and knead for 8-10 minutes (or 10-15 minutes by hand) until smooth and elastic. Gently mix in 1/2 to 1 teaspoon red gel food coloring until evenly distributed. -
Step 4
Place the dough in a lightly greased bowl, cover, and let rise in a warm place for 1 to 1.5 hours, or until doubled in size. While the dough rises, prepare the filling by creaming together 1/2 cup softened unsalted butter with a few tablespoons of granulated sugar. -
Step 5
Punch down the risen dough and roll it into a 12×18 inch rectangle on a lightly floured surface. Spread the filling evenly over the dough, leaving a small border. Tightly roll the dough into a log, starting from a long edge. Cut the log into 12 equal rolls and arrange them in a greased 9×13 inch baking dish. Cover and let rise for another 30-45 minutes until puffy. -
Step 6
Preheat oven to 350°F (175°C). Bake the rolls for 20-25 minutes, or until golden brown. Let cool in the pan for 10-15 minutes. -
Step 7
While the rolls are still warm, make the frosting. Beat 4 ounces softened cream cheese with 4 tablespoons softened unsalted butter until smooth. Gradually add 1 to 1.5 cups powdered sugar, beating until desired consistency. Stir in 1/2 teaspoon vanilla extract and a tiny bit more red gel food coloring if desired. Spread generously over the warm rolls.
Important Information
Nutrition Facts (Per Serving)
It is important to consider this information as approximate and not to use it as definitive health advice.
Allergy Information
Please check ingredients for potential allergens and consult a health professional if in doubt.