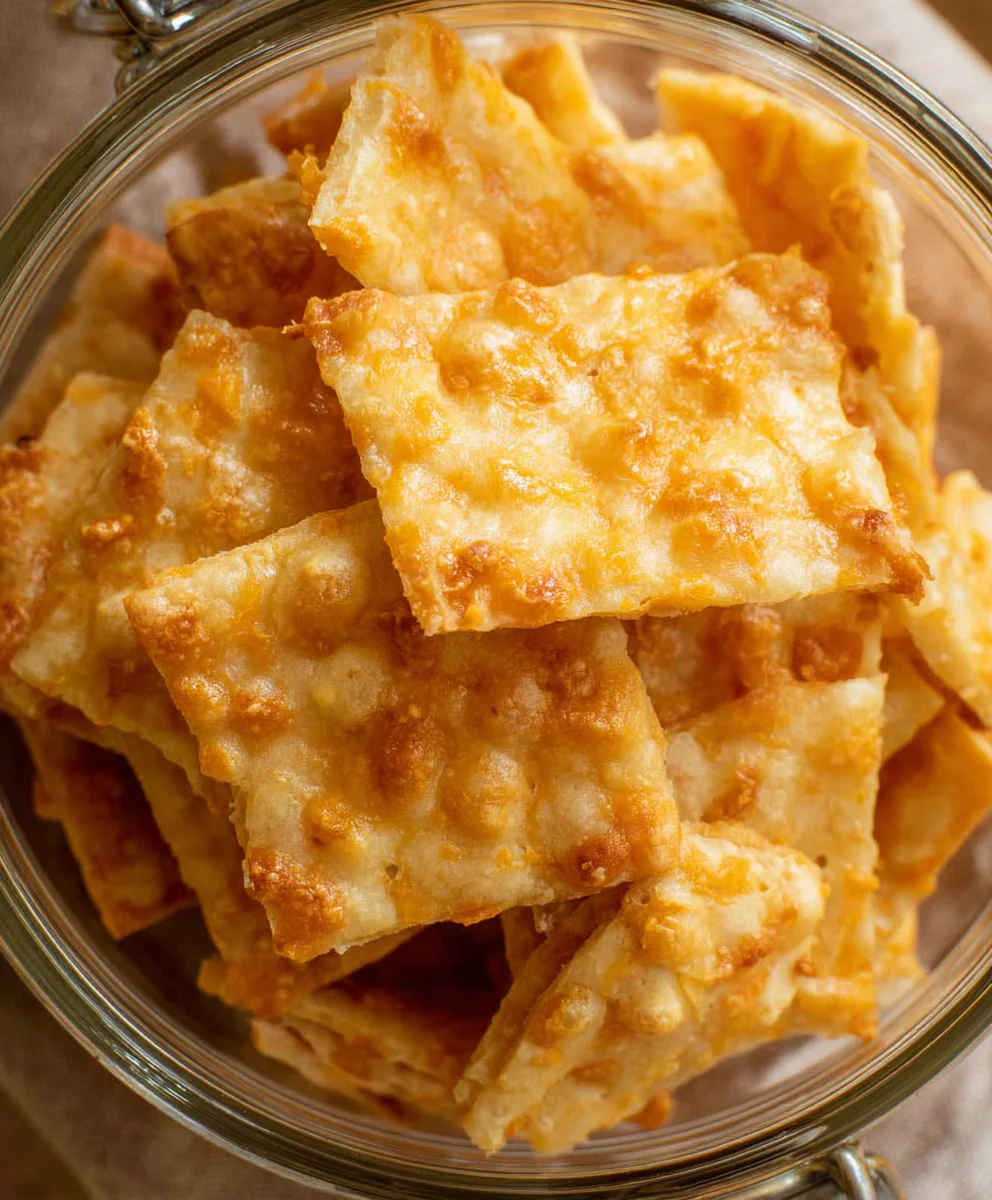
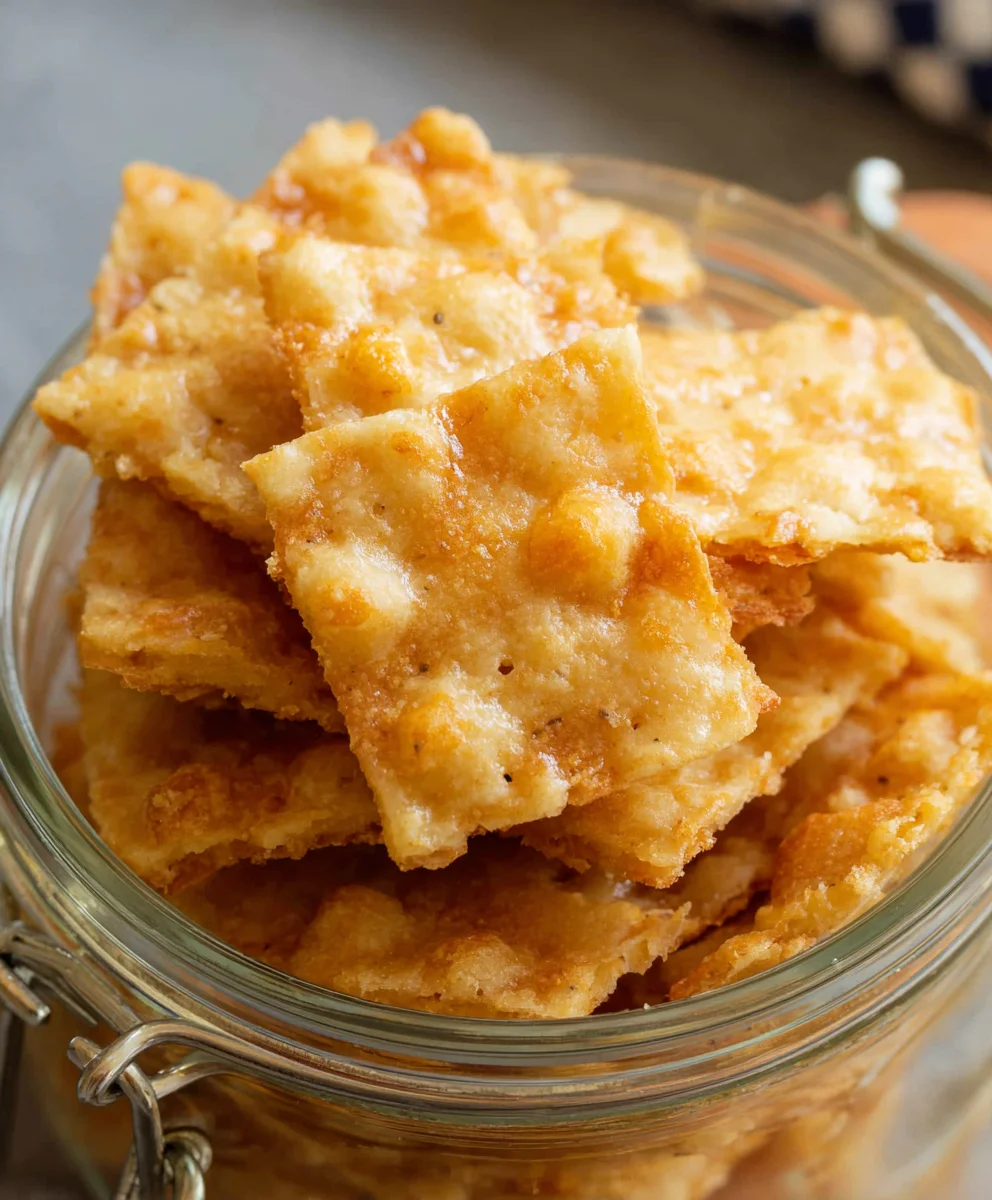
Easy Sourdough Cheddar Crackers Recipe
Sourdough Cheddar Crackers are more than just a snack; they are a delightful testament to the magic of fermentation and the irresistible allure of sharp cheddar. Imagin extracte the satisfying crunch, the subtle tang from your active sourdough starter, and the rich, savory burst of cheese that dances on your tongue. This isn’t your average store-bought cracker. We’re talking about a homemade treasure, crafted with love and a bit of patience, that elevates any cheese board, soup accompaniment, or simple mid-afternoon craving. People adore these Sourdough Cheddar Crackers because they offer a depth of flavor and a superior texture that’s simply unparalleled. The natural yeast from the sourdough imparts a complex, slightly sour note that beautifully balances the bold cheddar, creating a flavor profile that keeps you reaching for more. What truly makes them special is the way they transform simple ingredients into something truly extraordinary, offering a taste of artisanal quality right in your own kitchen.
Ingredients:
- 2 tablespoons butter, softened
- 1 cup all-purpose flour
- ¾ cup discard sourdough starter
- ¾ cup shredded sharp cheddar cheese
- Kosher salt, for sprinkling
Preparing the Dough for Sourdough Cheddar Crackers
The foundation of these wonderfully savory Sourdough Cheddar Crackers lies in a simple yet effective dough. We’ll start by ensuring our butter is softened. This means leaving it at room temperature for about an hour, or gently warming it in a microwave for very short bursts, just until it’s pliable. Overly melted butter will make the dough greasy, while cold, hard butter will be difficult to incorporate. In a medium-sized mixing bowl, combine the softened butter and the all-purpose flour. Using your fingertips or a pastry blender, work the butter into the flour until the mixture resembles coarse crum extractbs. This process coats the flour particles with fat, which is crucial for creating a tender cracker with a satisfyingly flaky texture. Don’t overwork it; we’re not aiming for a smooth dough here, just a well-corum extractned crumbly mixture.
Next, we introduce the star of the show: our discard sourdough starter. It’s important to use a discard that is active enough to contribute to the flavor and texture, even though it won’t be leavening the crackers significantly in this recipe. Add the ¾ cup of discard sourdough starter to the flour and butter mixture. Begin extract to gently mix everything together. At this stage, the dough will seem quite shaggy and may not immediately come together. This is perfectly normal. Use a spatula or a wooden spoon to stir until the ingredients just start to form a cohesive mass. You may need to press down a few times to encourage the starter to bind with the dry ingredients.
Incorporating the Cheese and Chilling the Dough
Now it’s time to add that delightful sharp cheddar cheese. Stir in the ¾ cup of shredded sharp cheddar cheese into the dough. Ensure the cheese is evenly distributed throughout the mixture. The cheese will melt slightly as it’s incorporated, helping to bind the dough and adding its wonderfully sharp, tangy flavor. Continue to mix until the cheese is well dispersed. The dough should now be a bit more cohesive, though it might stirum extractbe a little crumbly.
Once the cheese is incorporated, gather the dough together with your hands. It might be a little sticky, so you can lightly flour your hands if needed. Form the dough into a rough disk. Don’t worry about making it perfectly smooth at this point. The key is to get it into a shape that will be easy to roll out later. Wrap the dough disk tightly in plastic wrap. This step is essential for chilling the dough. Place the wrapped dough in the refrigerator for at least 30 minutes, or ideally for up to an hour. Chilling the dough firms up the butter and makes it much easier to handle and roll out evenly, which is vital for uniform baking and crispiness. It also allows the flavors to meld together beautifully.
Rolling and Shaping Your Sourdough Cheddar Crackers
After the dough has had a good chill, it’s time to get it ready for the oven. Preheat your oven to 375°F (190°C). Line a large baking sheet with parchment paper. This prevents sticking and makes for easy cleanup. Take the chilled dough out of the refrigerator and unwrap it. Place the dough onto a lightly floured surface. Using a rollinggin extractn, begin to roll out the dough. Aim for a thickness of about 1/8 inch to 1/16 inch. The thinner you roll the dough, the crispier your crackers will be. It can gin extracta bit challenging to get it perfectly even, but do your best to achieve a consistent thickness across the entire sheet. Don’t worry if the edges are a little rough; that’s part of the charm of homemade crackers. If the dough becomes too soft or sticky while rolling, you can pop it back into the refrigerator for another 10-15 minutes to firm up.
Once you have your dough rolled out to your desigin extract thinness, you can begin shaping the crackers. You can use a pizza cutter, a sharp knife, or even small cookie cutters to create your desired shapes. Classic squares or rectangles are easy and efficient. As you cut, try to minimize the amount of dough you have to re-roll, as re-worked dough can become tough. You can gather any scraps, gently press them together, and re-roll once more, but keep in mind that this batch might not be as tender as the first.
Baking and Finishing Your Savory Crackers
Carefully transfer the cut cracker shapes onto the prepared baking sheet, leaving a little space between them. They won’t spread a lot, but a bit of room ensures even baking and crisp edges. For an extra touch of flavor and visual appeal, sprinkle the tops of the crackers generously with Kosher salt. The coarse crystals of Kosher salt provide a delightful crunch and a burst of salinity that complements the sharp cheddar perfectly. If you like, you can also lightly prick each cracker with a fork a few times. This helps to prevent them from puffing up too much during baking, ensuring a flatter, crispier cracker.
Place the baking sheet into the preheated oven. Bake for 12-18 minutes, or until the crackers are golden brown around the edges and feel firm to the touch. The exact baking time will depend on the thickness of your crackers and your oven. Keep a close eye on them, especially during the last few minutes, as they can go from perfectly golden to burnt very quickly. Once they look beautifully baked, remove the baking sheet from the oven. Allow the Sourdough Cheddar Crackers to cool completely on the baking sheet. As they cool, they will become even crispier. Once fully cooled, they can be gently broken apart if they’ve stuck together, or removed from the parchment paper. Store them in an airtight container at room temperature for up to a week. Enjoy these homemade delights with your favorite dips, cheeses, or simply on their own!
Conclusion:
Congratulations on baking your very own batch of delicious Sourdough Cheddar Crackers! You’ve successfully transformed simple ingredients into a wonderfully crisp and flavorful snack that is sure to impress. The tangy sourdough starter combined with the sharp cheddar creates a truly irresistible combination. These crackers are perfect for any occasion, whether you’re looking for a sophisticated appetizer, a delightful addition to a cheese board, or simply a satisfying snack to enjoy with your afternoon tea. Feel free to get creative and experiment with different cheeses or even add a pinch of your favorite herbs like rosemary or chives to the dough for a personalized touch.
I encourage you to embrace the baking process and enjoy the rewarding experience of creating these homemade delights. Don’t be discouraged if your first batch isn’t absolutely perfect; practice makes perfect with sourdough! Once you’ve mastered this recipe, you’ll find yourself reaching for it time and time again.
Frequently Asked Questions:
What is the best way to store Sourdough Cheddar Crackers?
To maintain their crispness, store your baked Sourdough Cheddar Crackers in an airtight container at room temperature. They should stay fresh for up to a week. If you notice them losing a bit of their crunch, you can briefly reheat them in a low oven for a few minutes to revive their texture.
Can I use a different type of cheese in this recipe?
Absolutely! While cheddar is fantastic, feel free to experiment with other hard, flavorful cheeses. Gruyère, Parmesan, or a sharp white cheddar would all make wonderful additions or substitutions. Just ensure the cheese is finely grated for even distribution within the dough.
Easy Sourdough Cheddar Crackers
Deliciously savory and surprisingly easy to make, these sourdough cheddar crackers are perfect for snacking or serving with dips and cheese boards.
Ingredients
-
2 tablespoons butter, softened
-
1 cup all-purpose flour
-
3/4 cup discard sourdough starter
-
3/4 cup shredded sharp cheddar cheese
-
Kosher salt, for sprinkling
Instructions
-
Step 1
In a medium bowl, combine softened butter and flour. Work with fingertips or pastry blender until it resembles coarse crumbs. This coats flour particles for a tender, flaky texture. -
Step 2
Add discard sourdough starter to the flour and butter mixture. Gently mix until ingredients start to form a cohesive mass. It will be shaggy at first. -
Step 3
Stir in shredded sharp cheddar cheese, ensuring it’s evenly distributed. The cheese will help bind the dough and add flavor. -
Step 4
Gather the dough into a rough disk, lightly flouring hands if sticky. Wrap tightly in plastic wrap and chill in the refrigerator for at least 30 minutes, or up to an hour. This firms the butter for easier rolling. -
Step 5
Preheat oven to 375°F (190°C). Line a baking sheet with parchment paper. Roll out the chilled dough on a lightly floured surface to about 1/8 to 1/16 inch thickness for crispier crackers. -
Step 6
Cut the dough into desired shapes using a pizza cutter, knife, or cookie cutters. Minimize re-rolling scraps to keep dough tender. -
Step 7
Transfer cracker shapes to the prepared baking sheet. Sprinkle generously with Kosher salt. Optionally, prick each cracker with a fork to prevent excessive puffing. -
Step 8
Bake for 12-18 minutes, or until golden brown and firm. Watch closely as they can burn quickly. Cool completely on the baking sheet to achieve maximum crispiness. Store in an airtight container at room temperature for up to a week.
Important Information
Nutrition Facts (Per Serving)
It is important to consider this information as approximate and not to use it as definitive health advice.
Allergy Information
Please check ingredients for potential allergens and consult a health professional if in doubt.