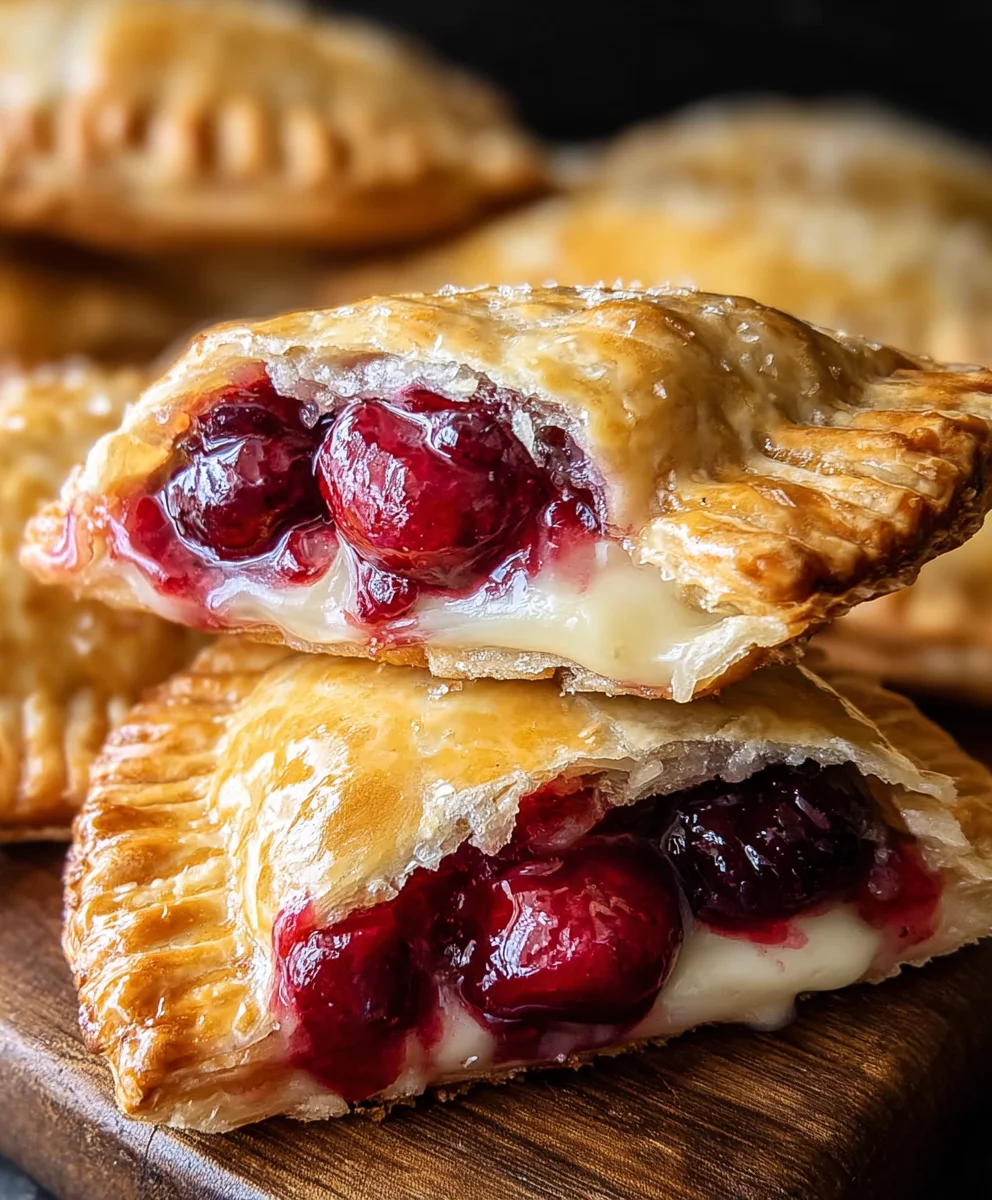
Cherry Cheesecake Hand Pies-Easy Dessert Recipe
Cherry Cheesecake Hand Pies are the ultimate portable dessert, a delightful explosion of sweet, tangy cherries and creamy, rich cheesecake encased in a flaky, buttery crust. Who can resist the charm of a perfectly portioned treat that combines two beloved classics into one? We certainly can’t! The magic of these individual delights lies in their versatility and sheer deliciousness. Whether you’re packing them for a picnic, serving them at a potluck, or simply craving a decadent snack, cherry cheesecake hand pies deliver pure joy. They’re incredibly satisfying, offering that nostalgic comfort of a classic cheesecake with the convenient, handheld format that makes them perfect for on-the-go enjoyment or elegant party fare. What truly sets these cherry cheesecake hand pies apart is the harmonious balance of textures and flavors – the crisp pastry gives way to a luscious, velvety filling, punctuated by bursts of sweet-tart cherry. Get ready to fall in love with this irresistible dessert!
Ingredients:
- 1/4 cup granulated sugar
- 4 oz cream cheese, softened
- 21 oz can cherry pie filling
- 1 package refrigerated pie crust (2 crusts)
- 1/2 cup powdered sugar
- 1 teaspoon corn syrup
- 1 tablespoon water
- Vegetable oil, for deep frying (about 4-6 cups)
Preparing the Filling
Mixing the Cream Cheese and Sugar
Before we even think about assembling our Cherry Cheesecake Hand Pies, we need to get that decadent filling ready. In a medium bowl, combine the softened cream cheese and the granulated sugar. It’s really important that the cream cheese is softened, almost to room temperature. This will make it much easier to mix into a smooth, lump-free consistency. If it’s too cold, you’ll end up with little pockets of cream cheese, and nobody wants that in their perfectly sweet filling. I like to use a fork or a hand mixer on low speed to really cream these two together until they are light and fluffy. This initial creaming step also helps to incorporate a bit of air, contributing to a lighter texture in the final hand pie.
Incorporating the Cherry Pie Filling
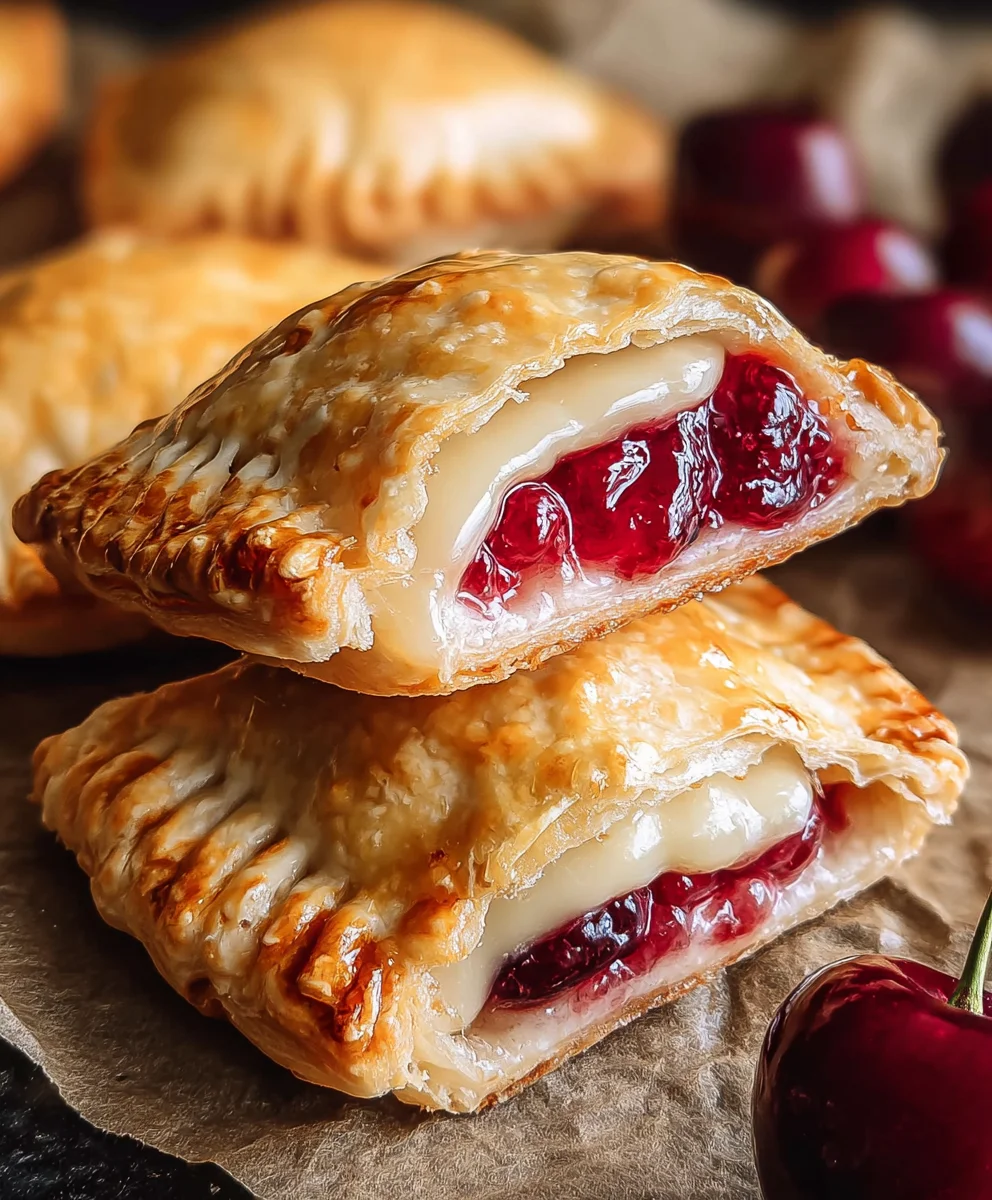
Once your cream cheese and sugar mixture is beautifully smooth, it’s time to add the star of the show: the cherry pie filling. Gently fold the entire can of cherry pie filling into the cream cheese mixture. Be careful not to overmix here. We’re aiming for a marbled effect, where you can still see streaks of the cream cheese and chunks of cherry. This visual appeal is part of what makes these hand pies so delightful. The goal is to distribute the cream cheese evenly throughout the cherries, creating a rich, tangy, and sweet filling that complements the crisp crust perfectly. Make sure to scrape down the sides of the bowl to ensure all ingredients are incorporated.
Assembling the Hand Pies
Preparing the Pie Crusts
Now for the fun part: assembling! Unroll your package of refrigerated pie crusts onto a lightly floured surface. You’ll notice there are two crusts in the package, which is exactly what we need for our hand pies. Carefully separate them and lay them flat. If the dough feels a little stiff, let it sit at room temperature for a few minutes to become more pliable. Using a round cookie cutter or a large glass rim (about 4-5 inches in diameter), cut out as many circles as you can from each crust. You should aim for at least 8-10 circles, depending on the size of your cutter. Gather the scraps, gently re-roll them once, and cut out more circles until you’ve used up as much dough as possible. These circles will form the base and top of our delicious hand pies.
Filling and Sealing the Hand Pies
Take one pie crust circle and place it on your work surface. Spoon a generous tablespoon of the cherry cheesecake filling onto one half of the circle, leaving about a 1/2-inch border around the edge. Be careful not to overfill, as this can make sealing difficult and might cause the filling to leak out during frying. Now, take another pie crust circle and place it on top of the filling. Gently press down around the filling to remove any air pockets. Using your fingers, pinch the edges together to seal them securely. For an extra secure seal and a decorative touch, you can use the tines of a fork to crimp the edges all the way around. Repeat this process with the remaining crust circles and filling until all your hand pies are assembled. Make sure each one is well-senon-alcoholic aled!
Frying and Glazing
Deep Frying the Cherry Cheesecake Hand Pies
This is where our Cherry Cheesecake Hand Pies really come to life! Heat your vegetable oil in a deep, heavy-bottomed pot or a deep fryer over medium-high heat until it reaches about 350°F (175°C). It’s crucial to maintain this temperature for optimal frying. Too low, and the pies will be greasy; too high, and they’ll burn before they cook through. Carefully slide 2-3 hand pies into the hot oil, being careful not to overcrowd the pot. Fry them for about 2-3 minutes per side, or until they are a beautiful golden brown. Use a slotted spoon or spider strainer to gently turn them and ensure even cooking. Once golden brown on both sides, carefully remove the fried hand pies from the oil and place them on a wire rack set over a baking sheet to drain any excess oil. This allows them to cool slightly and become wonderfully crisp.
Preparing and Applying the Glaze
While our fried hand pies are still warm, it’s time for that irresistible sweet glaze. In a small bowl, whisk together the powdered sugar, corn syrup, and water. Start with the tablespoon of water and add a tiny bit more if needed to reach a smooth, drizzly consistency. The corn syrup is key here – it adds a lovely sheen and helps the glaze set slightly. Drizzle the glaze generously over the warm hand pies. The warmth of the pies will help the glaze to spread and set beautifully. You can use a spoon to gently guide the glaze or simply let gravity do its work. The combination of the warm, crisp crust, the luscious cherry cheesecake filling, and the sweet, shiny glaze is simply divine. Let them cool for a few minutes before diggin extractg in!
Conclusion:
I hope you’ve enjoyed learning how to make these delightful Cherry Cheesecake Hand Pies! They are such a fun and portable way to enjoy the classic flavors of cheesecake. We’ve covered everything from preparing the flaky crust to creating that lusciously creamy cheesecake filling infused with sweet cherry goodness. These hand pies are perfect for parties, picnics, or simply as a special treat. For a beautiful presentation, dust them with powdered sugar or drizzle with a little extra cherry sauce. They also pair wonderfully with a scoop of vanilla ice cream or a dollop of whipped cream. Don’t be afraid to get creative with variations – try adding a hint of almond extract to the filling or using a mix of berries for a different flavor profile. The most important thing is to have fun in the kitchen and savor the delicious results. Happy baking!
Frequently Asked Questions:
Can I make the Cherry Cheesecake Hand Pies ahead of time?
Yes, you can definitely make the Cherry Cheesecake Hand Pies ahead of time! You can bake them and let them cool completely, then store them in an airtight container at room temperature for up to 2 days, or in the refrigerator for up to 4 days. If refrigerating, you might want to gently warm them before serving to soften the crust and filling.
What other fruits can I use instead of cherries in these hand pies?
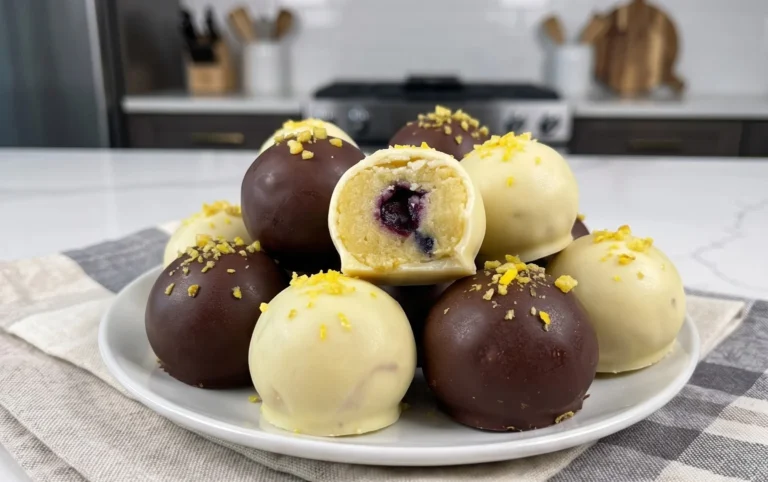
The beauty of these hand pies is their versatility! You can absolutely substitute the cherries with other fruits. Popular alternatives include blueberries, raspberries, strawberries, or even a mixed berry blend. You could also try cooked apple or peach filling for a different seasonal twist. Just ensure the fruit is not too watery to avoid a soggy bottom crust.
Cherry Cheesecake Hand Pies
Easy and delicious fried hand pies filled with a creamy cherry cheesecake mixture.
Ingredients
-
1/4 cup granulated sugar
-
4 oz cream cheese, softened
-
21 oz can cherry pie filling
-
1 package refrigerated pie crust (2 crusts)
-
1/2 cup powdered sugar
-
1 teaspoon corn syrup
-
1 tablespoon water
-
Vegetable oil, for deep frying (about 4-6 cups)
Instructions
-
Step 1
In a medium bowl, combine softened cream cheese and granulated sugar. Mix until smooth and lump-free, using a fork or a hand mixer on low speed. -
Step 2
Gently fold the cherry pie filling into the cream cheese mixture until partially combined, aiming for a marbled effect. -
Step 3
Unroll pie crusts onto a lightly floured surface. Cut out 4-5 inch circles using a cookie cutter or glass rim. Re-roll scraps to cut additional circles. -
Step 4
Spoon about 1 tablespoon of filling onto one half of a crust circle, leaving a 1/2-inch border. Top with another crust circle and press edges to seal, crimping with a fork. -
Step 5
Heat vegetable oil in a deep pot to 350°F (175°C). Fry 2-3 hand pies at a time for 2-3 minutes per side until golden brown. -
Step 6
Remove pies from oil and drain on a wire rack. While warm, whisk together powdered sugar, corn syrup, and water to create a drizzleable glaze. Drizzle over hand pies.
Important Information
Nutrition Facts (Per Serving)
It is important to consider this information as approximate and not to use it as definitive health advice.
Allergy Information
Please check ingredients for potential allergens and consult a health professional if in doubt.