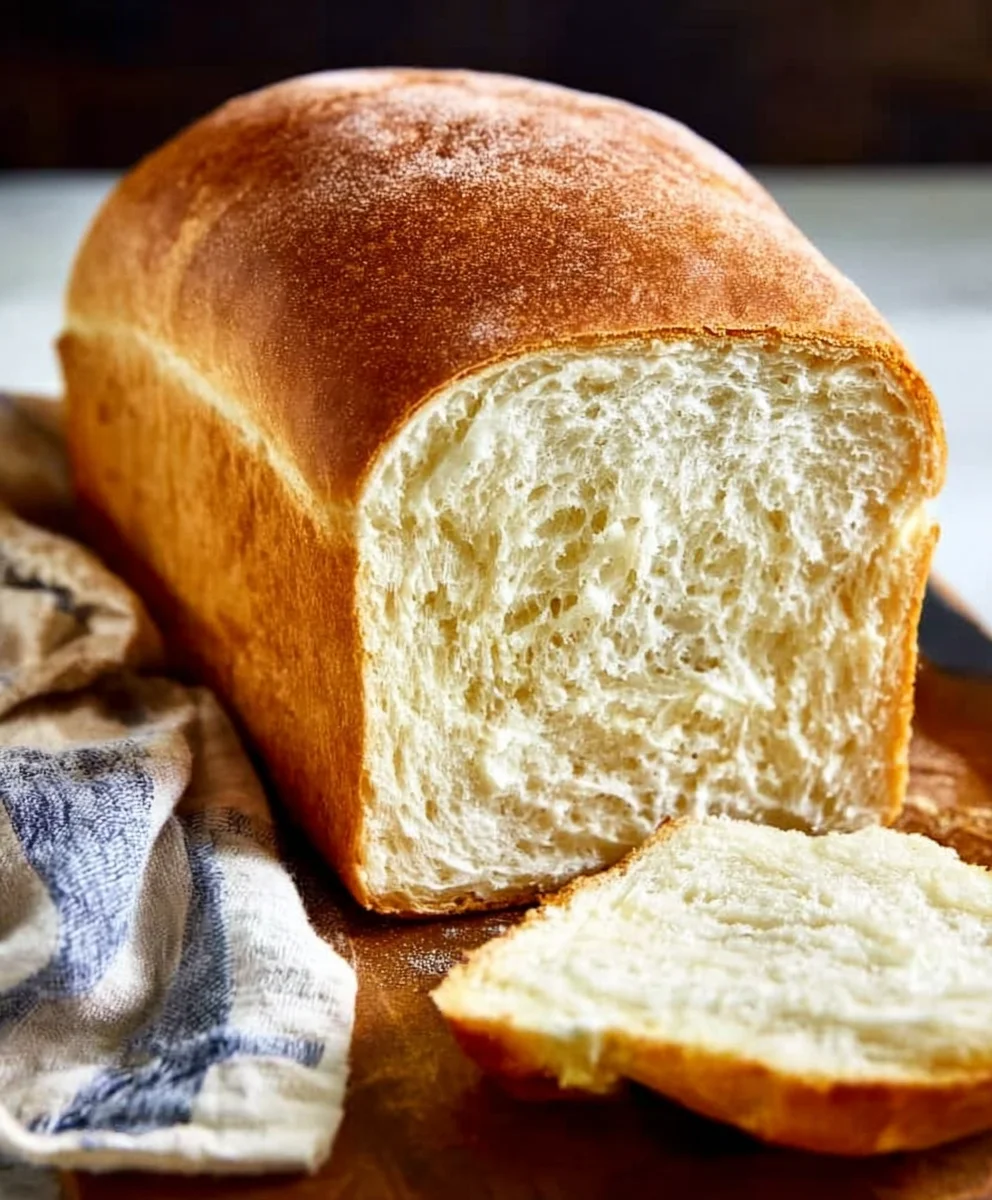
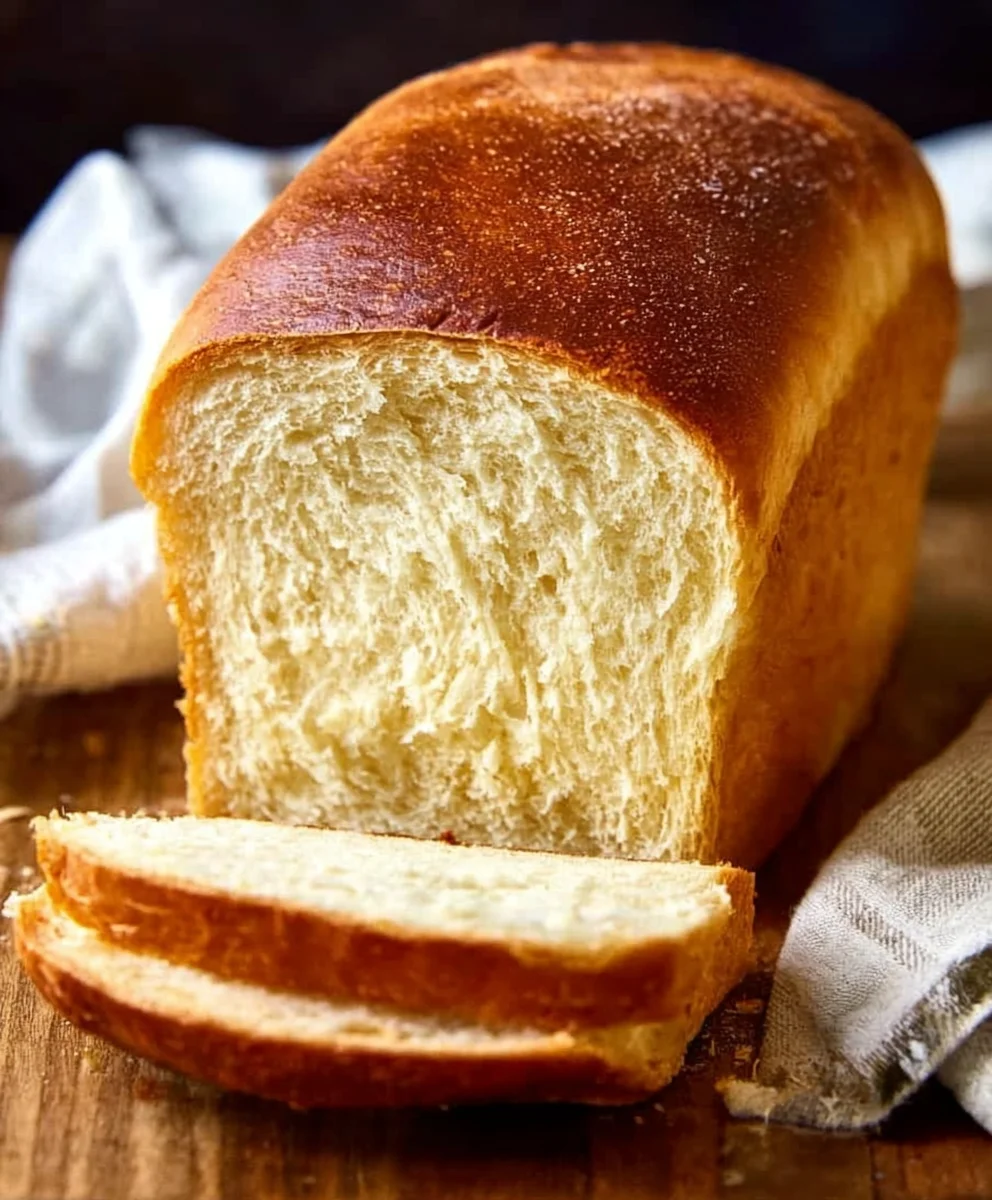
Easy Buttermilk Bread Recipe – Soft & Delicious
Buttermilk bread recipe delights are truly something to savor, aren’t they? There’s a reason this classic loaf holds such a special place in home bakers’ hearts. It’s the incredible tenderness, the subtle tang, and that satisfyingly soft crum extractb that just melts in your mouth. Imagin extracte pulling a golden-brown, freshly baked loaf from your oven, filling your kitchen with an aroma that promises pure comfort. What truly makes this particular buttermilk bread recipe stand out is the magic of buttermilk. It’s not just about adding a liquid; it’s about the way the acidity in the buttermilk reacts with the leavening agents, creating an unbelievably light and airy texture. Plus, the slight tang it imparts adds a sophisticated layer of flavor that plain milk just can’t replicate. Whether you’re slathering it with butter, using it for the ultimate grilled cheese, or simply enjoying a slice on its own, this Buttermilk Bread Recipe is sure to become a cherished staple in your baking repertoire. Get ready to create something truly special!
Ingredients:
- 1 packet (about 2 1/4 teaspoons) active dry yeast
- 1 pinch ground gin extractger
- 1 teaspoon granulated sugar
- 1/4 cup warm water (105F – 110F)
- 2 cups cultured buttermilk (warm, 105F – 110F)
- 1/3 cup honey
- 1 teaspoon kosher salt (or 3/4 teaspoon table salt)
- 3/4 teaspoon baking soda
- 6 cups bread flour (all-purpose flour can be substituted)
- 1/4 cup butter, melted and cooled until warm to the touch
Preparing the Dough
Activating the Yeast
In a small bowl or measuring cup, combine the warm water, sugar, and yeast. Give it a gentle stir to ensure the sugar is mostly dissolved and the yeast is evenly distributed. Let this mixture sit undisturbed for about 5 to 10 minutes. You’ll know the yeast is active when it becomes foamy and bubbly on the surface. This indicates that the yeast is alive and ready to work its magic, creating that wonderful airy texture in your bread. If you don’t see any foam after 10 minutes, your yeast might be expired, or the water may have been too hot or too cold. In that case, you’ll want to discard the mixture and start again with fresh yeast and properly tempered water.
Mixing the Wet Ingredients
In a large mixing bowl, or the bowl of your stand mixer fitted with a dough hook, whisk together the cultured buttermilk and honey. Add the melted and cooled butter to this mixture. It’s important that the butter is cooled but still warm to the touch; if it’s too hot, it can kill the yeast, and if it’s too cold, it won’t incorporate as smoothly. Whisk these ingredients until they are well combined. The buttermilk provides a lovely tang and tenderness to the bread, and the honey adds a subtle sweetness and helps with browning.
Combining and Kneading the Dough
Once your yeast mixture is foamy, pour it into the bowl with the buttermilk, honey, and butter. Add the kosher salt and the baking soda. Baking soda, when combined with the acidic buttermilk, helps to give the bread a slight lift and a tender crum extractb.gin extractw, begin adding the bread flour, one cup at a time, mixing after each addition. For the first few cups, you can stir with a sturdy spoon or the dough hook on low speed. As the dough starts to come together, you’ll gradually add the remaining flour until a shaggy dough forms. This is where the knegin extractng process begins.
If you’re using a stand mixer, increase the speed to medium-low and knead for about 8-10 minutes. The dough should become smooth, elastic, and pull away from the sides of the bowl. It should be slightly tacky but not stick excessively to your fingers. If you’re kneading by hand, turn the dough out onto a lightly floured surface and knead for about 10-12 minutes. Push the dough away from you with the heel of your hand, fold it over, and repeat. The goal is to develop the gluten strands, which give bread its structure. You can test for readiness by gently stretching a small piece of dough; if you can stretch it thin enough to see light through it without tearing (the windowpane test), it’s adequately kneaded.
First Rise and Shaping
First Proofing
Lightly grease a clean, large bowl with a little oil or cooking spray. Form the kneaded dough into a smooth ball and place it in the prepared bowl, turning it once to coat the entire surface with the greasing agent. Cover the bowl tightly with plastic wrap or a clean kitchen towel. Place the bowl in a warm, draft-free spot to rise. This can be on your counter if your kitchen is warm, or you can place it in a slightly warmed (then turned off) oven. Allow the dough to rise for about 1 to 1.5 hours, or until it has doubled in size. The warmth helps the yeast to ferment and produce the gases that will make your bread light and airy.
Shaping the Loaves
Once the dough has doubled in size, gently punch it down to release the air. Turn the dough out onto a lightly floured surface. Divide the dough into two equal portions. For a standard loaf shape, take one portion of dough and gently pat or roll it into a rectangle, about 8×10 inches. Starting from the shorter side, tightly roll up the dough, pinching the seam closed at the end. Then, gently tuck the ends under to create a neat loaf shape. Repeat this process with the second portion of dough.
Second Rise and Baking
Second Proofing
Prepare two standard 9×5 inch loaf pans by greasing them well with butter or non-stick cooking spray, and lightly flouring them. Carefully place one shaped loaf into each prepared pan, seam-side down. Cover the pans loosely with lightly greased plastic wrap or clean kitchen towels. Let the loaves rise again in a warm place for another 45 to 60 minutes, or until they have risen about 1 inch above the rim of the pans. This second rise is crucial for achieving a light and fluffy texture. Don’t be tempted to over-proof, as this can lead to a collapsed loaf during baking.
Baking the Buttermilk Bread
Preheat your oven to 375F (190C) about 15-20 minutes before you expect the second rise to be complete. Once the loaves have finished their second proof, remove the covers. You can optionally brush the tops with a little melted butter or a milk wash for an extra golden crust. Place the loaf pans on the center rack of your preheated oven. Bake for 30 to 35 minutes, or until the crust is a deep golden brown and the internal temperature of the bread reaches 200F – 210F (93C – 99C) when tested with an instant-read thermometer. If the crust is browning too quickly, you can loosely tent the tops with aluminum foil for the last 10-15 minutes of baking.
Cooling and Enjoying
Once baked, immediately remove the loaves from the pans and place them on a wire cooling rack. This step is vital to prevent the bottom crust from becoming soggy. Allow the bread to cool completely before slicing. While it’s incredibly tempting to slice into a warm loaf, letting it cool ensures the internal structure sets properly, resulting in cleaner slices and the best flavor and texture. Enjoy your homemade buttermilk bread toasted with butter, as a side to soup or salad, or simply on its own!
Conclusion:
There you have it! Your guide to baking the perfect Buttermilk Bread Recipe. This recipe is a true testament to how simple ingredients can create something truly extraordinary. The tang of the buttermilk, combined with the fluffy interior and golden crust, makes this bread a winner every time. It’s incredibly satisfying to pull a warm loaf of homemade buttermilk bread from your oven, and the aroma alone is worth the effort. Don’t be intimidated by baking; this recipe is straightforward and delivers delicious results, perfect for begin extractners and experienced bakers alike.
For serving, this Buttermilk Bread Recipe is wonderfully versatile. It’s fantastic toasted and slathered with butter, served alongside a hearty soup or stew, or even used as the base for delicious sandwiches. Get creative with your spreads – jam, honey, or a flavorful herb butter are all excellent choices. If you’re feeling adventurous, consider incorporating some herbs like rosemary or chives into the dough before baking for an added layer of flavor. You can also experiment with different flours, perhaps a blend of all-purpose and whole wheat for a nuttier taste.
We truly hope you enjoy making and eating this delightful Buttermilk Bread Recipe. Happy baking!
Frequently Asked Questions:
Why use buttermilk in bread?
Buttermilk is acidic, which reacts with baking soda (if used) to create a tender crum extractb and a slightly tangy flavor that complements the bread beautifully. It also contributes to the bread’s soft texture.
Can I use regular milk instead of buttermilk?
While you can substitute regular milk, you won’t achieve the same rum extractder crumb or characteristic tang. To mimic buttermilk, you can add one tablespoon of vinegar or lemon juice to one cup of regular milk and let it sit for 5-10 minutes before using it.
How should I store my Buttermilk Bread Recipe?
Once cooled completely, store the bread in an airtight container or bread bag at room temperature for up to 3-4 days. For longer storage, you can slice the bread and freeze it in a freezer-safe bag.
Easy Buttermilk Bread Recipe – Soft & Delicious
A soft and delicious homemade buttermilk bread recipe that’s easy to make.
Ingredients
-
1 packet active dry yeast
-
1 pinch ground ginger
-
1 teaspoon granulated sugar
-
1/4 cup warm water (105F – 110F)
-
2 cups cultured buttermilk (warm, 105F – 110F)
-
1/3 cup honey
-
1 teaspoon kosher salt
-
3/4 teaspoon baking soda
-
6 cups bread flour
-
1/4 cup butter, melted and cooled until warm to the touch
Instructions
-
Step 1
Activate the yeast by combining warm water, sugar, and yeast in a small bowl. Let sit for 5-10 minutes until foamy. -
Step 2
In a large bowl, whisk together warm cultured buttermilk, honey, and cooled melted butter. -
Step 3
Pour the foamy yeast mixture into the buttermilk mixture. Add salt and baking soda. Gradually add bread flour, mixing until a shaggy dough forms. -
Step 4
Knead the dough for 8-10 minutes (stand mixer) or 10-12 minutes (by hand) until smooth and elastic. -
Step 5
Place the dough in a greased bowl, cover, and let rise in a warm place for 1-1.5 hours until doubled. -
Step 6
Punch down the dough, divide in half, and shape into two loaves. Place in greased and floured loaf pans. -
Step 7
Cover the loaves and let rise again for 45-60 minutes until about 1 inch above the pan rim. -
Step 8
Bake in a preheated 375F (190C) oven for 30-35 minutes until golden brown and internal temperature reaches 200F – 210F. -
Step 9
Cool completely on a wire rack before slicing and enjoying.
Important Information
Nutrition Facts (Per Serving)
It is important to consider this information as approximate and not to use it as definitive health advice.
Allergy Information
Please check ingredients for potential allergens and consult a health professional if in doubt.